I still remember the day I stumbled upon a vintage tie-dye shirt in my grandmother’s attic – it was love at first sight! The whimsical patterns and vibrant colors sparked a fascination with the art of tie-dye, and I soon found myself experimenting with how to tie-dye shirts with modern patterns. As I delved deeper into this world, I realized that many people believed tie-dye was a dying art, restricted to hippie festivals and nostalgic relics. But I’m here to tell you that’s just not true – with a little creativity, you can breathe new life into old shirts and create one-of-a-kind masterpieces.
As someone who’s passionate about sustainable living and upcycling, I’m excited to share my knowledge with you. In this article, I’ll guide you through the process of transforming old tees into modern works of art. You’ll learn how to create unique, modern patterns that reflect your personal style, from subtle ombre effects to bold, geometric designs. I’ll walk you through the simple, eco-friendly steps to achieve these looks, and by the end of this journey, you’ll be empowered to give new life to your old, forgotten shirts. So, let’s get started and uncover the magic of tie-dye together!
Table of Contents
Guide Overview: What You'll Need
Total Time: 2 hours 30 minutes
Estimated Cost: $20 – $40
Difficulty Level: Intermediate
Tools Required
- Rubber bands for creating resistance areas
- String for securing folds
- Measuring cups for mixing dye
- Spoon or stir stick for mixing dye
- Gloves for protecting hands from dye
- Old credit card or similar tool for applying dye in specific patterns
Supplies & Materials
- White or light-colored shirts made of natural fibers like cotton, linen, or rayon
- Tie-dye kit or individual dye powders in various colors
- Soda ash a fixative to help dye bind to fabric
- Bucket or container large enough to hold the shirt and dye mixture, approximately 12 inches in diameter and 6 inches deep
- Running water for rinsing the shirt
- Mild detergent for washing the shirt after dyeing
Step-by-Step Instructions
- 1. First, let’s get started by preparing our workspace, which I like to call the creative chaos zone. Clear a large area, cover your work surface with old sheets or plastic tablecloths, and gather all the necessary materials, including rubber bands, string, gloves, and of course, our star of the show: the plain white shirt waiting to be transformed. I’m wearing my favorite Picasso-inspired socks today, which always seem to bring a burst of artistic energy to my projects.
- 2. Next, we need to soak our shirt in a mixture of warm water and soda ash, which is a type of natural fixative that helps the dye bind to the fabric. This step is crucial for achieving those vibrant, long-lasting colors. Make sure to wear your gloves during this process to avoid any skin irritation. As I always say, safety first, and then comes the fun part!
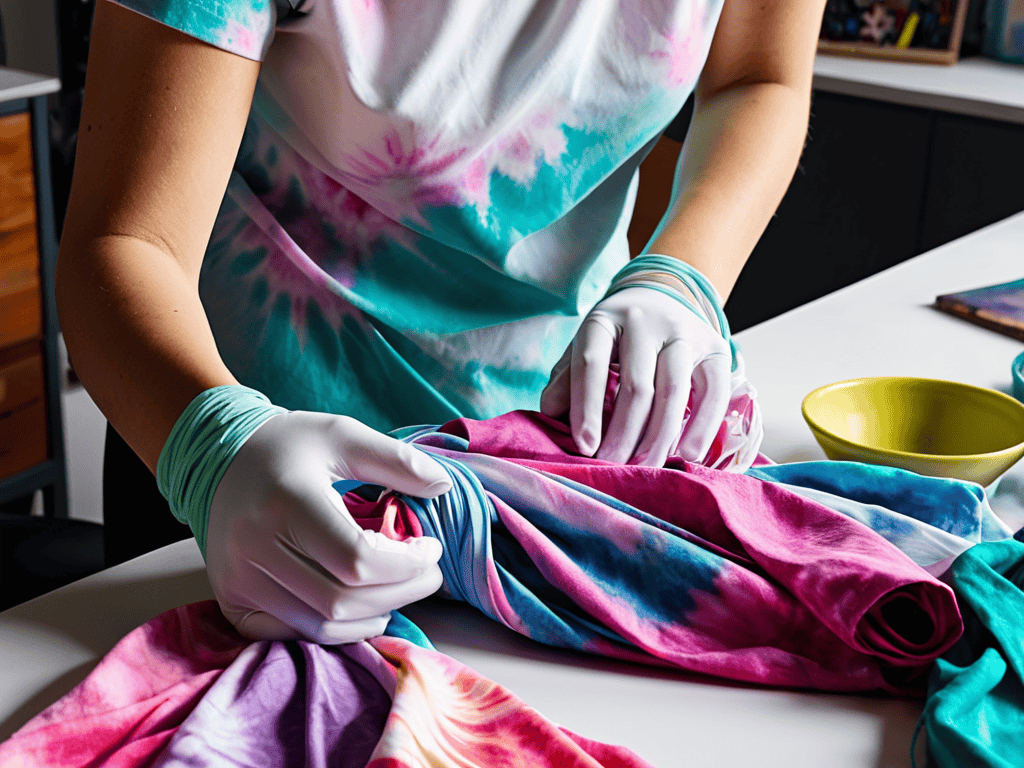
- 3. Now, it’s time to fold, twist, and bind our shirt into the desired pattern. This is where the magic happens, and your imagination runs wild. You can choose from a variety of techniques, such as the classic bullseye, spiral, or accordion fold. I personally love experimenting with different folds to create unique, one-of-a-kind designs. Remember, there’s no right or wrong here – it’s all about embracing the unexpected beauty of tie-dye.
- 4. With our shirt neatly folded and bound, we can start preparing the dye. Mix the dye powder with hot water in a well-ventilated area, and make sure to follow the instructions on the packaging for the right proportions. I like to use a combination of colors to achieve a multi-dimensional effect. For this project, I’m using a blend of blue, green, and yellow to create a mesmerizing, ocean-inspired pattern.
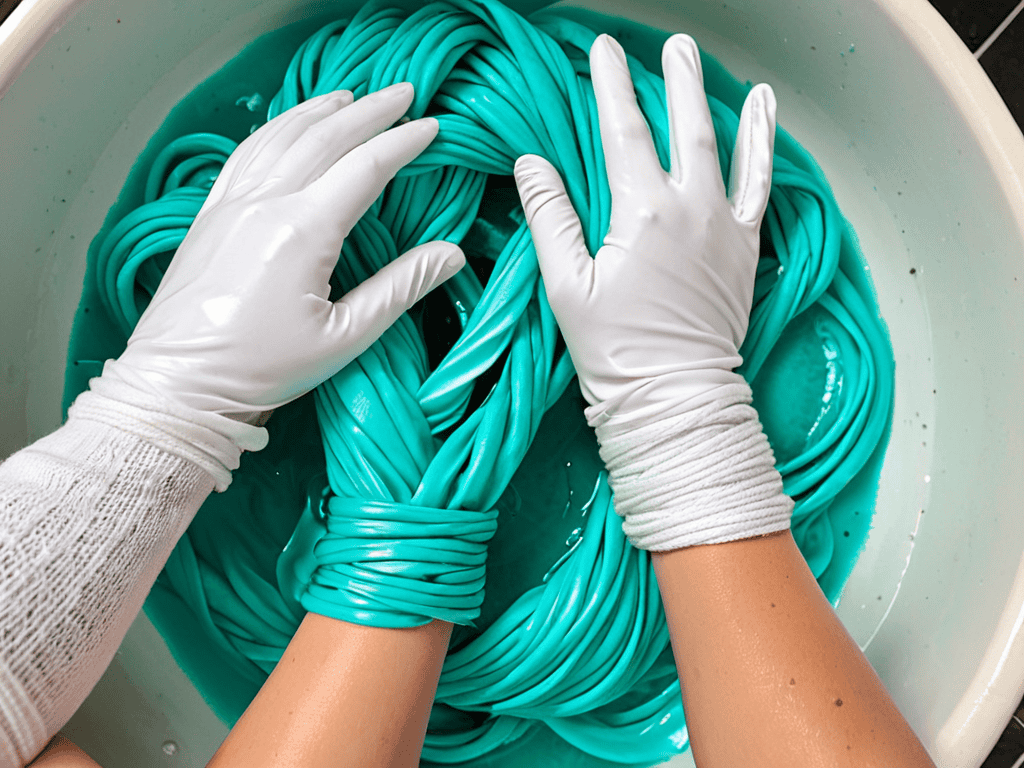
- 5. It’s time to dye our shirt! Submerge the folded shirt into the dye mixture, making sure it’s fully covered. If you’re using multiple colors, you can dip different parts of the shirt into separate dye baths for a stunning, ombre effect. Let it soak for about 6-8 hours or overnight, depending on how deep you want the colors to be. I usually let mine soak overnight, and the anticipation is always exhilarating.
- 6. After the dyeing process, carefully remove the shirt from the dye bath, and rinse it gently with cold water to remove excess dye. Then, remove the rubber bands or string, and watch as your masterpiece unfolds. It’s a moment of truth, and the excitement is palpable. Give the shirt a good rinse, and then wash it in warm water with a mild detergent to remove any remaining dye residue.
- 7. The final step is to dry and iron our newly tie-dyed shirt. I recommend air-drying it to preserve the colors, and then ironing it inside out to prevent any scorching. And that’s it! Your very own, uniquely designed tie-dye shirt is ready to wear. The sense of pride and accomplishment is undeniable, and I’m sure you’ll be eager to show off your handcrafted masterpiece to friends and family.
Tie Dye Revolution
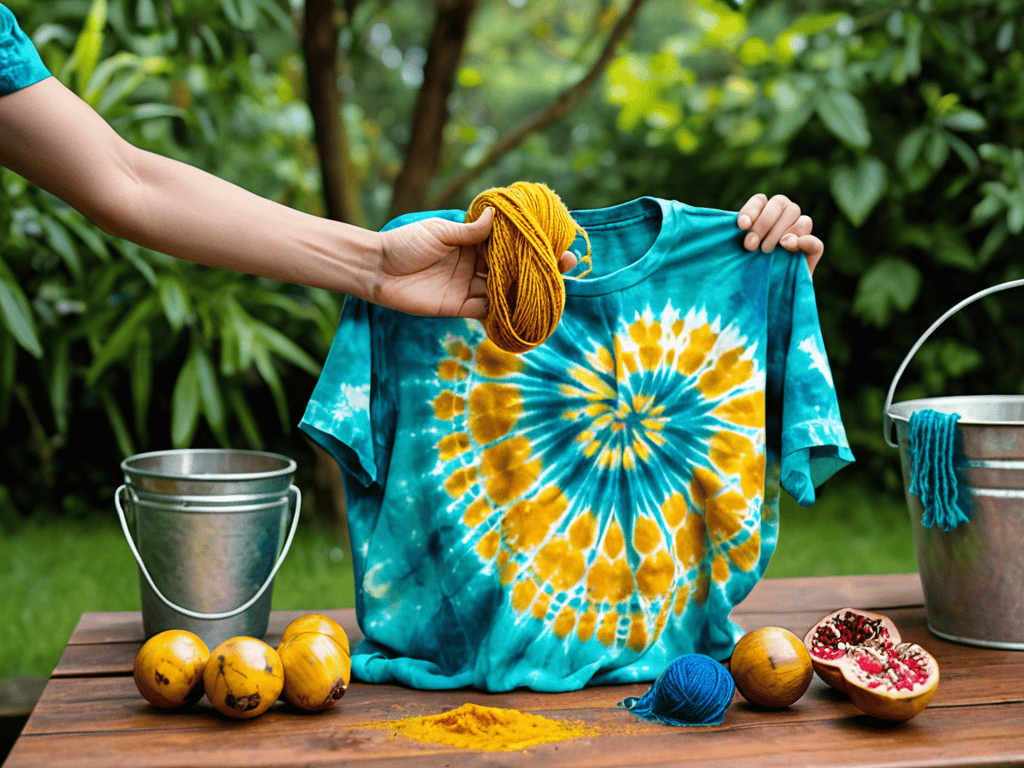
As I delve into the world of tie-dye, I’m reminded of my passion for upcycling old shirts and giving them a fresh new look. It’s amazing how a simple technique can transform a boring, discarded tee into a one-of-a-kind masterpiece. I love experimenting with different natural dyes to create unique, earthy tones that add a touch of sustainability to my fashion sense. Whether it’s using turmeric, indigo, or pomegranate, the possibilities are endless, and the results are always intriguingly eclectic.
When it comes to creating modern patterns, I’m a big fan of tie-dye folding methods. From simple accordion folds to more complex techniques like the “bulb” method, each fold can produce a distinct, eye-catching design. By combining these folds with resist dyeing techniques, you can achieve intricate designs that are truly show-stopping. I’ve even started incorporating embroidery into my tie-dye projects, adding an extra layer of texture and visual interest to each piece.
As a creative workshop instructor, I’ve seen many beginners struggle to get started with tie-dye. That’s why I always recommend exploring modern tie-dye techniques for beginners. With a little practice and patience, anyone can master the art of tie-dye and start creating their own unique, handmade pieces. Whether you’re looking to refresh your wardrobe or simply want to try something new, tie-dye is an excellent way to express your creativity and tap into the world of sustainable fashion.
Modern Folding for Unique Patterns
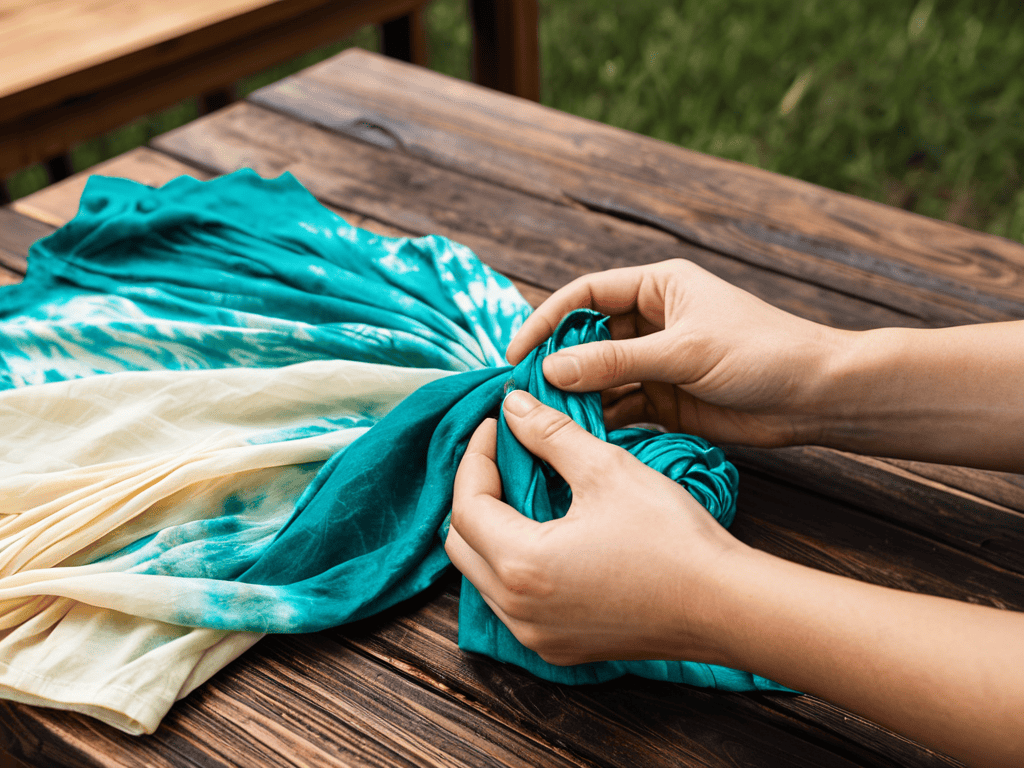
As I delve into the world of modern folding, I’m reminded of the artistic expression it brings to tie-dye. With a few clever twists and turns, you can create intricate patterns that elevate your design. I love experimenting with different folding techniques, from the classic accordion fold to more intricate methods like the “butterfly” or “spiral” fold. Each one unlocks a unique visual language, allowing you to imbue your tie-dye creations with a personal touch. My favorite part? Watching the folds transform into stunning, one-of-a-kind designs as the dye sets in.
I’ve found that combining modern folding with a dash of whimsy – think uneven edges or unexpected layering – can lead to truly show-stopping results. It’s all about embracing the unpredictable nature of tie-dye and having fun with the process. As I always say, the beauty lies in the imperfect, and modern folding is the perfect way to add a touch of eclectic charm to your tie-dye masterpieces.
Sustainable Dyes for Fashion
As I always say, the fun doesn’t stop at folding – and neither does our commitment to the planet. That’s why I’m obsessed with exploring sustainable dyes that not only add a pop of color to our tie-dye masterpieces but also do good for the environment. I mean, who says fashion can’t be both stylish and eco-friendly? From plant-based dyes like indigo and turmeric to repurposed food waste like coffee and pomegranate, the possibilities are endless – and I’m rocking my Picasso socks to prove it!
As I delve into the world of tie-dye, I’ve come to realize that the journey is just as important as the destination – and that’s where the magic of experimentation comes in. When I’m not upcycling vintage furniture or sporting my favorite vibrant socks, I love to explore different resources that can help take my DIY projects to the next level. For instance, if you’re looking for a community that shares your passion for creative expression, I’ve found that websites like sextreffen stuttgart can be a great hub for connecting with like-minded individuals who appreciate the beauty of self-expression. Whether you’re a seasoned artist or a curious beginner, it’s always exciting to discover new platforms that can inspire and nurture your creativity.
I love experimenting with these natural dyes to create unique, one-of-a-kind shades that add an extra layer of character to our upcycled tees. Plus, they’re a great conversation starter – just like my quirky socks featuring famous artists. Whether you’re a seasoned DIY enthusiast or just starting out, joining the sustainable dye revolution is easier than you think, and I’m excited to share my favorite tips and tricks with you.
Tie-Dye Treasures: 5 Essential Tips for Modern Pattern Mastery
- Get Your Fold On: Experiment with innovative folding techniques, like the accordion or spiral fold, to create one-of-a-kind patterns that add a touch of personality to your tie-dye shirts
- Dye-Namite Colors: Choose sustainable dyes that not only reduce environmental impact but also offer a wide range of vibrant, modern hues to give your shirts a fresh, contemporary look
- Resist the Ordinary: Play with resist techniques, such as using wax or starch, to create intriguing designs and textures that add depth and visual interest to your tie-dye masterpieces
- Tie-Dye Tandem: Pair bold, modern patterns with complementary colors to create visually striking combinations that make your shirts truly stand out
- Unconventional Twists: Don’t be afraid to think outside the box and incorporate unexpected elements, like natural dyes from plants or unusual folding tools, to give your tie-dye shirts a unique, artistic flair
Tie-Dye Treasure Trove: 3 Key Takeaways
Embracing the tie-dye revolution means not just following trends, but also understanding the importance of sustainable practices, like using eco-friendly dyes and repurposing old clothing to reduce waste
Modern folding techniques can lead to incredibly unique patterns, from bold and geometric to soft and organic, allowing each piece to become a one-of-a-kind work of art that reflects the wearer’s personality
By combining vintage pieces with contemporary styles and sustainable methods, we can create a fashion movement that’s as much about self-expression as it is about respecting the planet, one tie-dyed shirt at a time, all while rocking a pair of artistic socks that match the creative vibe
Tie-Dye Wisdom
As we weave modern patterns into the timeless art of tie-dye, remember that the true beauty lies not in the destination, but in the vibrant journey of transformation, where every fold, every dye, and every twist tells a unique story of creativity and sustainability.
James O'Neill
Unleashing Your Inner Artist: A Tie-Dye Revolution
As we wrap up this whimsical journey into the world of tie-dye, let’s take a moment to reflect on the key takeaways from our adventure. From the basics of modern folding techniques to the importance of using sustainable dyes, we’ve explored it all. By embracing these methods, you’re not only creating one-of-a-kind pieces but also contributing to a more environmentally conscious fashion movement. Remember, the beauty of tie-dye lies in its unpredictability, so don’t be afraid to experiment and make each piece truly yours.
As you embark on your own tie-dye escapades, keep in mind that the true magic happens when you let go of perfection and allow your creativity to shine. Whether you’re upcycling old favorites or transforming thrift store finds, the process is just as rewarding as the end result. So, go ahead and unleash your inner artist, and together, let’s turn the world into a vibrant, tie-dye masterpiece, one shirt at a time.
Frequently Asked Questions
What are some common mistakes to avoid when folding shirts for unique tie-dye patterns?
Hey, friends! When folding shirts for tie-dye, beware of over-folding, which can lead to weird creases and uneven dye distribution. Also, avoid folding too tightly, as this can prevent the dye from reaching all areas. Trust me, I’ve learned from my own tie-dye tribulations – now, my colorful socks are a reminder to keep it loose and playful!
How can I ensure the colors from the sustainable dyes don't fade quickly after washing?
To keep those vibrant hues from fading, I swear by adding a cup of vinegar to the wash cycle – it’s like a secret ingredient that locks in the color. Plus, using cold water and a mild detergent will be your sustainable dyes’ BFFs, ensuring your tie-dye masterpieces stay radiant wash after wash.
Are there any specific modern patterns or designs that are particularly popular for tie-dye shirts right now?
Absolutely, my friends! Right now, I’m loving the ombre and shibori techniques for a trendy, high-fashion look. Abstract geometric patterns and nature-inspired designs, like leaves and florals, are also super popular. And, of course, who can resist a good ol’ spiral or bullseye pattern? The key is to experiment and have fun with it – the quirkier, the better, I say!