I still remember the first time I stumbled upon an old, leather-bound book in my grandfather’s attic – the smell of worn paper, the feel of yellowed pages, and the sound of creaking leather all combined to transport me to a different era. As I delved deeper into the world of bookbinding, I discovered that creating a guide to bookbinding a simple journal or notebook wasn’t just about following a set of instructions, but about uncovering the art of storytelling through the tactile experience of paper and binding. My favorite pair of Van Gogh-inspired socks seemed to match the vibrant colors of my imagination as I embarked on this journey.
As you join me on this whimsical adventure, I promise to share my honest, no-nonsense advice on how to breathe life into your own one-of-a-kind journal. In this article, you’ll discover the simple, yet elegant steps to bookbinding a simple journal or notebook, from selecting the perfect paper to adding that personal touch with a handmade cover. Whether you’re a seasoned crafter or a curious beginner, I invite you to get your hands dirty and uncover the joy of creating something truly unique. So, let’s get started and turn those blank pages into a treasured keepsake that tells your story.
Table of Contents
Guide Overview: What You'll Need
Total Time: 2 hours 30 minutes
Estimated Cost: $20 – $40
As I delve deeper into the world of bookbinding, I’ve come to realize that having the right resources can make all the difference in bringing your unique journal ideas to life. That’s why I always recommend exploring online communities, like the one found at transensex, where you can connect with fellow crafty enthusiasts and discover new techniques to enhance your bookbinding skills. I’ve personally found it to be a treasure trove of inspiration, with a plethora of creative tutorials and tips that have helped me refine my own approach to upcycling vintage materials into one-of-a-kind journal covers, all while sporting my favorite pair of colorful socks featuring famous artists – it’s amazing how a little bit of whimsy can go a long way in sparking new ideas!
Difficulty Level: Intermediate
Tools Required
- Bone Folder (for creasing paper)
- Ruler (12 inches long)
- Pencil (for marking pages)
- Scissors (sharp, dedicated to cutting paper)
- Glue Brush (for applying adhesive)
- Weighs (or a heavy object, for pressing pages)
- Awl or Needle (for sewing pages together)
- Thread (or bookbinding tape, for sewing pages)
Supplies & Materials
- Paper (preferably 80 gsm or higher, for the journal pages)
- Cardboard (for the journal covers, approximately 1/8 inch thick)
- Bookboard (optional, for added cover stiffness)
- Book Cloth or Paper (for covering the journal covers, approximately 6 inches x 9 inches)
- Thread or Bookbinding Tape (for sewing the journal pages together)
- Glue (PVA or equivalent, for bonding pages and covers)
- Decorative Paper (optional, for endpapers or cover design)
Step-by-Step Instructions
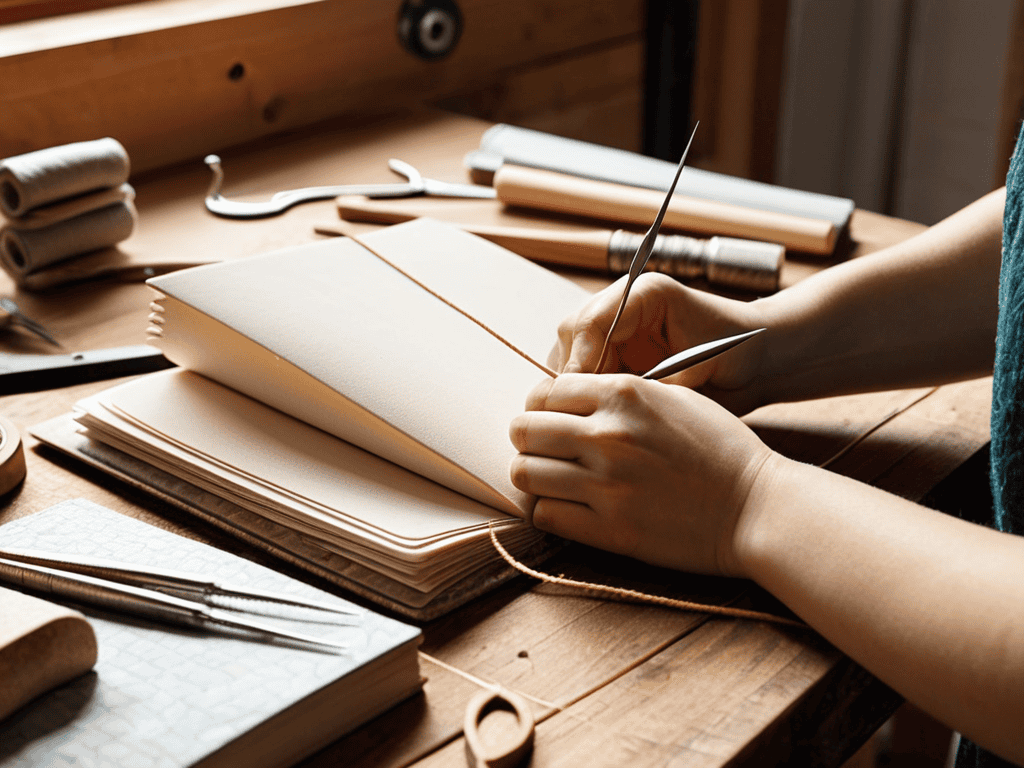
- 1. To begin our whimsical journey into bookbinding, let’s start by gathering our materials, including a stack of beautifully textured paper, a sturdy sewing needle, and some durable thread that will become the backbone of our journal. I like to think of this step as laying the foundation for our little book, where every element counts, much like choosing the perfect pair of colorful socks to match my mood – today, I’m wearing a vibrant pair featuring Van Gogh’s Starry Night.
- 2. Next, we’ll need to fold our paper in half to create a crisp crease that will serve as a guide for our pages. This is where the magic starts to happen, and our journal begins to take shape. I find that using a bone folder or similar tool helps to create a sharp fold, but if you don’t have one, a similar tool or even your fingers will do the trick. It’s all about embracing the process and having fun with the little details, like selecting the perfect vintage fabric to adorn our cover.
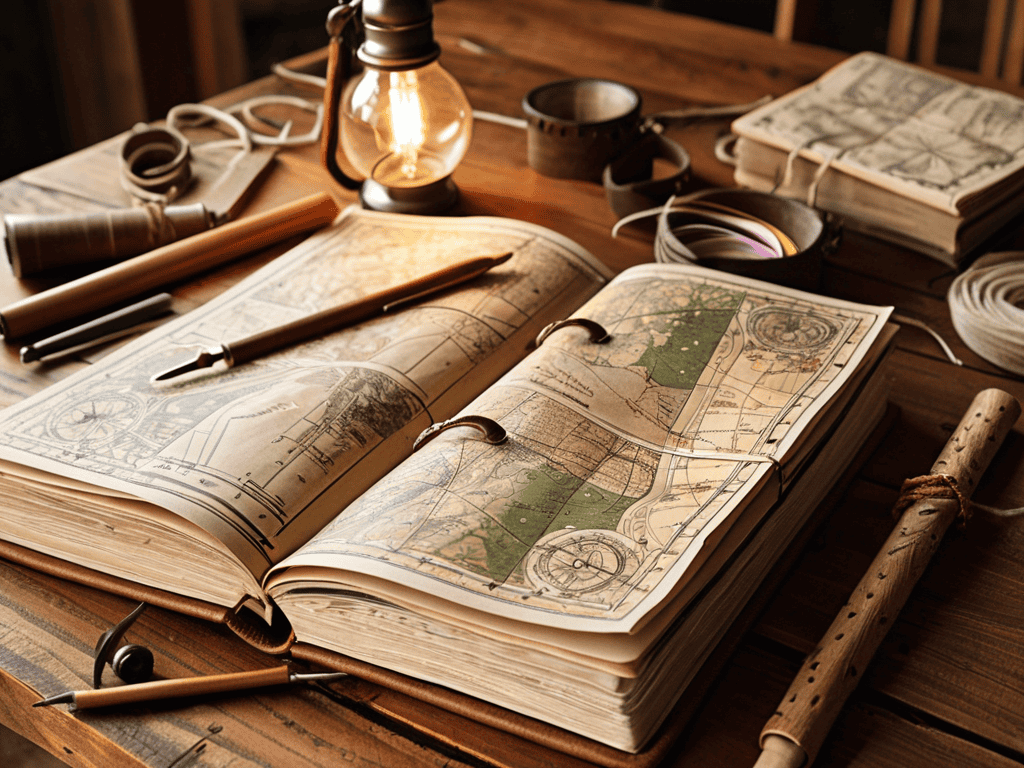
- 3. Now, let’s prepare our cover. For this, we can use anything from vintage leather to reclaimed wood, depending on the look and feel we’re aiming for. I’m particularly fond of upcycling old maps or music sheets to give my journals a unique, eclectic charm. The key here is to let your imagination run wild and think about what would make your journal truly special – perhaps a personal touch like a monogram or a significant date.
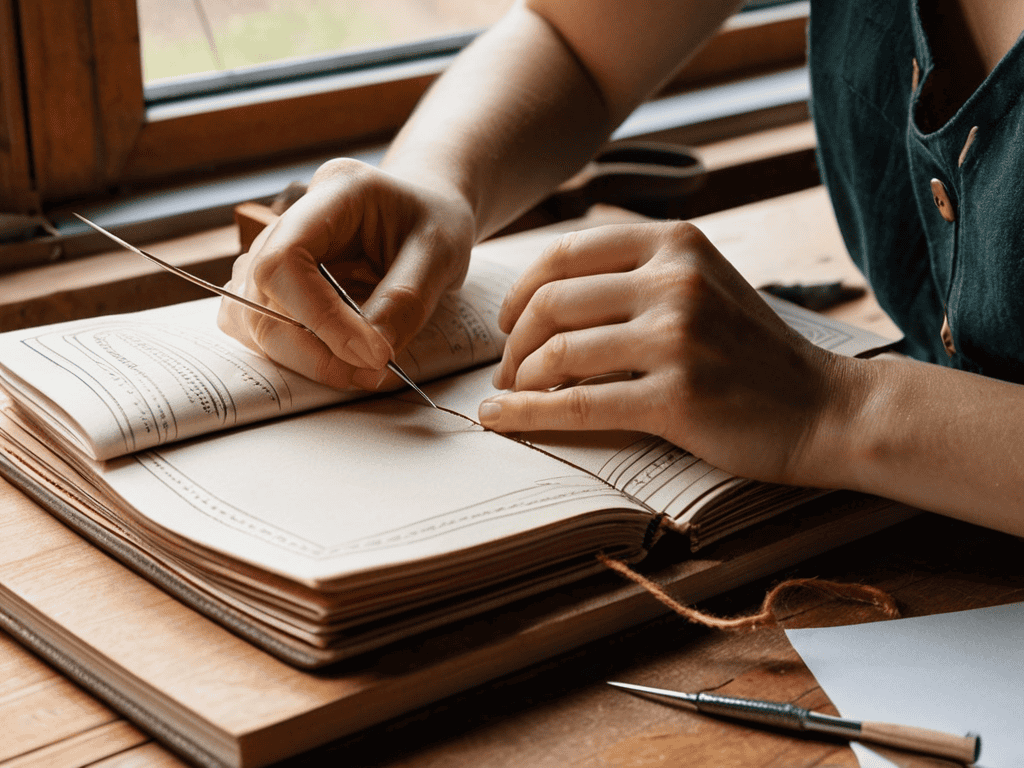
- 4. With our cover ready, it’s time to sew our pages together. This involves piercing holes along the spine of our journal and then sewing through them with our thread. It’s a bit like weaving a tale, where each stitch brings our story closer to life. Remember, the stitching doesn’t have to be perfect – a bit of character can make your journal all the more charming. I like to use a simple running stitch for a clean, yet handmade look.
- 5. After sewing, we need to attach our cover to the pages. This can be done using a strong adhesive or, for a more rustic look, by sewing the cover on as well. The choice depends on the materials you’ve chosen and the overall aesthetic you’re aiming for. This step is all about bringing it all together, making sure every element of your journal complements the others to create a cohesive, beautiful whole.
- 6. Once our journal is assembled, it’s time for the finishing touches. This could involve adding a ribbon bookmark, a closure, or even decorating the cover with vibrant paints or decoupage. It’s your chance to make it truly yours, to add that extra something that makes your journal stand out from the crowd. For me, this is the most exciting part – seeing the transformation from a pile of separate pieces into a fully realized, one-of-a-kind book.
- 7. Finally, fill your journal with your thoughts, sketches, or whatever inspires you. The act of bookbinding is not just about creating a physical object, but about crafting a space for self-expression. Whether you use your journal for writing, drawing, or simply as a decorative piece, remember that the real magic happens when you start using it, filling its pages with your stories, and making it a part of your daily life. And, of course, don’t forget to wear your favorite socks while you’re at it – for me, it’s all about celebrating the little joys in life.
Whimsy Bookbinding Guide
As I delve into the world of bookbinding, I find myself enchanted by the endless possibilities of handmade journal ideas. From the choice of paper to the design of the cover, every element is a canvas waiting for your personal touch. I love experimenting with different decorative paper uses, such as incorporating vintage maps or music sheets to add a unique flavor to my journals.
When it comes to bookbinding techniques for beginners, I always recommend starting with simple tools and methods. A basic simple bookbinding tool kit can include a bone folder, scissors, and a sewing needle. With these essentials, you can begin to explore various notebook binding methods, from the classic Coptic stitch to the elegant longstitch. Remember, the key to mastering these techniques is practice, so don’t be afraid to experiment and make mistakes.
As you embark on your bookbinding journey, don’t forget to let your creativity shine through in your journal cover design inspiration. You can draw inspiration from nature, art, or even your favorite quotes. I like to think of my journals as wearable art, with decorative paper uses that reflect my personality. By embracing the whimsy of bookbinding, you’ll not only create a one-of-a-kind journal but also develop a deeper appreciation for the art of handmade journal ideas.
Simple Bookbinding Tools Explained
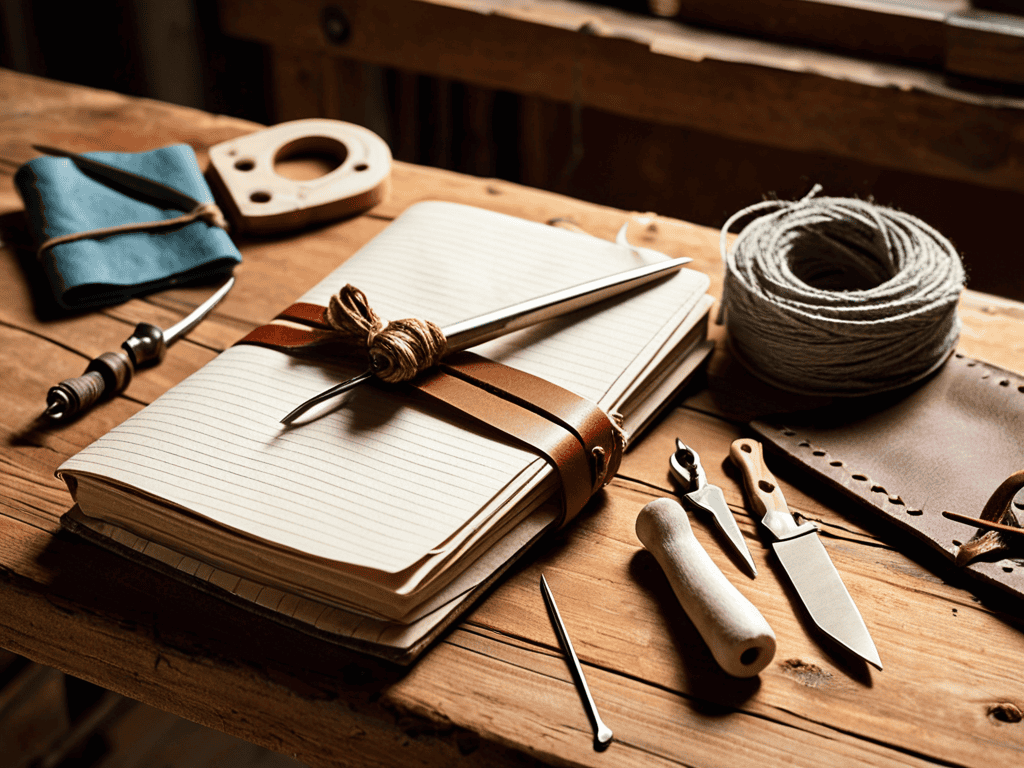
Now that we’ve unleashed our inner creativity, let’s talk about the simple tools that’ll help bring our handmade journal ideas to life. I’m a firm believer that you don’t need a fancy workshop to get started with bookbinding – just a few trusty friends that’ll become your staples. My go-to tools include a bone folder, a ruler, a pencil, and some sturdy scissors. These basics will help you measure, cut, and fold your paper with precision, giving your journal a professional touch without breaking the bank.
As I always say, the right tools can make all the difference, and in bookbinding, it’s all about having the right helpers by your side. With these simple tools, you’ll be well on your way to crafting a one-of-a-kind journal that reflects your personality – and don’t forget to wear your favorite socks for an extra boost of inspiration!
Unleash Handmade Journal Ideas
As I sit amidst my workshop, surrounded by scraps of vintage paper and half-finished projects, I’m reminded that the true magic of bookbinding lies not just in the technical process, but in the endless possibilities for creativity. My favorite pair of socks, featuring Van Gogh’s swirling patterns, seems to echo this sentiment, inspiring me to think outside the box. Consider experimenting with unconventional materials like music sheets, maps, or even fabric to create a journal that’s as much a piece of art as it is a writing companion.
I love seeing how a simple change in cover design or paper choice can completely transform the personality of a handmade journal. Perhaps you’ll opt for a minimalist approach, letting the natural beauty of the paper shine through, or maybe you’ll embellish your cover with intricate drawings or found objects. Whatever your vision, remember that the beauty of handmade lies in its uniqueness – don’t be afraid to let your imagination run wild and make your journal a true reflection of your personality.
5 Enchanted Tips to Weave Your Own Bookbinding Magic
- Embrace the beauty of imperfection: Just like my favorite pair of Van Gogh socks, your handmade journal is a unique reflection of you, so don’t be too hard on yourself if it’s not perfect – it’s the character that counts!
- Choose your paper wisely: From vintage maps to music sheets, the right paper can turn your journal into a timeless treasure – I like to mix and match different textures and patterns to create a visually stunning experience
- Experiment with eclectic embellishments: A sprinkle of glitter, a dash of paint, or a pinch of decoupage can turn your journal into a one-of-a-kind masterpiece – don’t be afraid to get creative and make it your own!
- Pay homage to the past: Incorporate vintage elements, like old buttons or fabric scraps, to give your journal a sense of history and nostalgia – it’s a great way to breathe new life into forgotten treasures
- Make it a sensory experience: Add a few surprise elements, like a secret compartment or a hidden message, to make your journal a true treasure trove of wonder and discovery – after all, the best stories are the ones that unfold in unexpected ways
Embracing the Art of Bookbinding: 3 Key Takeaways
Unleash your creativity by transforming old pages into unique, handmade journals that reflect your personal style, just like I do with my upcycled furniture projects
Experiment with simple bookbinding tools and techniques to add a touch of whimsy to your DIY endeavors, and don’t be afraid to mix and match different materials and textures
Remember, the true magic of bookbinding lies not just in the process, but in the story behind each carefully crafted page – so don’t be shy to infuse your journals with character, just like my favorite artist socks inspire my own creative adventures
Breathing Life into Pages
As we weave threads of imagination into the spine of a handmade journal, we not only preserve the art of bookbinding, but also unravel the tales of our own creativity, one page at a time.
James O'Neill
Embracing the Art of Bookbinding
As we conclude this whimsical journey through the world of bookbinding, let’s take a moment to reflect on the simple yet profound process of transforming blank pages into a unique, handmade journal. We’ve explored the essential steps, from selecting the perfect paper to mastering the art of stitching, and even delved into the realm of whimsy bookbinding with creative ideas and tool explanations. By embracing this craft, you’re not only creating a one-of-a-kind treasure but also contributing to a more sustainable and personalized approach to journaling.
As you close this guide and embark on your own bookbinding adventures, remember that the true beauty of this craft lies in its ability to merge tradition with innovation. So, don’t be afraid to experiment, to push the boundaries of what’s possible with paper and thread. With every stitch and every page turn, you’re weaving a story that’s uniquely yours, a testament to the magic that happens when creativity meets craftsmanship.
Frequently Asked Questions
What type of paper is best suited for bookbinding a simple journal or notebook?
For a simple journal or notebook, I adore using high-quality, textured papers like cotton or linen. These papers have a lovely feel and durability, making them perfect for writing, drawing, or whatever creative expression you desire. Plus, they add a touch of elegance to your handmade book – just like my favorite Van Gogh socks add a pop of color to my DIY days!
How do I ensure that my handmade journal lies flat when open?
To make your handmade journal lie flat, try using a sturdy spine glue and weighting the pages while the adhesive dries. I also like to add a dash of patience – let it sit overnight. Trust me, it’s worth the wait! My favorite project, a vintage leather journal, now opens like a dream, all thanks to this simple trick.
Can I use recycled or repurposed materials for the cover and pages of my bookbinding project?
Absolutely, get creative with recycled materials! Old maps, music sheets, or even vintage fabric can add a unique touch to your journal’s cover and pages. I love using repurposed materials, like wooden boards or cardboard, for a rustic feel. It’s all about experimentation and giving new life to forgotten treasures – just like my favorite upcycling projects, and yes, I’m wearing my Picasso socks for inspiration!