
As I sat in my cozy workshop, surrounded by half-finished upcycling projects and wearing my favorite Van Gogh-inspired socks, I couldn’t help but think about the common myth that a guide to checking for and sealing air leaks is a daunting, expensive task. But the truth is, it’s quite the opposite – with the right mindset and tools, anyone can turn their drafty old house into a snug, energy-efficient haven. I’ve seen it time and time again in my own DIY adventures, from transforming vintage furniture into quirky modern pieces to helping friends and family seal those sneaky air leaks.
In this article, I promise to share my honest, no-hype advice on a guide to checking for and sealing air leaks, so you can start enjoying the benefits of a warmer, more sustainable home. You’ll learn how to identify common air leak culprits, choose the right materials for the job, and get hands-on tips for sealing those gaps without breaking the bank. Whether you’re a seasoned DIY enthusiast or just starting out, my goal is to empower you with the knowledge and confidence to tackle this project head-on, and have fun while doing it – all while sporting your own unique style, of course!
Table of Contents
Guide Overview: What You'll Need
Total Time: 1 hour 30 minutes
Estimated Cost: $20 – $50
Difficulty Level: Easy
Tools Required
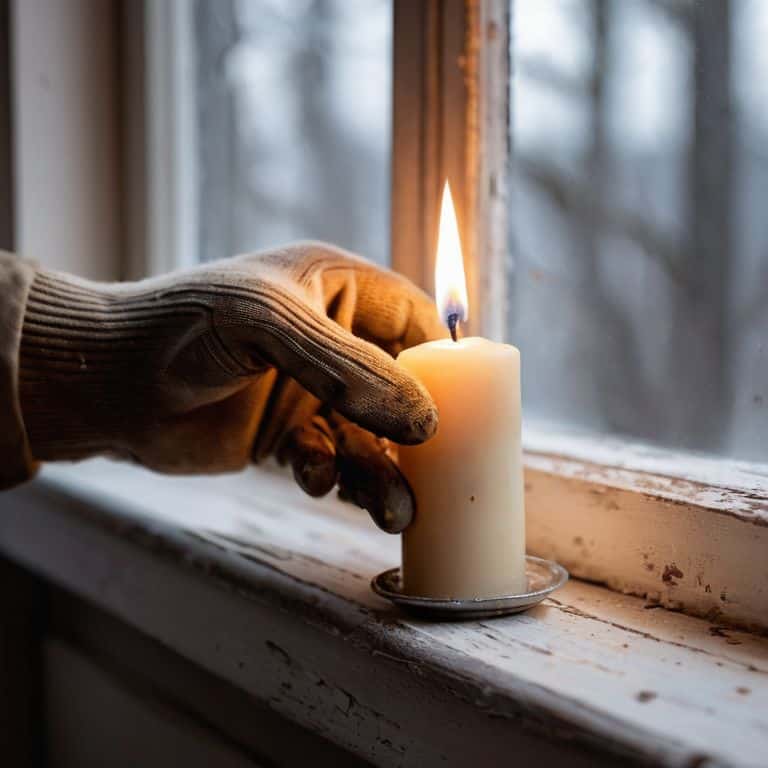
- Candle (to detect air leaks)
- Incense stick (to detect air leaks)
- Sealant gun (for applying caulk or spray foam)
- Putty knife (for applying and smoothing sealant)
- Utility Knife (with extra blades)
Supplies & Materials
- Caulk
- Spray foam (for larger gaps)
- Weatherstripping (for doors and windows)
- Foam tape (for gaps around 1/4 inch or less)
Step-by-Step Instructions
- 1. First, let’s get started by gathering our detective tools – a candle, a stick of incense, or even just a damp hand. These will be our trusty sidekicks in uncovering those sneaky air leaks that might be hiding in plain sight. I like to wear my Van Gogh-inspired socks for this part, as they remind me to think outside the box and see the beauty in the everyday.
- 2. Next, turn off all the fans and heaters in your home to create a still environment. This will help us pinpoint exactly where those air leaks are occurring. Now, light your candle or incense, and carefully move it around the edges of your windows, doors, and any other potential leak spots. If the flame flickers or the smoke gets sucked in, you’ve found yourself an air leak. It’s like hunting for treasure, but instead of gold, we’re finding opportunities to make our homes more energy-efficient.
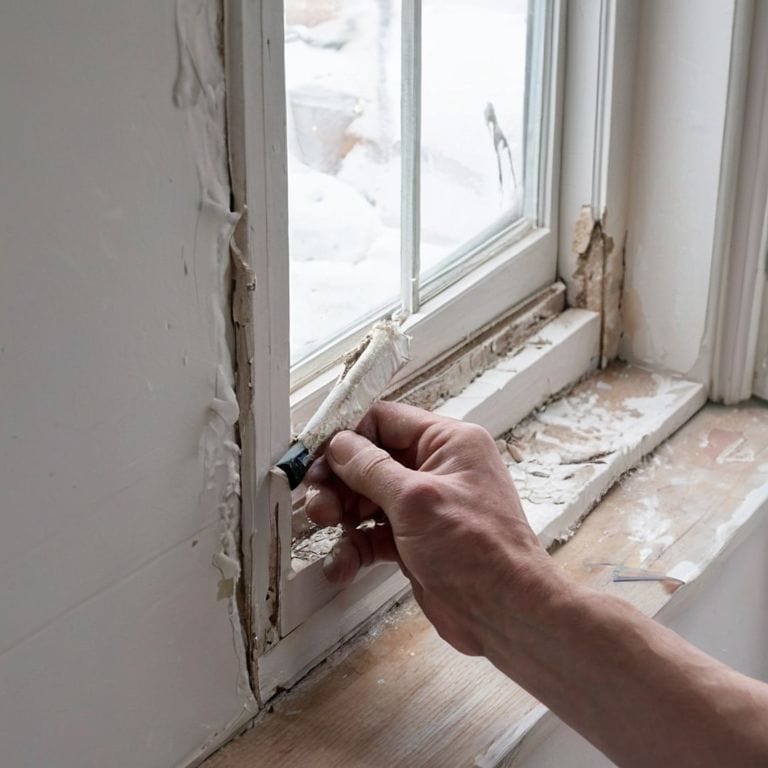
- 3. With our leaks identified, it’s time to seal the deal. For gaps around windows and doors, a good quality caulking or weatherstripping will do the trick. Apply it according to the manufacturer’s instructions, making sure to fill the gap completely. Don’t worry if it gets a bit messy – that’s all part of the fun of DIY, right? I find that listening to music or a podcast while I work makes the process even more enjoyable.
- 4. For bigger gaps or holes, especially in areas like attics or basements, you might need something a bit more heavy-duty. Expanding foam is a great option here. Just remember to wear gloves and work in a well-ventilated area, as it can get a bit messy and smelly. The satisfaction of watching it expand and fill the gap is quite rewarding, though.
- 5. Another often-overlooked area for air leaks is around electrical outlets and switches. To seal these, you can use outlet sealers or a bit of caulking behind the plates. It’s a small step but can make a significant difference in keeping your home cozy and your energy bills lower. Plus, it’s a great excuse to get out my Monet-themed socks, which always bring a touch of elegance to any DIY project.
- 6. Moving on to the exterior of your home, check for any gaps or cracks in the siding, foundation, or around piping and vents. These can be sealed with caulking or, for larger gaps, with a more robust sealant. Remember, every little bit counts, and sealing these exterior leaks can help prevent heat loss and reduce your energy consumption. It’s all about making those small changes that add up to a bigger impact.
- 7. Lastly, don’t forget to check and seal any leaks around your ducts, especially if you have a forced-air heating or cooling system. Duct sealant or foil tape can be used to seal any gaps or holes in the ducts. This is a bit more of a challenge, but the payoff in terms of energy efficiency and cost savings is well worth the effort. Plus, the sense of accomplishment when you’re done is incredibly satisfying. Now, go ahead and give yourself a pat on the back – you’ve just made your home a bit more sustainable and energy-efficient.
Unseal the Past Seal the Deal

As I delve into the world of detecting air leaks in homes, I’m reminded of the quirky, vintage pieces I’ve upcycled over the years. You see, sealing air leaks is not just about saving energy, it’s about breathing new life into your home. I like to think of it as giving your house a warm hug from the inside out. By sealing those sneaky gaps, you’re not only reducing heat loss but also preventing moisture from seeping in and causing damage.
When it comes to sealing air leaks around windows, I always say, “it’s all about the details.” A simple DIY weatherstripping installation can make a huge difference. I recommend using a combination of caulk and weatherstripping to ensure a tight seal. And, let’s not forget about the benefits of air leak sealing – from reducing your energy bills to preventing pesky drafts, it’s a win-win situation.
As you embark on this journey, keep an eye out for common areas for air leaks in houses, such as baseboards, attic hatches, and electrical outlets. Investing in a few air leak detection tools, like a candle or incense stick, can also be super helpful in identifying those hard-to-find gaps. By taking the time to seal these leaks, you’ll be creating a cozier, more energy-efficient home that’s full of character and charm.
Detecting Sneaky Leaks at Home
As I always say, “a leaky home is a sneaky foe,” and detecting those hidden air leaks is an adventure in itself. I grab my trusty flashlight, a pair of keen eyes, and my favorite Van Gogh socks – they seem to bring me good luck in spotting the sneaky ones. Together, we’ll explore the nooks and crannies of your home, from dusty attics to mysterious crawl spaces, in search of those pesky gaps and cracks that are stealing your warmth and your money.
With a dash of curiosity and a pinch of creativity, we’ll uncover the hidden pathways of escaping air, and I’ll share my top tips for tracking them down. Whether it’s a flickering flame, a whispered draft, or a cleverly concealed crevice, we’ll leave no stone unturned in our quest to seal the deal and make your home a cozy, energy-efficient haven.
Diy Weatherstripping for Whimsy
Now that we’ve uncovered those sneaky leaks, let’s get creative with DIY weatherstripping. I just love repurposing old materials to give my home a unique touch. For this project, I’m wearing my favorite Van Gogh socks – the swirling patterns inspire my artistic approach to sealing gaps. To make your own weatherstripping, try using vintage fabric scraps or recycled felt. Simply cut them into strips, add a dash of adhesive, and voilently – you’ve got a charming, eco-friendly sealant.
As I work on this project, I feel like I’m not only saving energy but also telling a story through my home decor. The quirky, handmade weatherstripping adds a personal touch that mass-produced materials just can’t replicate. Plus, it’s a great excuse to get crafty and experiment with different textures and colors. Who knows, you might just discover a new passion for upcycling and make your home a true reflection of your personality.
Seal the Deal: 5 Whimsy Tips to Plug Those Sneaky Air Leaks
- Get Your Hands Dirty: Use candles or incense to detect hidden air leaks, watching for flickers or wafts that indicate sneaky escapes
- Whimsical Windows: Apply a thin layer of DIY weatherstripping around window frames to keep the warmth in and the chill out
- Sock It to Leaks: Wear your favorite colorful socks, like my Van Gogh-inspired pair, to add a dash of whimsy while crawling around to check for leaks under doors and baseboards
- Rustic Revival: Repurpose old rugs or mats to create homemade door sweeps, adding a touch of eclectic charm while keeping cold air at bay
- Eclectic Efficiency: Blend function with art by using vintage materials to create one-of-a-kind air leak solutions, like transforming old wooden spoons into unique door stops
Sealing the Deal: 3 Key Takeaways
Embracing sustainable living is as simple as sealing those sneaky air leaks, which can save you up to 30% on your energy bills and reduce your carbon footprint
By upcycling old materials for DIY weatherstripping, you’re not only reducing waste but also adding a touch of whimsy and character to your home renovations
Whether you’re a seasoned DIY enthusiast or a beginner, uncovering and sealing air leaks is an accessible and fun project that lets you get creative, save money, and live more sustainably – all while rocking your favorite pair of inspirational socks
Sealing the Deal with Wisdom
As we seal the leaks of yesterday, we unlock the doors to a more sustainable tomorrow, where every drafty corner tells a story of our journey towards a greener, more whimsical world.
James O'Neill
Sealing the Deal: A Sustainable Victory
As we conclude our whimsical journey through the world of air leak detection and sealing, let’s recap the key takeaways: we’ve learned how to identify those sneaky leaks, create our own DIY weatherstripping, and even explored the historical significance of preserving our homes. By embracing these sustainable practices, we not only reduce our energy consumption but also contribute to a more eco-friendly lifestyle. Remember, every small action counts, and sealing those air leaks is a significant step towards a greener tomorrow.
So, as you finish reading this guide and prepare to embark on your own air leak sealing adventure, I want to leave you with a final thought: imperfection is perfection. Don’t be too hard on yourself if your DIY projects aren’t flawless – it’s the character and charm that comes with upcycling and repurposing that truly makes them special. Keep on creating, and together, let’s make sustainable living a beautifully imperfect reality, one sealed air leak at a time.
Frequently Asked Questions
What are some common signs that my home has air leaks that need to be sealed?
Hey, friend! If you notice drafts near windows, doors, or electrical outlets, or if your energy bills are higher than expected, it might be time to go on a leak-hunting adventure! Look for signs like uneven temperatures, musty smells, or pesky pests sneaking in – these could all be clues that your home is whispering, “Seal me, please!
How can I determine the best type of sealant or weatherstripping to use for different types of air leaks?
Ah, my friend, choosing the right sealant or weatherstripping is like picking the perfect paint color – it’s all about the vibe! For gaps around doors, I swear by foam tape or felt weatherstripping. For windows, silicone sealant is my go-to. And for those pesky baseboard leaks, caulk is the way to go. Match the material to the leak, and you’ll be golden!
Are there any specific safety precautions I should take when sealing air leaks, especially if I'm working with older homes or potentially hazardous materials?
When sealing air leaks, especially in older homes, safety first, my friend! Wear a mask, gloves, and protective eyewear when handling potentially hazardous materials like asbestos or lead-based paint. Ensure good ventilation and consider hiring a pro if you’re unsure – better safe than sorry, and those colorful socks won’t save you from harm!