I still remember the first time I encountered plumber’s tape – I was a young DIY enthusiast, trying to fix a leaky faucet in my grandfather’s vintage cottage. My grandfather, a seasoned handyman, handed me a roll of this mysterious tape and said, “This is the secret to watertight wonders, my boy!” As I learned what is plumber’s tape and how to use it, I realized that it’s not just a simple adhesive, but a game-changer for any plumbing project. The common myth that plumber’s tape is only for professionals is simply not true – with the right guidance, anyone can master its use.
In this article, I’ll share my personal experience and no-nonsense knowledge on what is plumber’s tape and how to use it. You’ll learn the basics of plumber’s tape, from its composition to its applications, and I’ll walk you through a step-by-step guide on how to use it effectively. Whether you’re a seasoned DIYer or a beginner, you’ll discover how to make the most of this versatile tool and avoid common mistakes. By the end of this guide, you’ll be equipped with the confidence to tackle any plumbing project that comes your way, and you’ll understand the true value of plumber’s tape in achieving watertight wonders.
Table of Contents
- Guide Overview: What You'll Need
- Step-by-Step Instructions
- Unlocking Plumbers Tape Secrets
- Taping Into Success: 5 Essential Tips for Mastering Plumber's Tape
- Key Takeaways to Tighten Up Your Plumbing Game
- The Plumber's Tape Revelation
- Wrapping Up the Plumber's Tape Adventure
- Frequently Asked Questions
Guide Overview: What You'll Need
Total Time: 30 minutes to 1 hour
Estimated Cost: $5 – $10
Difficulty Level: Easy
Tools Required
- Adjustable wrench or basin wrench for tightening fittings
- Channel-type pliers for gripping small objects
Supplies & Materials
- Plumber’s tape also known as Teflon tape, in various thicknesses
- Pipe fittings such as threaded pipes or connectors
Step-by-Step Instructions
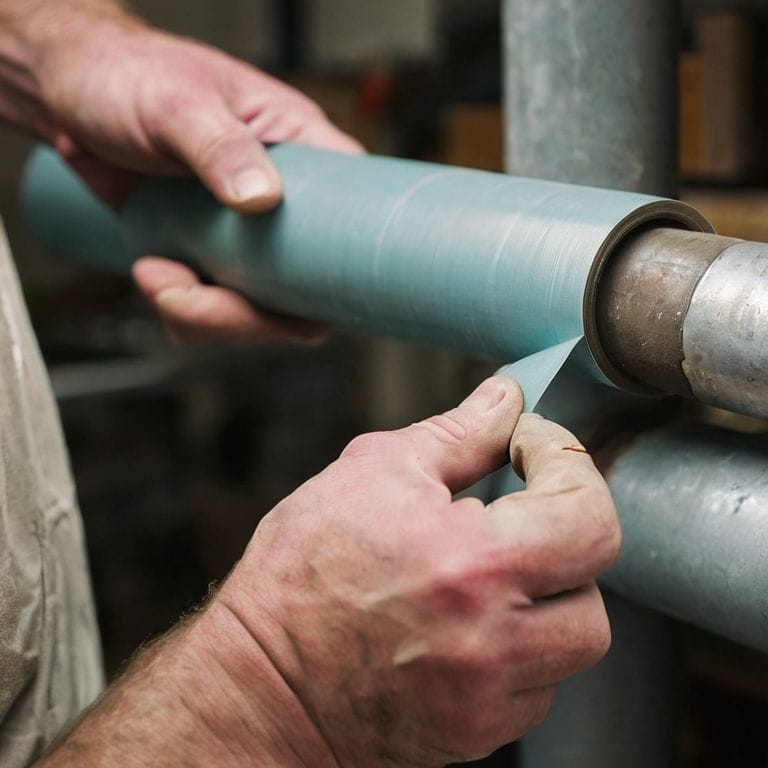
- 1. First, let’s get our hands on some plumber’s tape, also known as Teflon tape. This magical tool is a must-have for any DIY enthusiast, and I always make sure to have a roll or two in my workshop. When selecting your tape, look for a high-quality option that’s designed for your specific needs – in my case, I love using a tape with a bit of color to match my quirky renovation style.
- 2. Next, prepare the area where you’ll be applying the plumber’s tape. This might involve cleaning out any debris or old tape from the threads of your pipe or fixture. I like to use a soft-bristled brush to gently sweep away any dirt or grime, making sure the surface is smooth and ready for the tape. Remember to wear your favorite pair of DIY-themed socks – like my Van Gogh-inspired ones – to get you in the right mindset for creativity.
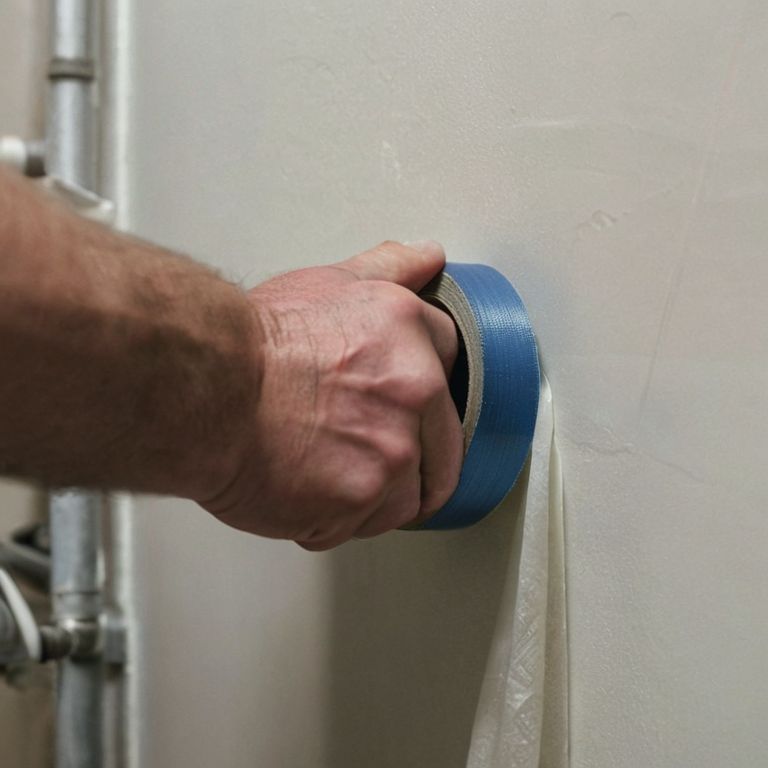
- 3. Now it’s time to cut a piece of plumber’s tape to the right length. The general rule of thumb is to use about 2-3 wraps of tape around the thread, but this can vary depending on the specific job. I like to err on the side of caution and use a bit more tape than necessary, just to ensure a watertight seal. When cutting the tape, use a sharp utility knife or scissors to get a clean edge.
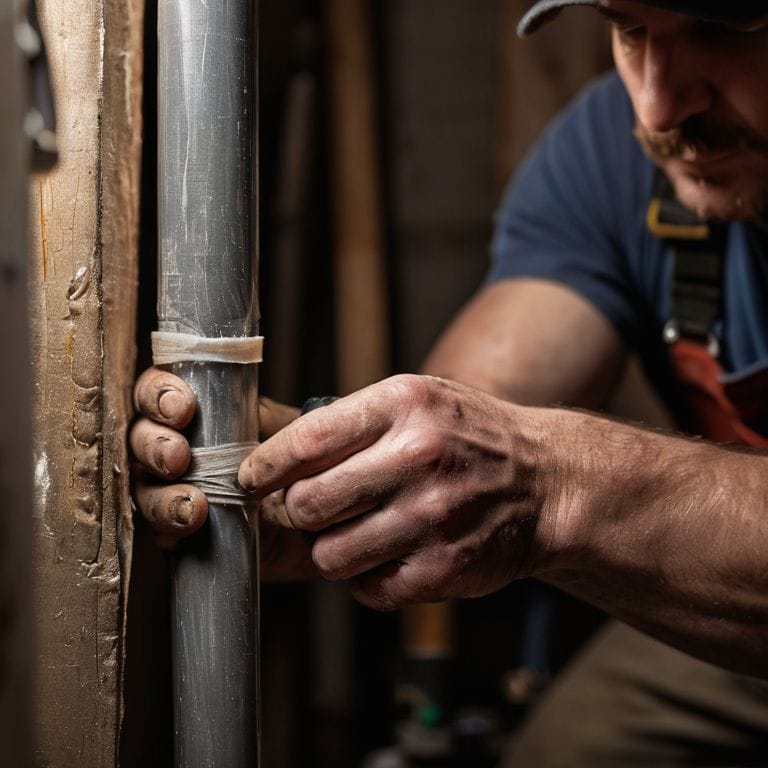
- 4. With your tape cut to size, it’s time to apply it to the threads of your pipe or fixture. Start by wrapping the tape clockwise around the thread, overlapping each wrap by about half the width of the tape. Make sure to keep the tape tight, but not too tight – you don’t want to restrict the thread’s ability to screw in smoothly.
- 5. As you apply the tape, make sure to press it firmly onto the thread to ensure it adheres properly. You can use a bit of pressure to get the tape to stick, but be careful not to stretch or distort it in the process. I like to use a small tool, like a dental pick, to press the tape into the tiny crevices and ensure a solid bond.
- 6. Once you’ve applied the plumber’s tape, it’s time to screw in your pipe or fixture. Make sure to turn it clockwise to tighten, and be careful not to overtighten – you don’t want to strip the threads and cause more problems down the line. As you tighten, you should start to feel the tape doing its magic, creating a secure and watertight seal.
- 7. Finally, test your handiwork by turning on the water supply and checking for any leaks. If you’ve applied the plumber’s tape correctly, you should be rewarded with a drip-free connection that will last for years to come. And if you’re feeling extra proud of your DIY skills, go ahead and treat yourself to a new pair of colorful socks – you’ve earned it!
Unlocking Plumbers Tape Secrets
As I delve into the world of plumber’s tape, I’ve discovered that thread sealing techniques are just the beginning. One of the most common misconceptions is that plumber’s tape and electrical tape are interchangeable – but trust me, they’re not. Plumber’s tape, also known as Teflon tape, is specifically designed for leak prevention methods in plumbing applications. Its unique properties make it an essential tool in my workshop, especially when working with vintage pipes.
When it comes to types of Teflon tape, I’ve found that there are a few variations to choose from. Some are more suitable for gas lines, while others are better suited for water pipes. Understanding the differences is crucial for a successful project. I like to think of plumber’s tape as a plumbing tape application specialist – it’s all about choosing the right tool for the job. By mastering the art of thread tape installation, you’ll be well on your way to creating watertight wonders.
In my experience, plumber’s tape vs electrical tape is a comparison that often comes up. While electrical tape is great for insulating wires, it’s not designed to withstand the same level of pressure as plumber’s tape. By choosing the right tape for the task at hand, you’ll be able to ensure a leak-free connection that will last for years to come. Whether I’m working on a quirky renovation project or a simple DIY fix, plumber’s tape is always by my side – and with the right techniques, it can be your go-to solution too.
Plumbers Tape vs Electrical Tape the Verdict
As I delve into the world of tapes, I often find myself pondering the age-old debate: plumber’s tape vs electrical tape. While both may seem like interchangeable heroes in our DIY toolkits, they serve distinct purposes. Plumber’s tape, with its Teflon coating and specialized weave, is the undisputed champion of watertight seals and pipe-fitting prowess. Electrical tape, on the other hand, excels at insulating and securing electrical connections. In my upcycling adventures, I’ve learned to appreciate the unique strengths of each, ensuring that I wield the right tape for the task at hand.
The verdict? Plumber’s tape reigns supreme in the realm of plumbing and pipe-related wizardry, whereas electrical tape takes the stage for all things spark-related. By recognizing and respecting their differences, we can unlock a world of DIY possibilities, armed with the knowledge of when to deploy each trusty sidekick.
Thread Sealing Techniques for Leak Proof Bliss
To achieve thread sealing techniques for leak-proof bliss, I like to think of plumber’s tape as the trusty sidekick to my DIY adventures. The key is to apply it with a gentle yet firm touch, making sure to cover the entire thread. I’ve found that wrapping the tape in a clockwise direction helps to prevent it from unraveling when you screw on the fitting. It’s a small detail, but one that makes all the difference in ensuring a watertight seal. And, as I always say, a good seal is like a good pair of socks – it’s all about the fit! Speaking of which, my current project-inspired sock choice features a vibrant portrait of Claude Monet, adding a pop of color to my workshop.
Taping Into Success: 5 Essential Tips for Mastering Plumber's Tape
- Always clean and dry the threads before applying plumber’s tape to ensure a strong seal and prevent any debris from interfering with the tape’s adhesive
- Use the right amount of tape – too little and you might not get a watertight seal, too much and you could end up with a messy, stubborn removal process
- Wrap the tape in the correct direction to avoid unraveling, which is usually clockwise for most pipe fittings
- Choose the correct thickness of plumber’s tape for your specific project, as different sizes and types of pipes require varying levels of sealing capability
- Don’t over-tighten the fittings after applying plumber’s tape, as this can cause the tape to compress and lose its sealing properties, leading to potential leaks and damage
Key Takeaways to Tighten Up Your Plumbing Game
Always remember to wrap plumber’s tape in a clockwise direction to ensure a watertight seal – it’s a small detail that makes a big difference in your DIY projects!
Choose the right tape for the job: plumber’s tape is designed for pipes and fittings, while electrical tape is better suited for, well, electrical work – don’t get them mixed up, my friend!
Experiment with different thread sealing techniques to find what works best for you, and don’t be afraid to get creative – after all, that’s what DIY is all about, right?
The Plumber's Tape Revelation
Plumber’s tape is not just a tool, it’s a time traveler – bridging the gap between worn-out pipes and a leak-free tomorrow, one wrap at a time.
James O'Neill
Wrapping Up the Plumber's Tape Adventure
As we conclude our journey into the world of plumber’s tape, let’s recap the essential takeaways: understanding what plumber’s tape is, learning how to use it effectively, and unlocking its secrets to achieve leak-proof bliss. From distinguishing it from electrical tape to mastering thread sealing techniques, we’ve covered a lot of ground. Remember, the key to getting the most out of plumber’s tape lies in its proper application and understanding its limitations. By following the steps and tips outlined, you’ll be well on your way to becoming a plumber’s tape pro, ready to tackle any piping project that comes your way.
So, as you embark on your next DIY adventure, keep in mind that sustainability and creativity go hand in hand. Don’t be afraid to think outside the box and find new uses for plumber’s tape, or any other material for that matter. With a little imagination and a lot of heart, you can turn even the most mundane projects into something truly special. Now, if you’ll excuse me, I have a vintage dresser to upcycle – and I just found the perfect pair of socks to inspire my next creation!
Frequently Asked Questions
Can I use plumber's tape for outdoor faucets and hoses?
Absolutely, my friend! Plumber’s tape is a great fit for outdoor faucets and hoses. Its waterproof and UV-resistant properties make it perfect for withstanding the elements. Just wrap it clockwise around the threads, and you’re good to go! I’ve used it on my own outdoor projects, and it’s been a game-changer – no more pesky leaks to ruin my upcycling vibes!
How often should I replace plumber's tape on existing connections?
The million-dollar question: how often to replace plumber’s tape? Honestly, it’s a good idea to inspect and potentially replace it every 5-10 years or when you notice signs of wear, like cracking or fraying. Think of it like rotating your favorite pair of socks – even my beloved artist socks need a refresh now and then!
Is it possible to use plumber's tape with PVC pipes and fittings?
Absolutely, my friend! Plumber’s tape is a game-changer for PVC pipes and fittings too. Just wrap it clockwise around the threads, and you’re golden. The key is to use the right amount – not too little, not too much. I like to think of it as the perfect harmony between pipe and fitting, sealed with a dash of tape magic!