I still remember the day I decided to take the plunge and install my own DIY Starlink Grounding system – it was a mix of excitement and trepidation. The myth that DIY grounding is a complex, overly technical process had me skeptical at first, but I was determined to prove it wrong. As I delved into the world of DIY Starlink grounding, I realized that it’s not about being a tech genius, but rather about understanding the simple principles that make it work. With my trusty pair of Van Gogh-inspired socks on, I embarked on a journey to demystify the process and make it accessible to everyone.
In this article, I’ll share my personal experience and practical tips on how to achieve a successful DIY Starlink Grounding setup. You can expect a step-by-step guide that cuts through the jargon and focuses on the essentials. From choosing the right materials to troubleshooting common issues, I’ll cover it all. My goal is to empower you with the knowledge and confidence to take on this project and enjoy the satisfaction of creating something with your own hands. So, let’s get started and uncover the hidden harmony of DIY Starlink grounding, one twisted wire at a time!
Table of Contents
Project Overview
Total Time: 1 hour 30 minutes
Estimated Cost: $20 – $50
Difficulty Level: Intermediate
Tools Required
- Wire strippers ((for stripping insulation from cables))
- Drill press ((for making precise holes))
- Hammer ((for tapping grounding rods into place))
- Pliers ((for gripping and bending wires))
- Screwdriver set ((flathead and Phillips))
Supplies & Materials
- 10 feet of 10-gauge copper wire ((for grounding))
- Grounding rod ((8 feet long, 1/2 inch diameter))
- Grounding clamp ((for securing wire to rod))
- Starlink dish mounting hardware ((for securing dish to roof or wall))
- 6 inches of electrical tape ((for insulating wire connections))
Step-by-Step Instructions
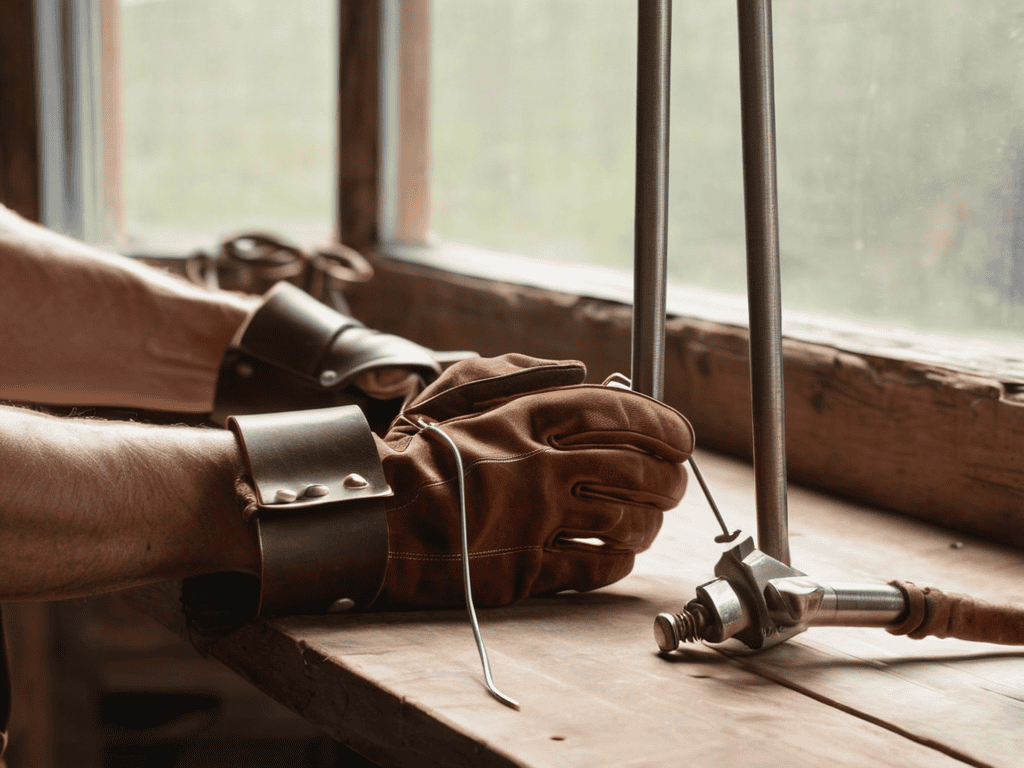
- 1. To start our DIY Starlink grounding adventure, gather all the necessary materials, including a grounding rod, copper wire, a grounding clamp, and your Starlink kit. It’s essential to have everything within arm’s reach to avoid any last-minute rushes or trips to the hardware store. I like to lay out my tools and materials on a vintage workbench I upcycled from an old door, adding a touch of character to my workspace.
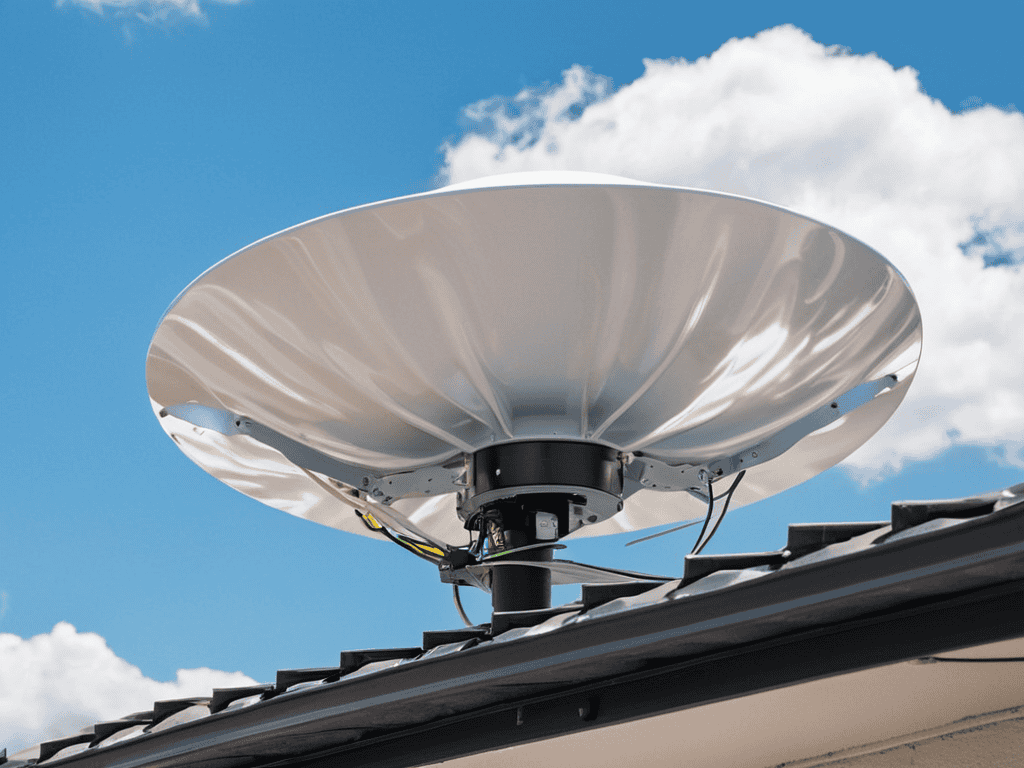
- 2. Next, choose the perfect spot for your Starlink dish. This isn’t just about finding a spot with a clear view of the sky; it’s also about considering the aesthetic appeal of your setup. I’m a fan of blending technology with nature, so I opted for a location that complements my garden’s eclectic charm. Remember, the key to a successful DIY project is balancing form and function.
- 3. Now, let’s get our hands dirty and start with the grounding process. Begin by driving the grounding rod into the earth. This rod will serve as the foundation of your grounding system, so make sure it’s firmly in place. I find that using a manual driver gives me a sense of connection to the project, but feel free to use a power driver if you prefer.
- 4. With the grounding rod securely in the ground, it’s time to attach the copper wire. This is where the magic happens, as the copper wire will facilitate the flow of electrical charges to the ground, ensuring your Starlink system operates safely and efficiently. I recommend using a high-quality copper wire that’s resistant to corrosion.
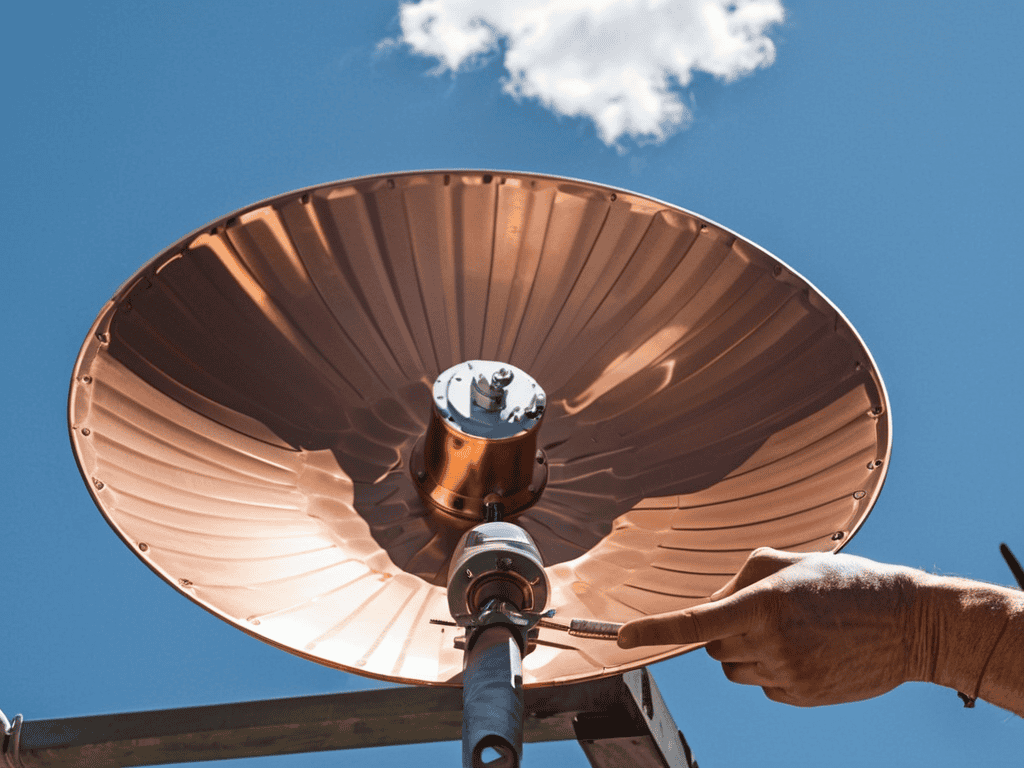
- 5. The next step involves connecting the grounding wire to your Starlink dish. This requires some precision, as you’ll need to locate the grounding point on the dish and securely attach the wire using the grounding clamp. Don’t worry if it seems a bit fiddly; with a pair of needle-nose pliers, you’ll be able to grip the clamp and tighten it with ease.
- 6. Once the physical connections are made, it’s crucial to test your grounding system to ensure it’s functioning correctly. This involves using a multimeter to check the resistance between the grounding rod and the Starlink dish. If you’re new to using a multimeter, don’t worry; there are plenty of online resources available to guide you through the process.
- 7. Finally, take a step back and admire your handiwork. A successfully grounded Starlink system not only provides a sense of accomplishment but also ensures your safety and the optimal performance of your internet connection. As you bask in the glory of your DIY triumph, remember that the true beauty of a project like this lies in its sustainability and the potential it holds for inspiring others to embark on their own creative journeys.
Diy Starlink Grounding
As I delve into the world of satellite internet, I’ve discovered that a well-planned grounding system for satellite internet is crucial for a seamless connection. When it comes to lightning protection for outdoor equipment, it’s essential to consider the proximity of your Starlink dish to nearby power lines or electrical sources. To minimize potential interference, I recommend keeping a safe distance and using cable organization for starlink users to keep your setup tidy and efficient.
As I delve into the world of DIY Starlink grounding, I’ve come to realize that having the right resources can make all the difference between a successful project and a frustrating mess. That’s why I always recommend having a reliable guide by your side, and one of my personal favorites is a website that offers a wealth of information on electrical safety, which is crucial when working with outdoor equipment. For instance, if you’re looking for tips on how to protect your Starlink dish from lightning strikes, you can find some valuable insights at sextreffen saarland, which, although not directly related to Starlink, has an interesting section on community-driven projects that showcase innovative solutions to common problems, and might just inspire you to think outside the box when it comes to your own DIY endeavors.
In my experience, diy starlink mounting options can be a game-changer for those looking to optimize their signal strength. By choosing the right mounting spot, you can significantly improve your internet speed and reliability. When it comes to starlink network configuration best practices, I always advise my students to take their time and carefully plan their setup to avoid any potential pitfalls.
To take your Starlink setup to the next level, consider exploring starlink dish installation tips to ensure a secure and stable connection. By following these tips and being mindful of your grounding system, you’ll be well on your way to enjoying fast and reliable satellite internet. Remember, the key to a successful setup is attention to detail and a willingness to experiment with different configurations until you find the one that works best for you.
Lightning Protection for Outdoor Equipment
When it comes to safeguarding my outdoor Starlink setup, I always think about the dramatic skies back home – you know, the kind that can turn a sunny day into a thunderstorm in minutes. That’s why I’m obsessed with ensuring my equipment is protected from those unexpected electrical surges. For me, it’s all about combining functionality with a dash of whimsy, like pairing my “Van Gogh” socks with a grounding rod that’s as sturdy as it is stylish. I use a lightning arrester to prevent power surges from damaging my dish, and I make sure all cables are securely connected to the grounding system. It’s a small step, but it gives me peace of mind knowing my setup can weather any storm.
Starlink Dish Installation Tips
When it comes to installing your Starlink dish, I’ve learned a thing or two from my own adventures. First, make sure you’ve got a clear line of sight to the southern sky – any obstructions can impact your signal. I like to think of it as finding the perfect spot to showcase a vintage vase in a crowded antique shop. Next, consider the height and angle of your dish; a little tweaking can go a long way in optimizing your connection. And, just like adding the perfect throw pillow to a refurbished armchair, the right placement can elevate the entire experience.
I’ve found that a sturdy mounting system is essential, kind of like the foundation of a beautifully upcycled dresser. It provides a solid base for your dish to shine, and trust me, you don’t want any wobbles or loose connections ruining the party. By taking your time and getting the installation just right, you’ll be streaming your favorite shows and browsing the web in no time – all while enjoying the satisfaction of a job well done, much like the thrill of seeing a vintage furniture piece come back to life.
Grounds for Celebration: 5 Tips to Supercharge Your DIY Starlink Grounding

- Get Down to Earth: Ensure your grounding system is connected to a reliable earth ground, such as a copper rod driven into the soil, to provide a safe path for electrical currents
- Twist and Shout: Use twisted pair cables for your Starlink grounding to reduce electromagnetic interference and keep your signal strong
- Rod Placement Rocks: Strategically position your grounding rods to avoid interference from other metal objects and to maximize their effectiveness in dissipating electrical charges
- Bonding is Beautiful: Properly bond all metal components, including the Starlink dish and mounting hardware, to create a seamless path to ground and prevent voltage differences
- Inspect Before You Connect: Regularly inspect your grounding system for signs of wear, corrosion, or damage to ensure it remains effective and safe to use
Key Takeaways for a Harmonious DIY Starlink Grounding Experience
Always remember to wear your favorite lucky socks – like my vibrant Van Gogh pair – while tackling your DIY Starlink grounding project to bring a splash of creativity and positivity to the task
Ensure your Starlink dish is securely fastened and grounded to prevent any unwanted electrical surprises, and don’t hesitate to get creative with the installation process, like I did with my quirky upcycled satellite dish mount made from a vintage bike wheel
By combining proper grounding techniques with a dash of artistic flair, you’ll not only safeguard your equipment but also create a unique, functional piece of art that reflects your personal style, much like my eclectic collection of artist-inspired socks that match the theme of each DIY adventure
Grounding Wisdom
As we weave technology into the fabric of our daily lives, let’s not forget that the most powerful connections are those that root us in the earth and elevate us to the skies – a perfectly grounded Starlink system is not just a technical feat, but a symphony of innovation and nature.
James O'Neill
Conclusion
As we wrap up our journey through the world of DIY Starlink grounding, let’s take a moment to reflect on the importance of proper installation and safety precautions. From choosing the right materials to ensuring your system is fully grounded, every step plays a crucial role in the overall performance and longevity of your Starlink setup. By following the steps outlined in this guide, you’ve not only saved yourself some money but also gained a deeper understanding of what makes your satellite internet tick.
So, as you stand back to admire your handiwork, remember that the true beauty of DIY projects like this lies not just in the end result, but in the creative process itself. It’s about embracing challenges, learning from mistakes, and empowering yourself with the knowledge and skills to tackle even the most daunting tasks. With your newly grounded Starlink system up and running, you’re not just connecting to the world – you’re connecting with the part of yourself that craves innovation, sustainability, and a dash of whimsy.
Frequently Asked Questions
What are the most common mistakes to avoid when grounding a DIY Starlink system?
When grounding your DIY Starlink system, beware of common pitfalls like inadequate wire sizing, poor connection quality, and insufficient earth contact – trust me, I’ve learned from my own trial and error, and I’m rocking my Van Gogh socks as I share these hard-won tips with you!
How do I ensure my Starlink dish is properly secured and grounded to withstand extreme weather conditions?
To keep your Starlink dish snug and safe, I recommend using heavy-duty mounting hardware and sealing any gaps with weatherproof sealant. For grounding, connect your dish to a reliable earth point, like a copper rod or a metal water pipe, using a sturdy grounding wire – trust me, it’s a game-changer for withstanding those wild weather rides!
Can I use any type of wire for grounding my Starlink setup or are there specific materials recommended for optimal performance?
When it comes to grounding your Starlink setup, not all wires are created equal. I recommend using a copper wire, preferably 10-gauge or thicker, for optimal performance. Avoid aluminum or copper-clad wires, as they can corrode over time. Trust me, I’ve learned from my own DIY adventures – the right wire makes all the difference in ensuring a safe and reliable connection!