
I still remember the first time I tried to build a workbench – I was a novice DIY enthusiast with a passion for upcycling vintage furniture, and I thought I needed a fancy, expensive setup to get started. But as I delved deeper into the world of woodworking, I discovered the simple truth: a guide to building a simple workbench from 2x4s is all you need to unlock a world of creative possibilities. The myth that you need a lot of space or specialized tools to create something amazing is just that – a myth. With a few simple planks and some basic tools, you can create a functional and beautiful workbench that will become the heart of your DIY haven.
As you embark on this journey with me, I promise to share my honest, no-hype advice on how to bring your workbench vision to life. You’ll learn how to choose the right materials, design a layout that works for you, and bring it all together with some basic construction techniques. My goal is to empower you to see the potential in everyday items and turn them into unique treasures, just like I do with my quirky modern pieces. So, let’s get started and uncover the hidden potential in those humble 2x4s – with a guide to building a simple workbench from 2x4s, the possibilities are endless, and I’m excited to explore them with you.
Table of Contents
Guide Overview: What You'll Need
Total Time: 2 hours 30 minutes
Estimated Cost: $50 – $100
Difficulty Level: Intermediate
Tools Required
- Circular Saw (for cutting 2x4s)
- Drill (with screwdriver and drill bits)
- Tape Measure (for measuring and marking lumber)
- Square (for ensuring accurate corners)
- Clamp (for holding pieces together during assembly)
- Sandpaper (for smoothing out wood surfaces)
- Hammer (for tapping pieces into place)
Supplies & Materials
- 2×4 Lumber (for workbench frame and shelf)
- 3/4 inch Plywood (for workbench top)
- 2 1/4 inch Wood Screws (for assembling frame and attaching top)
- Wood Glue (for reinforcing joints)
- 2 inch Wood Screws (for attaching shelf)
Step-by-Step Instructions
- 1. First, let’s gather our materials and get excited about the project ahead. We’ll need 2×4 lumber for the frame, some 3/4 inch plywood for the top, a drill press, a hand saw or circular saw, a tape measure, a square, and some 2 1/4 inch screws. I love this part of the process, as it feels like preparing for a fun recipe, but instead of baking a cake, we’re baking a workbench.
- 2. Next, we need to cut the 2x4s to the appropriate lengths for our workbench’s legs, shelves, and frame. This is where precision becomes our best friend. Using our tape measure and square, we ensure that all cuts are accurate and that our corners are perfectly squared. It’s a bit like solving a puzzle, and I find it really satisfying to see everything fit together neatly.
- 3. Now, let’s assemble the frame of our workbench. We’ll use our 2 1/4 inch screws to attach the sides, top, and bottom frames together. I recommend starting with the bottom and top frames, then adding the sides. Make sure everything is level and securely fastened. This step is crucial, as it forms the foundation of our workbench, determining its stability and usability.
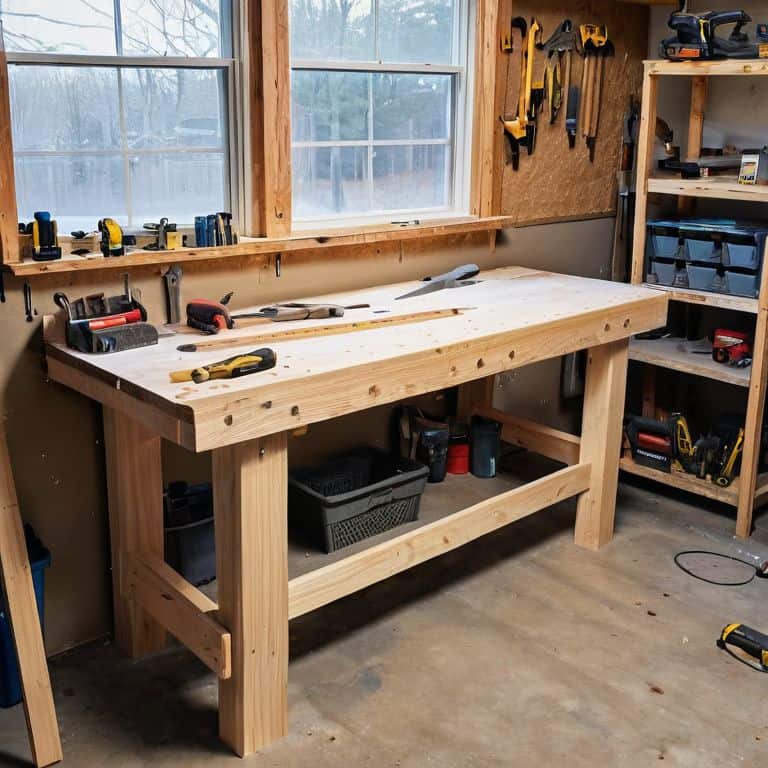
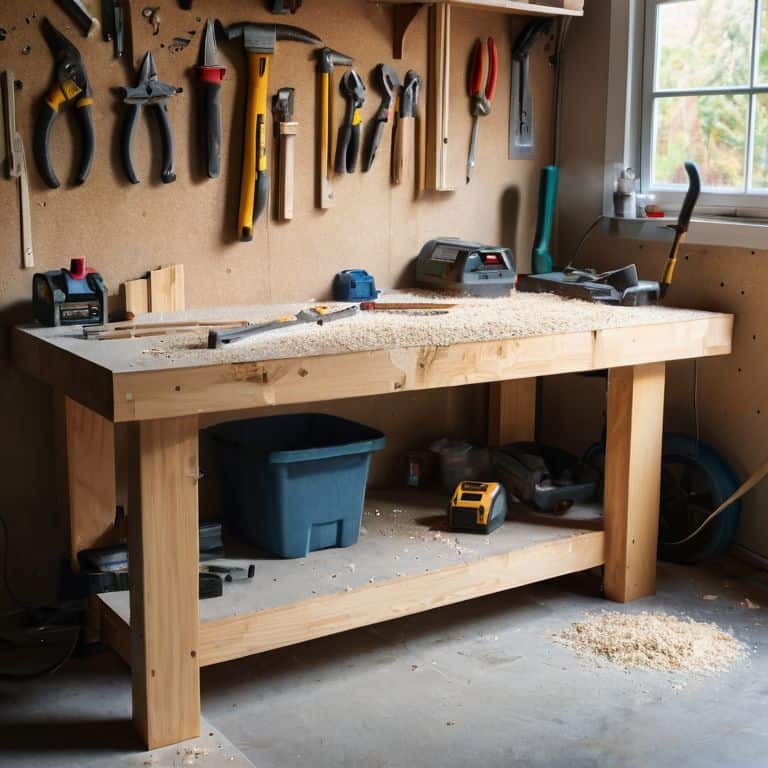
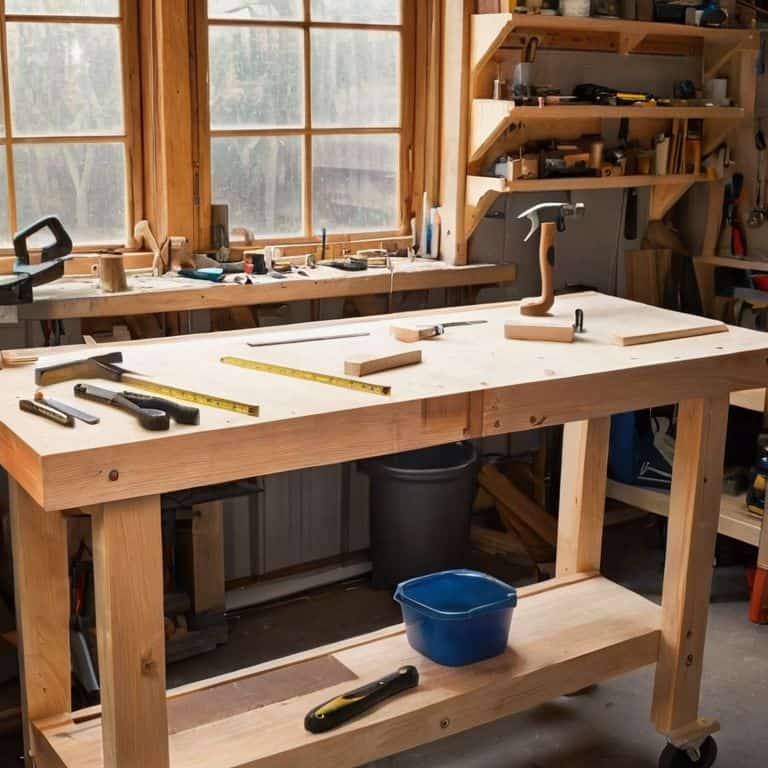
- 4. After assembling the frame, it’s time to attach the plywood top. This is where our workbench starts to look like, well, a workbench. Apply some wood glue to the top of the frame and place the plywood on it. Use our screws to secure the plywood to the frame, making sure they are evenly spaced to prevent any warping of the wood. I find that adding the top is a turning point in the project, as it transforms the collection of lumber into a functional piece of furniture.
- 5. With the basic structure in place, we can now add any additional features we want, such as drawers or a vice. For a simple workbench, we might just add a vice to one end. This involves attaching the vice to the workbench top and ensuring it’s securely fastened. The vice is a versatile tool that can hold pieces of wood in place, allowing us to work on them safely and efficiently.
- 6. Next up, let’s add some shelves for storage. Cut additional 2x4s to fit inside the workbench frame as supports for our shelves. Then, cut some more plywood to the appropriate size for the shelves themselves. Attach the shelves to the supports using our trusty screws. This step is all about maximizing space and keeping our workspace organized, which is essential for any DIY enthusiast.
- 7. Finally, it’s time to finish and protect our workbench. Sand all the surfaces to smooth out any rough edges or splinters, then apply a finish of your choice. This could be a stain to match your workshop decor, a waterproof sealant to protect the wood from spills, or even a coat of paint for a pop of color. I’m a fan of keeping it natural with a clear sealant, as it allows the beauty of the wood to shine through while still providing protection. Now, let’s stand back and admire our handiwork – we’ve managed to create a functional, one-of-a-kind workbench from a few simple 2x4s.
A Guide to Building a Simple Workbench From 2x4s
As I always say, the key to a great DIY project is in the details. When building a workbench for small spaces, it’s essential to consider the layout and functionality of your workspace. I like to think of it as a puzzle, where every piece fits together perfectly to create a harmonious and efficient work area. For instance, you can incorporate workbench plans with storage to keep your tools and materials organized and within reach.
One of the most crucial elements of a workbench is the vice. Learning how to add a vice to a workbench can be a bit tricky, but trust me, it’s worth the effort. A good vice can make all the difference in your projects, providing a secure hold on your materials and allowing you to work with precision. I’ve found that investing in a quality vice is essential, even when working with best 2×4 workbench designs on a budget.
For beginners, I recommend exploring simple workbench ideas that cater to your specific needs and skill level. Don’t be afraid to experiment and try new things – it’s all part of the creative process. When it comes to workbench materials on a budget, remember that you don’t have to break the bank to create something amazing. With a little creativity and resourcefulness, you can build a fantastic workbench that will serve as the foundation for countless DIY adventures.
Best 2×4 Designs With Storage Charm
As I always say, a workbench with storage is like wearing my favorite Van Gogh socks – it’s all about adding that extra layer of personality. When it comes to 2×4 designs, I’m obsessed with creating hidden compartments and shelves that not only keep my tools organized but also tell a story. For instance, you can add a sliding drawer made from an old wooden crate or a pegboard with hooks fashioned from vintage door handles. These unique touches will make your workbench a true reflection of your eclectic style.
My personal favorite design element is incorporating wooden crates as storage units. Not only do they add a rustic charm, but they’re also incredibly functional. You can label each crate with its contents, making it easy to find what you need in a snap. Plus, they’re a great way to upcycle old materials, which is right up my alley. With a little creativity, your 2×4 workbench can become a stunning piece of functional art that showcases your personality and style.
Unleash Small Space Workbench Potential
As I always say, a workbench is the heart of any DIY haven, and even the smallest of spaces can harbor a creative powerhouse. I recall a project where I transformed a tiny corner of my workshop into a functional area, and it’s amazing how a simple 2×4 workbench can thrive in compact spaces. By opting for a wall-mounted or foldable design, you can unlock the full potential of your mini workshop, making every inch count.
To make the most of your small space workbench, consider vertical storage solutions and multi-functional tools. My favorite trick is to use the space beneath the workbench for storing seldom-used items, keeping the top clear for your current project. With a little creativity, even the coziest of areas can become a vibrant hub of innovation, waiting to be unleashed.
Hammering Out the Details: 5 Tips for Your 2×4 Workbench
- Measure Twice, Cut Once: The Golden Rule of DIY to Avoid Waste and Ensure a Perfect Fit
- Choose Your 2x4s Wisely: Opt for Pressure-Treated Lumber for Outdoor Projects or Kiln-Dried for Indoor Ones
- Screw It: Use 2.5″ or 3″ Screws for Assembling the Frame to Ensure Stability and Durability
- Add Some Flair with Finishes: Consider Adding a Coat of Paint or Stain to Protect Your Workbench and Give It a Personal Touch
- Lighten the Load: Incorporate Casters or Wheels to Make Your Workbench Mobile and Convenient for Any Project
Key Takeaways for Your 2×4 Workbench Project
Embrace the versatility of 2x4s and unleash your creativity to craft a workbench that not only serves as a functional workspace but also reflects your personal style
By incorporating storage solutions, such as shelves or drawers, into your workbench design, you can maximize your workshop’s efficiency and keep your tools and materials organized
Remember, the true beauty of upcycling and DIY projects lies in their uniqueness, so don’t be afraid to experiment, add your own flair, and make your workbench a one-of-a-kind masterpiece that tells a story of its own
Building with Whimsy
The beauty of a simple workbench lies not in its complexity, but in the stories it will help you tell through the projects it holds, and the memories it will witness as it stands steadfast, a silent companion to your creativity.
James O'Neill
Embracing the Joy of DIY
As we conclude our journey to building a simple workbench from 2x4s, let’s take a moment to reflect on the process. We’ve covered the essential steps, from planning to execution, and even explored ways to unleash the potential of small space workbenches and incorporate storage charm into our designs. The key takeaway is that with a little creativity and some basic tools, anyone can create a functional and unique workbench that meets their needs. Whether you’re a seasoned DIY enthusiast or a beginner, the sense of accomplishment that comes from building something with your own hands is truly rewarding.
Now that you’ve got the skills and the inspiration, it’s time to unleash your inner DIY rebel. Don’t be afraid to experiment, try new things, and push the boundaries of what’s possible with 2x4s and a little imagination. As you work on your next project, remember that it’s not just about the end result, but about the journey itself – the learning, the creating, and the joy of bringing new life to old materials. So go ahead, get creative, and show the world what you’re capable of – one DIY project at a time.
Frequently Asked Questions
What are the essential tools I need to have in my workshop to build a simple 2×4 workbench?
My friend, let’s get this workshop party started! For a simple 2×4 workbench, you’ll need the basics: a trusty tape measure, a drill press, a jigsaw or circular saw, and of course, a hammer. Don’t forget a level and some clamps to keep things steady and secure – now, if you’ll excuse me, I’ve got to match my socks to the project’s vibe!
How can I customize my 2×4 workbench to fit into a small or irregularly shaped workspace?
To tame a tight space, get creative with your 2×4 workbench design! Consider a foldable or wall-mounted version, or even a modular build that can be rearranged to fit snugly into your unique workspace – I just love a good puzzle, and this is DIY nirvana!
What are some creative ways to add storage and organization to my 2×4 workbench without compromising its functionality?
Let’s get creative with storage! I love adding bins, baskets, and hooks to my 2×4 workbench to keep tools and supplies within reach. You can also repurpose old pallets or crates to create shelves or drawers, adding a touch of rustic charm to your DIY haven.