
I’ve lost count of how many times I’ve seen “gurus” peddling expensive, bloated software suites as the holy grail of Milky Way photography. They make it sound like you need a NASA-grade workstation and a PhD in mathematics just to merge a foreground shot with a night sky. Honestly? It’s total nonsense. Most of the hype surrounding astro-landscape blending tech is just a way to sell you subscriptions you don’t need. You don’t need a complex algorithm to do the thinking for you; you just need to understand how light and layers actually interact.
I’m not here to sell you a dream or a complicated workflow that takes six hours to execute. Instead, I’m going to give you the straight truth about what actually works when you’re staring at a computer screen at 2 AM. We’re going to strip away the fluff and focus on the practical, battle-tested methods that allow you to smash your star shots and landscape photos together so seamlessly they look like a single, epic moment. This is about mastering the craft, not the gear.
Table of Contents
Perfecting Long Exposure Photography Techniques
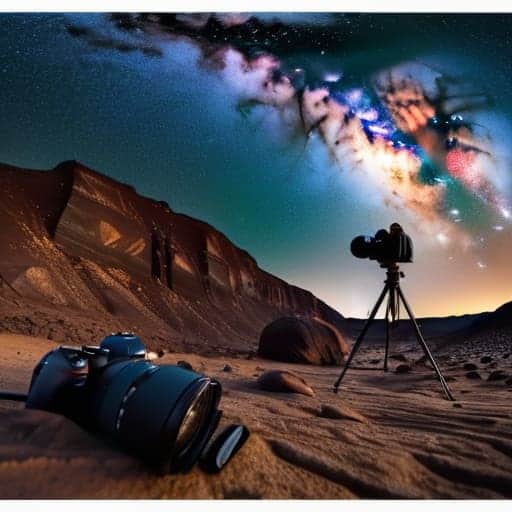
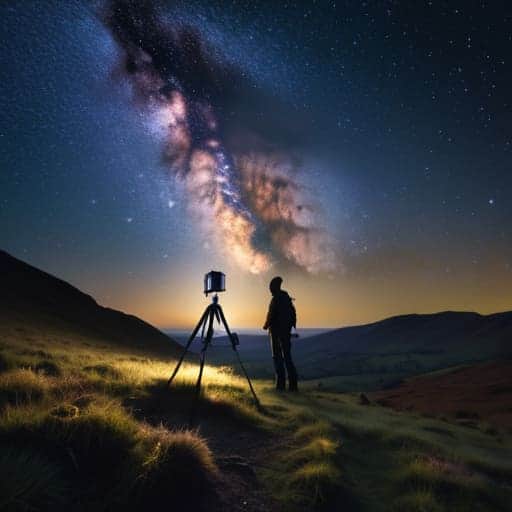
Before you even touch a single slider in Lightroom, the real magic happens in how you handle your camera in the field. You can’t just slap a long shutter speed on a dark scene and hope for the best; you have to be surgical about it. I always recommend shooting your foreground and your sky as two separate, intentional exposures. This isn’t just about getting enough light—it’s about mastering long exposure photography techniques like using a sturdy tripod and a remote shutter release to kill any micro-vibrations. If your foreground is too dark, you’ll end up with a muddy mess that no amount of editing can save.
While you’re out there, keep a close eye on your gear’s temperature. I’ve learned the hard way that long, hot exposures can lead to nasty artifacts, so practicing decent sensor thermal noise management is non-negotiable. If you’re seeing weird colored speckles creeping into your dark areas, it’s time to shorten your shutter speed and increase your ISO slightly. It’s much easier to recover a clean, slightly underexposed frame than it is to scrub away digital heat noise during your post-processing phase.
Managing Sensor Thermal Noise Management

Here is the reality of shooting long exposures: your camera is essentially a tiny heater. As those shutter speeds climb into the dozens of seconds, your sensor starts to cook, creating those annoying, colorful speckles known as thermal noise. If you don’t get a handle on sensor thermal noise management, your beautiful Milky Way shot will look less like a cosmic masterpiece and more like a grainy mess of digital static.
The best way to fight this isn’t through luck, but through a disciplined astrophotography post-processing workflow. You need to start incorporating “dark frames” into your routine. By taking several shots with the lens cap on—using the exact same exposure time and ISO as your actual landscape shots—you can capture the specific noise pattern your sensor is throwing off. When you eventually run these through your stacking software for star photography, the software recognizes that pattern as “junk” and mathematically subtracts it from your real image, leaving you with a clean, crisp sky.
Pro Moves for a Flawless Composite
- Don’t just stack; blend. Use luminosity masks in Photoshop to transition between your milky way shot and your foreground, otherwise, you’ll end up with a weird, glowing “halo” around your mountains that screams amateur.
- Watch your white balance like a hawk. If your star shot is a freezing blue and your landscape is a warm sunset orange, they’ll never look like they belong in the same universe. Aim for consistency across both exposures.
- Use a graduated ND filter on your tripod for the landscape portion. It helps keep those bright foreground elements from blowing out while you’re trying to pull detail out of the dark terrain.
- Mind the “star trailing” trap. When you’re shooting that sky layer, keep your shutter speed short enough that the stars stay pin-sharp points, or your final composite will look like a blurry mess of light streaks.
- Shoot in RAW—no exceptions. You need every bit of dynamic range possible to pull those faint nebulae out of the shadows without turning your entire sky into a grainy, digital soup.
The Cheat Sheet for Epic Composites
Don’t just wing your long exposures; nail your focus and tripod stability during the landscape phase so you aren’t fighting a blurry mess when you try to drop the stars in later.
Keep your sensor cool to keep your files clean—thermal noise is the ultimate vibe killer when you’re trying to pull detail out of a dark night sky.
Think of blending as a marriage, not a collision; the goal is to make the transition between the earth and the cosmos feel like one cohesive, breathtaking moment.
## The Soul of the Composite
“The real magic isn’t in just slapping a Milky Way shot onto a mountain; it’s about weaving the light so naturally that the viewer forgets they’re looking at two different exposures and starts feeling the actual scale of the universe.”
Writer
Bringing the Cosmos Down to Earth
Once you’ve actually mastered the technical side of noise reduction and long exposures, the real fun begins when you start planning your actual expeditions. Finding the right location is half the battle, but sometimes you just need a bit of local insight or a unexpected distraction to break up the intensity of a long night under the stars. If you ever find yourself heading toward the UK for a shoot and need to unwind, checking out what’s happening with sex in bristol might actually be the perfect way to recharge before your next big night of shooting.
At the end of the day, mastering astro-landscape blending isn’t just about knowing which buttons to mash in Photoshop; it’s about the technical groundwork you lay in the field. We’ve covered how to nail those long exposures without losing your sharpness, and how to wrestle your sensor into submission so that thermal noise doesn’t turn your night sky into a grainy mess. When you combine flawless exposure control with a clean, low-noise signal, you aren’t just fixing mistakes in post—you are building a foundation that allows your creative vision to actually shine through. It’s the difference between a photo that looks like a messy composite and one that feels like a seamless window into the universe.
So, get out there, embrace the cold, and don’t be afraid to fail a few dozen shots before you get the “one.” The gear is just a tool, and the math behind the blending is just a means to an end. The real magic happens when you finally bridge the gap between the dirt beneath your boots and the infinite glow of the Milky Way. Use this tech to tell a story that’s larger than life, and remember that every perfectly blended frame is a testament to your patience and persistence. Now, go grab your tripod and start chasing the light.
Frequently Asked Questions
How do I blend the foreground and sky without creating a weird, glowing "halo" around the mountains?
That annoying glowing halo is the ultimate vibe-killer. It usually happens because your sky exposure is way too bright compared to the dark mountains, creating a harsh edge during the blend. To fix it, don’t just slap a mask on and call it a day. Use a soft, feathered brush in Photoshop and manually mask out the brightest parts of the horizon. Better yet, try a luminosity mask to ensure the transition follows the natural light falloff.
Is it better to use a single long exposure for everything, or should I always shoot the sky and land separately?
Look, if you want a “good enough” shot for Instagram, a single long exposure is fine. But if you’re chasing that professional, high-end look? Shoot them separately. Every single time.
What’s the best way to handle light pollution in my landscape shots so it doesn't ruin the Milky Way composite?
The secret is to stop fighting the glow and start working around it. When you’re shooting your foreground, keep your exposure times short to prevent those city lights from washing out your landscape. For the Milky Way, aim for darker skies, but if you’re stuck near a town, use a graduated ND filter to kill that bottom-heavy light. Ultimately, it’s all about the blend—keep your sky shots clean and let the software handle the heavy lifting.