
I still remember the day I realized that best workbench lighting ideas weren’t just about slapping some lamps on my workbench, but about creating an ambiance that sparks creativity. I was in the middle of upcycling an old vintage dresser, surrounded by my collection of colorful socks featuring famous artists – my trusty sidekicks that always seem to match the theme of my projects. As I worked, I noticed how the right lighting brought out the intricate details of the wood, making the entire process feel almost therapeutic. It was then that I understood the importance of proper lighting in bringing out the best in my DIY endeavors.
As you delve into the world of DIY projects, you’ll soon discover that effective lighting is not just a luxury, but a necessity. In this article, I promise to share my honest and practical advice on how to illuminate your workspace with the best workbench lighting ideas. From overcoming common obstacles to creating a warm and inviting atmosphere, I’ll guide you through the process of selecting and setting up the perfect lighting for your workbench. Whether you’re a seasoned DIY enthusiast or just starting out, my goal is to empower you with the knowledge to transform your workspace into a creative sanctuary that inspires you to bring your most imaginative projects to life.
Table of Contents
Guide Overview: What You'll Need

Total Time: 1 hour 45 minutes
Estimated Cost: $50 – $100
Difficulty Level: Intermediate
Tools Required
- Drill Press (for precise hole drilling)
- Hand Saw (for cutting 2-in x 4-in lumber)
- Tape Measure (for measuring workbench dimensions)
- Level (for ensuring even installation)
- Wire Strippers (for stripping electrical wires)
Supplies & Materials
- LED Light Strips (waterproof, 12 inches long)
- 2-in x 4-in Lumber (for creating a shelf or mounting bracket)
- Electrical Wire (16-gauge, 6 feet long)
- Switches (for controlling light strips)
- Power Supply (for powering LED light strips)
Step-by-Step Instructions
- 1. First, let’s start by assessing the current lighting situation in your workshop – take a moment to evaluate the layout and identify areas where the light is lacking, this will help you determine the best placement for your new lighting fixtures. As I always say, a well-lit workspace is not just about functionality, but also about setting the mood for creativity and productivity.
- 2. Next, consider the type of lighting you need – are you looking for task lighting to focus on specific areas, or ambient lighting to illuminate the entire space? I’m a big fan of using a combination of both to create a layered lighting effect that’s both functional and visually appealing. For my own workshop, I opted for a mix of LED strips and pendant lights to achieve the perfect balance.
- 3. Now, let’s talk about the fun part – choosing the actual lighting fixtures! I’m obsessed with vintage-inspired lamps that add a touch of whimsy to the space, but you can also opt for more modern designs like recessed lighting or track lighting. When selecting fixtures, remember to consider factors like energy efficiency, durability, and ease of installation.
- 4. Once you’ve selected your fixtures, it’s time to think about light Temperature – do you prefer the warm glow of traditional incandescent bulbs or the cool tone of LED bulbs? I personally love the flexibility of LED bulbs, which can be adjusted to different color temperatures to suit my mood and the project at hand. Plus, they’re eco-friendly and energy-efficient, which aligns with my passion for sustainable living.
- 5. With your fixtures and bulbs in hand, it’s time to start installing – begin by mapping out the layout and planning the placement of each fixture to ensure even coverage and minimal shadows. Don’t be afraid to get creative and experiment with different configurations until you find the one that works best for you. As I always say, trial and error is all part of the DIY process.
- 6. As you’re installing your lighting, keep in mind the importance of adjustability – can you easily direct the light where you need it, or adjust the brightness to suit your tasks? I’m a big fan of using articulated arms or adjustable heads on my fixtures to ensure I can focus the light exactly where I need it. This is especially useful when working on intricate projects that require precise illumination.
- 7. Finally, take a step back and admire your handiwork – a well-lit workshop is not just functional, but also a source of inspiration that can spark new ideas and creativity. Don’t be afraid to add some personal touches, like colorful rugs or eclectic decor, to make the space truly yours. As I always say, a workshop should be a reflection of your personality and style, and the lighting is a key part of that.
Best Workbench Lighting Ideas
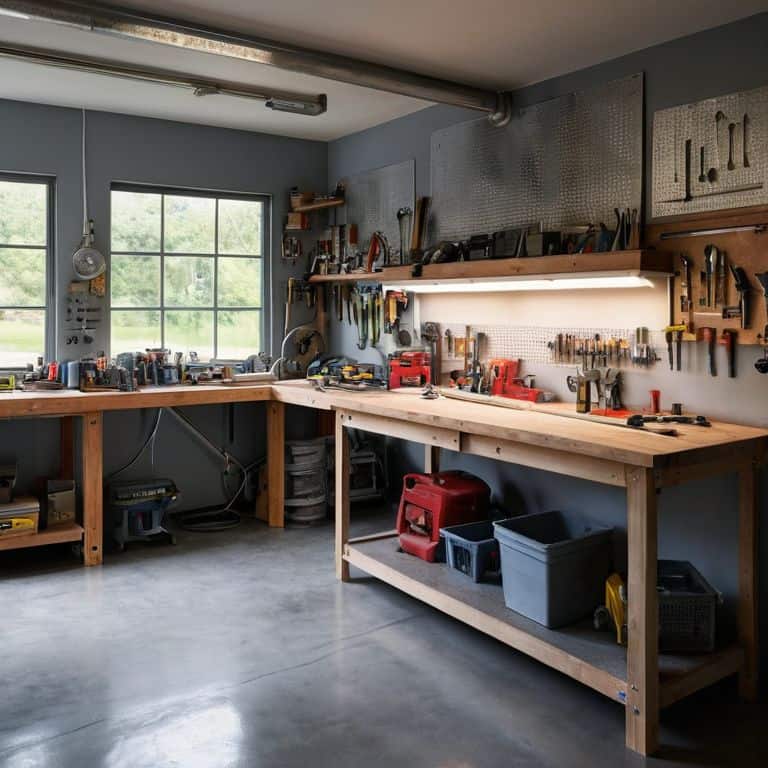
As I delve into the world of workbench lighting, I’m reminded of the importance of task lighting for garage workshops. It’s not just about illuminating the space, but also about creating a functional and safe environment. When choosing lighting options, consider the type of tasks you’ll be performing on your workbench. For instance, if you’ll be working with small parts or intricate details, adjustable arm lamp benefits come into play, allowing you to direct the light exactly where you need it.
In my own workshop, I’ve experimented with various lighting setups, including led strip lighting for workbenches. This has been a game-changer, providing a flexible and energy-efficient solution. I’ve also explored energy efficient workshop lighting options, which not only reduce my carbon footprint but also help keep my workspace cool and comfortable. By combining these elements, I’ve created a well-lit and inviting space that inspires creativity and productivity.
When it comes to workbench lighting safety tips, it’s essential to consider the placement and protection of your lighting fixtures. I’ve learned to keep my lights away from flammable materials and to use under cabinet lighting options to minimize clutter and reduce the risk of accidents. By taking these precautions and choosing the right lighting for your needs, you can create a safe and functional workspace that sparks joy and creativity.
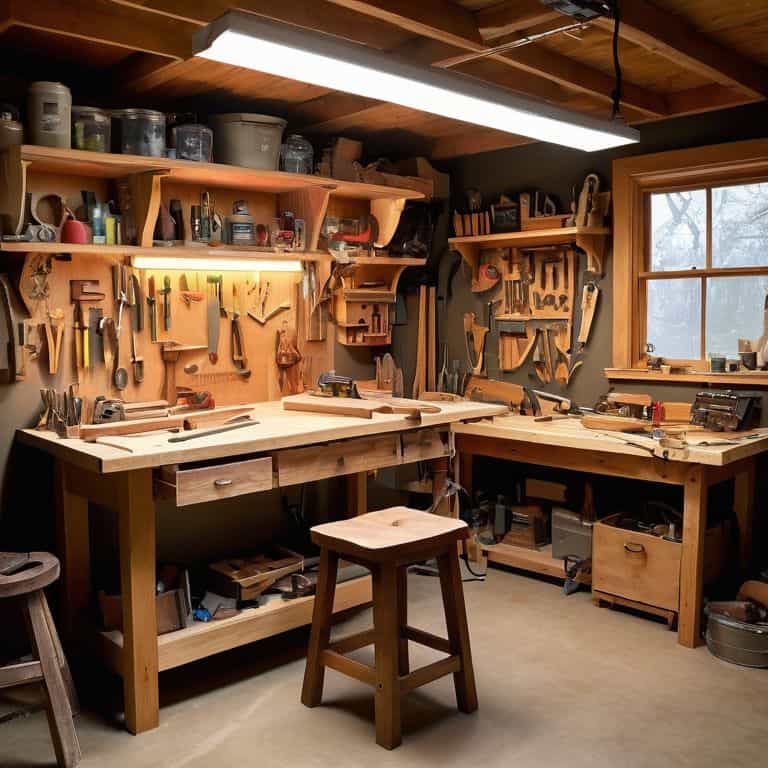
Illuminating Whimsy With Led Strip Lighting
I’m obsessed with LED strip lighting – it’s like adding a dash of magic to my workbench! Not only is it energy-efficient, but it’s also ridiculously easy to install. I love tucking strips under my shelves or wrapping them around the edges of my upcycled furniture pieces. The result is a whimsical glow that highlights my quirky creations and makes my workshop feel like an art studio. Plus, with color-changing options, I can match the ambiance to my project’s theme – or my socks, for that matter!
Task Lighting Tips for Garage Workshops
When it comes to task lighting in my garage workshop, I’m all about spotlighting the fun in functionality. I love using adjustable arm lamps to shine a light on my latest upcycling project – whether it’s refinishing a vintage dresser or repurposing an old door into a one-of-a-kind coffee table. These lamps are a game-changer, allowing me to direct the light exactly where I need it, and their quirky industrial design adds a touch of whimsy to my workspace.
By combining these task lights with my LED strip lighting, I can create a truly immersive and efficient work environment. Plus, it’s a great excuse to wear my favorite Van Gogh socks – the swirling colors always seem to match the creative chaos of my workshop! With the right task lighting, even the most mundane projects become an adventure, and I feel like I’m uncovering hidden treasures in every nook and cranny of my garage sanctuary.
Shining Bright: 5 Essential Tips for Your Workbench Lighting
- Choose lighting that complements your workshop’s style, whether it’s rustic, modern, or a quirky blend like mine
- Layer your lighting with a mix of overhead, task, and ambient options to create a harmonious and functional space
- Consider the color temperature of your lighting – warm whites for a cozy feel, cool whites for a more energizing atmosphere
- Don’t underestimate the power of directional lighting – it can make all the difference in highlighting your work area
- Experiment with smart lighting solutions that can adjust brightness and color based on the time of day or your specific task at hand
Shining Bright: 3 Key Takeaways for Your Dream Workbench
Embracing eclectic lighting solutions, like mixing vintage fixtures with modern LED strips, can add a unique charm to your workshop, making it a reflection of your personality and style
Incorporating task lighting, such as under-cabinet lights or adjustable arm lamps, can significantly enhance your work efficiency by providing focused illumination exactly where you need it
By experimenting with different lighting layouts and colors, you can transform your workbench into a creative sanctuary that inspires imagination and productivity, making every DIY project a joyful, whimsical adventure
Shining Insights
The right workbench lighting is not just about illumination, it’s about inspiration – it’s the spark that turns a discarded piece into a masterpiece, and a fleeting thought into a timeless creation.
James O'Neill
Shining a Light on Creativity
As we wrap up our journey through the best workbench lighting ideas, it’s clear that the right lighting can make all the difference in your creative sanctuary. From LED strip lighting that adds a touch of whimsy to your workspace, to task lighting tips that help you focus on the details, every element plays a crucial role in bringing your projects to life. Whether you’re a seasoned DIY enthusiast or just starting to explore the world of upcycling and restoration, the key is to find a balance between form and function that inspires you to create something truly unique.
So, as you embark on your own lighting adventure, remember that the true magic happens when you combine sustainable living with a dash of creativity. Don’t be afraid to experiment, to try new things, and to see the potential in every discarded item. With a little bit of imagination and the right lighting, even the most mundane workspace can be transformed into a treasure trove of inspiration, where history meets innovation in the most playful of ways. Happy creating!
Frequently Asked Questions
What are the most energy-efficient options for workbench lighting?
For an eco-friendly glow, I swear by LED bulbs and energy-harvesting lamps – they’re a match made in heaven! My favorite trick is repurposing vintage lanterns with LED inserts, adding a touch of whimsy while keeping the planet happy. Plus, smart LED strips with sensors can automatically adjust brightness, making them a super savvy choice.
How can I determine the ideal color temperature for my workbench lighting?
For me, choosing the ideal color temperature is all about the task at hand. I like to think of it as setting the mood for my project. Warm white lighting, around 2700K-3000K, is perfect for cozying up with a vintage restoration, while cool white, 3500K-5000K, provides a crisp glow for intricate details – it’s all about finding the right ambiance to spark your creativity!
Are there any specific safety considerations I should keep in mind when installing lighting in my garage workshop?
Safety first, my friend! When installing lighting in your garage workshop, remember to keep cords and wires out of reach from power tools and heat sources. Also, ensure all fixtures are securely fastened to prevent accidents, and consider using GFCI outlets for extra protection. Now, let’s get lit – safely, of course!