I still remember the first time I tried to paint a room without proper prep – it was a disaster! I had no idea how to properly prep a room for painting, and let me tell you, it showed. The paint splattered everywhere, and I ended up with a mess that took hours to clean. But, as I’ve learned since then, it’s all about setting the stage for a beautiful transformation. The key to a successful paint job lies in the prep work, and I’m excited to share my knowledge with you on how to properly prep a room for painting.
In this article, I promise to give you the lowdown on the best practices for prepping your space. You’ll learn how to protect your floors and furniture, fix any holes or cracks, and create a smooth canvas for your new paint job. I’ll share my personal tips and tricks, gained from years of experience, to make the process as easy and stress-free as possible. By the end of this guide, you’ll be equipped with the knowledge to tackle any painting project with confidence, and transform your space into a beautiful work of art.
Table of Contents
Guide Overview: What You'll Need
Total Time: 2 hours 30 minutes
Estimated Cost: $50 – $100
Difficulty Level: Intermediate
Tools Required
- Utility Knife (with extra blades)
- Putty Knife (for filling holes and cracks)
- Sandpaper (various grits)
- Drop Cloths (for protecting floors and furniture)
- Masking Tape (for trimming and edges)
- Ladder (sturdy, for reaching high areas)
- Vacuum Cleaner (for cleaning dust and debris)
- Cleaning Solution (for washing walls)
Supplies & Materials
- Drywall Patch Kit
- Spackling Compound
- Primer (optional, depending on wall condition)
- Paint (choose your desired color and finish)
- Paintbrushes (various sizes)
- Roller Extension Pole (for painting ceilings and large areas)
- Roller Covers (microfiber or wool, for smooth finish)
- Tray Liners (for easy cleanup)
Step-by-Step Instructions
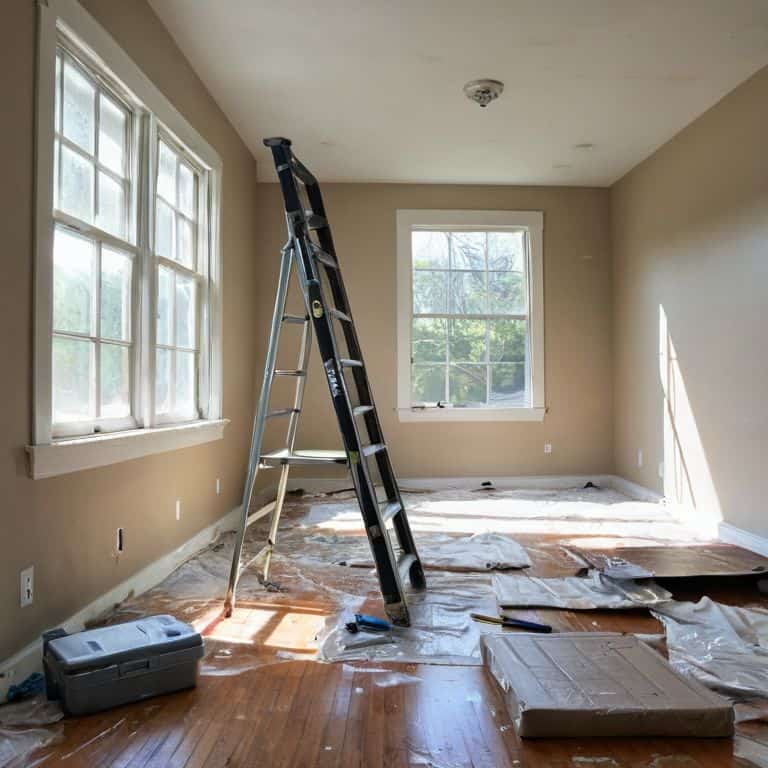
- 1. First, let’s get this room ready for a fresh coat of paint – we need to clear the space of any furniture, curtains, and rugs to prevent them from getting damaged or stained. I like to think of this step as setting up a blank canvas, where the only limit is our imagination. As I always say, a good pair of socks can inspire creativity, and today I’m wearing my favorite Van Gogh socks to get those artistic juices flowing.
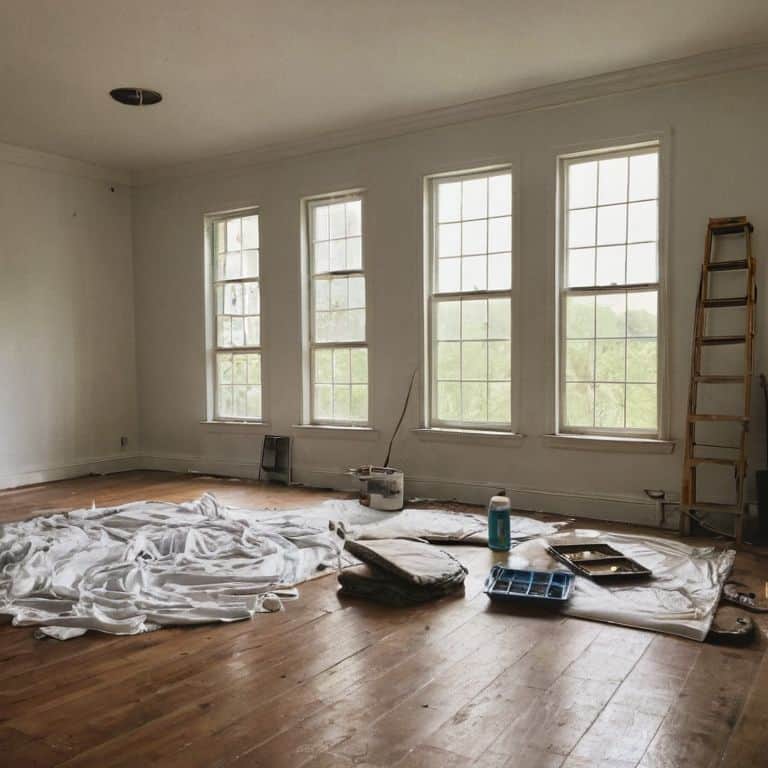
- 2. Next, we’ll need to protect the floors and any remaining furniture with drop cloths or plastic sheets. This is a crucial step, as we don’t want any stray paint splatters ruining the vibe of our soon-to-be masterpiece. I remember a time when I forgot to cover the floors, and let’s just say it was a colorful mess to clean up.
- 3. Now that our floors are protected, it’s time to remove any outlet covers and light switch plates to prevent paint from getting behind them. This is a simple yet often overlooked step that can make a big difference in the end result. As someone who loves upcycling, I always appreciate the little details that can elevate a room’s character.
- 4. With our outlet covers removed, we can move on to washing the walls to remove any dirt, grime, or grease that might be lurking on the surface. This step is essential for ensuring a smooth, even paint job. I like to use a mixture of soap and water, and a soft brush to gently scrub away any stubborn stains.
- 5. After the walls are clean, it’s time to fix any holes or cracks in the plaster or drywall. This is where my interior design background comes in handy, as I know how important it is to create a seamless surface for painting. I use a joint compound to fill in any gaps, and then sand it down to a smooth finish.
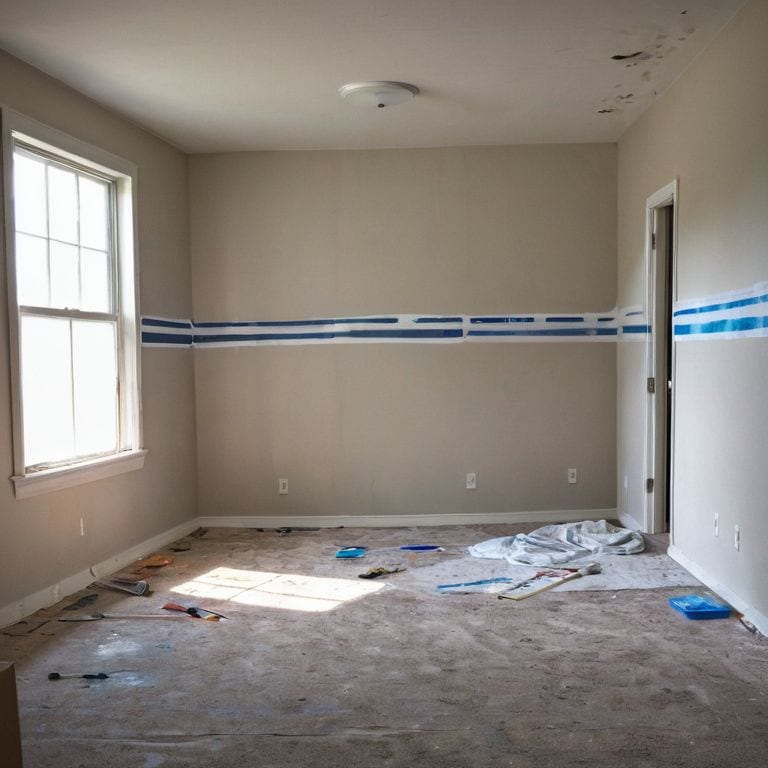
- 6. With our walls repaired, we can move on to taping off the trim and any areas we don’t want to paint, such as baseboards, moldings, and windows. This is a crucial step for achieving those crisp, clean lines that can make a room look truly polished. I use a high-quality painter’s tape to ensure a seal that’s both strong and easy to remove.
- 7. Finally, it’s time to prime the walls (if necessary) and get ready for the fun part – painting! This step is all about preparing the surface for the perfect paint job. I always say that a good primer is like a good pair of socks – it sets the foundation for a flawless finish. Now, let’s get painting and bring our vision to life!
Prep Room for Painting

As I delve into the world of painting, I always find myself excited about the transformation that’s about to unfold. When painting over dark colors, it’s essential to consider the extra coats of paint you might need to achieve the desired hue. I recall a project where I had to apply three coats to get the perfect shade, and let me tell you, it was worth the extra effort. On a similar note, choosing the right paint roller can make a significant difference in the finish. I prefer using a high-quality roller with a thick nap to ensure a smooth, even application.
Before you start painting, don’t forget to remove outlet covers to prevent any pesky paint splatters from getting stuck in those tiny crevices. It’s a small step, but trust me, it saves a lot of trouble in the long run. Additionally, sanding drywall for a smooth finish is crucial, especially if you’re dealing with a previously textured surface. I like to use a fine-grit sandpaper to get the job done, and it’s amazing how it can elevate the entire look of the room.
Now, let’s talk about protecting flooring from paint spills. I’ve learned the hard way that a single drop of paint can ruin an entire floor. To avoid this, I always lay down a thick layer of drop cloths or plastic sheets, making sure to secure them with tape. It’s also important to prepare trim for painting by lightly sanding and wiping it down with a damp cloth. This ensures a strong bond between the paint and the surface, resulting in a beautiful, long-lasting finish.
Removing Outlet Covers With Flair
Now that we’ve got our drywall sanded to perfection, it’s time to tackle those outlet covers. I like to think of this step as the secret ingredient in our recipe for a flawless paint job. You see, removing these covers not only prevents paint from getting behind them, but it also gives us a chance to add a touch of personality to our space. I mean, who says outlet covers have to be boring? As I slip on my vibrant Van Gogh socks, I’m reminded that even the smallest details can make a big impact. So, let’s get creative and remove those covers with flair! Simply use a screwdriver to gently pry them off, and set them aside for safekeeping.
Sanding Drywall for Smooth Finish
Now that we’ve covered the basics of prepping our room for painting, let’s dive into one of my favorite details – sanding drywall for a silky smooth finish. I mean, who doesn’t love the feeling of transforming a rough, porous surface into a canvas ready for our artistic expression? Grab your trusty sanding block and some fine-grit sandpaper, and let’s get to work. As I always say, a good sanding session is like a meditation for me – it’s all about finding that perfect balance between removing imperfections and preserving the integrity of the surface.
With gentle, circular motions, work your way across the drywall, feathering out any rough spots or joints. Don’t forget to wear a dust mask and protective eyewear – safety first, my friends! As you sand, imagine the possibilities unfolding before you – the vibrant colors, the textures, the unique character you’re about to infuse into this space. My colorful socks, featuring the whimsical designs of Matisse, seem to be dancing with excitement as I sand away, ready to unveil the masterpiece beneath.
Rolling Up Your Sleeves: 5 Whimsical Tips to Prep Your Room for Painting
- Let the games begin: Clear the room of furniture, or if that’s not possible, push everything to the center and cover it with drop cloths – I like to think of it as setting the stage for a masterpiece!
- Don’t let the little things slip away: Remove outlet covers and switch plates to prevent paint from getting behind them, it’s all about the details, my friend!
- Smooth operator: Sanding your drywall is key to a smooth finish, think of it as exfoliating your walls – they’ll thank you, I promise!
- A tape above the rest: Use painter’s tape to mask off trim, baseboards, and any areas you don’t want to paint, it’s like adding a decorative border to your soon-to-be work of art!
- Lighten up: Remove light fixtures and ceiling fan globes to prevent paint from getting on them, it’s like taking a deep breath before the creative chaos begins – and trust me, it’s worth it!
Key Takeaways to Unlock a Masterpiece
Always remember to cover your floors and furniture with drop cloths before painting, because trust me, you don’t want any unexpected splatters ruining your vibe!
Sanding your drywall to a smooth finish is an absolute must – it’s like preparing a perfect canvas for your artistic expression, and removing those outlet covers with a dash of flair can make all the difference in achieving a seamless look
By embracing these simple yet effective steps, you’ll not only be prepping your room for a fresh coat of paint, but you’ll also be embracing a more sustainable and creative approach to home renovation, one that celebrates the beauty of transformation and the joy of making something old, wonderfully new again
The Art of Preparation
As we unleash the brushes and let the colors dance, remember that the true masterpiece lies not in the paint, but in the preparation – for it’s in the sanding, the scraping, and the sweeping away of the old that we make room for the vibrant stories of our walls to unfold.
James O'Neill
Bringing it all Together: A Masterpiece Unveiled
As we’ve journeyed through the steps to properly prep a room for painting, from sanding drywall for a smooth finish to removing outlet covers with flair, it’s clear that the devil is in the details. Each task, no matter how small, contributes to the overall masterpiece that will soon adorn your walls. Remember, preparation is key, and taking the time to ensure every surface is ready for paint will make all the difference in the final result. Whether you’re a seasoned DIY enthusiast or a beginner, the process of transforming a space is not just about applying paint, but about the journey of creation itself.
So, as you stand back to admire your handiwork, remember that the true beauty of DIY lies not just in the end result, but in the process of making something with your own hands. It’s about embracing the imperfections and turning them into unique characteristics that tell a story. With every brushstroke, you’re not just painting walls, you’re crafting a narrative that reflects your personality and style. Keep exploring, keep creating, and most importantly, keep inspiring others to see the potential in every forgotten corner, waiting to be transformed into a one-of-a-kind treasure.
Frequently Asked Questions
What's the best way to fill in holes or cracks in the drywall before painting?
My friend, filling holes or cracks in drywall is an art form! I swear by using a trusty spackling compound, applying it with a putty knife, and sanding it down to a silky smooth finish – it’s like giving your walls a brand new lease on life!
How do I choose the right sandpaper grit for smoothing out drywall surfaces?
Ah, my friend, choosing the right sandpaper grit is like selecting the perfect brushstroke – it’s all about feel! For drywall, I swear by starting with a coarse 120-grit to knock down those imperfections, then moving to a finer 220-grit for a silky smooth finish. Trust me, your walls will thank you!
Are there any special considerations for removing outlet covers without damaging the surrounding paint or wallpaper?
Ah, great question, friend! When removing outlet covers, I like to use a trusty screwdriver and a dash of patience. Gently pry them off, and if you’re dealing with delicate wallpaper, consider using a putty knife to protect the surrounding area – it’s all about finesse, my friend!