I still remember the first time I tried to install a ceiling fan in my grandfather’s old workshop. I was a novice DIY enthusiast, and the experience was nothing short of overwhelming. The instructions seemed to be written in a language I couldn’t understand, and the end result was a wobbly fan that looked like it was about to fall off the ceiling. But that was years ago, and since then, I’ve learned that how to install a ceiling fan is not rocket science – it just requires a bit of patience, the right tools, and a willingness to get your hands dirty.
As you read through this article, I promise to guide you through the process with honest, no-hype advice that will make you wonder why you ever thought installing a ceiling fan was a daunting task. We’ll cover everything from preparing the area to making the final connections, and I’ll share some practical tips that I’ve learned from my own experiences. By the end of this journey, you’ll be equipped with the knowledge to install a ceiling fan that not only looks great but also adds a touch of rustic charm to your room. So, let’s get started and spin our way to sustainability, one ceiling fan at a time!
Table of Contents
- Guide Overview: What You'll Need
- Step-by-Step Instructions
- Spin Your Way to Sustainability
- Fan-tastic Finishing Touches: 5 Tips to Spin Your Ceiling Fan into Action
- Whimsy in Wiring: 3 Key Takeaways for a Sustainable Spin
- A Spin of Wisdom
- Spinning Towards a Sustainable Future
- Frequently Asked Questions
Guide Overview: What You'll Need
Total Time: 2 hours 30 minutes
Estimated Cost: $50 – $100
Difficulty Level: Intermediate
Tools Required
- Drill (with screwdriver and drill bits)
- Voltage Tester (for safety)
- Level (to ensure proper alignment)
- Pliers (for gripping and twisting)
- Screwdriver (flathead and Phillips)
- Wrench (for removing old fan or light fixture)
- Ladder (sturdy, 6 feet or taller)
- Wire Strippers (for stripping electrical wires)
Supplies & Materials
- Ceiling Fan (with mounting hardware)
- 2-in x 4-in lumber (for support, if necessary)
- Electrical Wire (14-gauge or 12-gauge, depending on the fan)
- Wire Nuts (for connecting wires)
- Ceiling Fan Mounting Bracket (if not included with the fan)
- Screws (1 inch or 1.5 inches, for mounting the fan)
- Drywall Anchors (if you have hollow ceilings)
Step-by-Step Instructions
- 1. First, let’s get started by turning off the power to the circuit at the main electrical panel – safety always comes first, my friends! Make sure to flip the switch or remove the fuse to ensure there’s no electricity flowing to the area where you’ll be working. This is a crucial step, as we don’t want any accidents or injuries to occur during our DIY adventure.
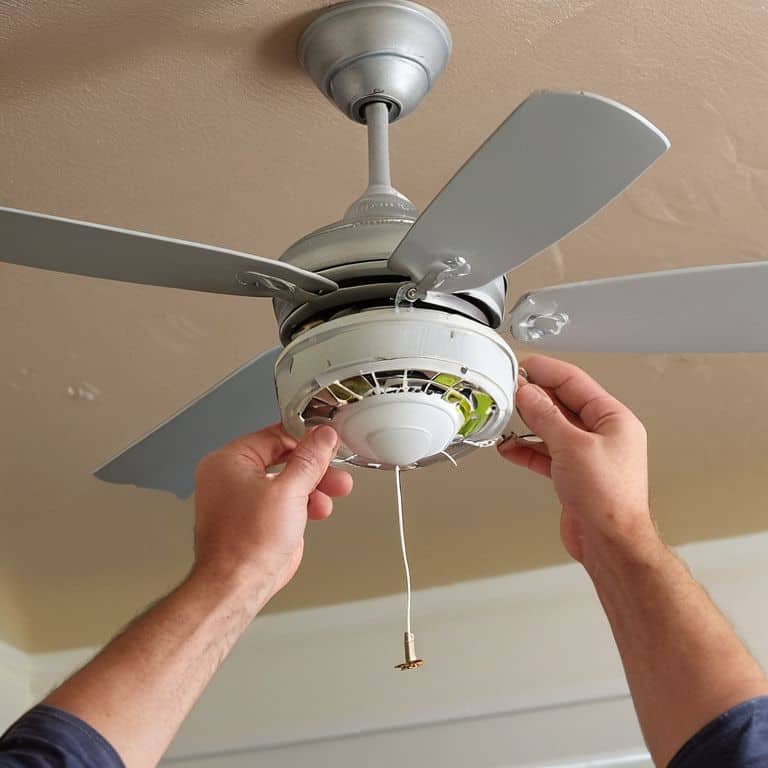
- 2. Next, remove the old light fixture or ceiling fan, if there is one – this is where the magic begins, and we start to envision our new, eco-friendly ceiling fan in place. Take note of the wiring and how it’s connected, as you’ll need to replicate this setup with your new fan. Don’t worry if it looks a bit confusing; we’ll break it down into manageable parts as we move forward.
- 3. Now, let’s prepare the ceiling for our new fan by ensuring it’s sturdy enough to support the weight – a reliable mounting system is essential for a secure and stable installation. Check if you need any additional hardware, such as a fan-rated outlet box or a mounting bracket, to provide the necessary support. This step might require some research or consultation with a professional, but trust me, it’s worth the extra effort.
- 4. With our ceiling ready, it’s time to unpack and prepare our new ceiling fan – the exciting part where we get to see our project start to take shape. Follow the manufacturer’s instructions to assemble the fan, if required, and make sure all the necessary parts are included. Take a moment to appreciate the sleek design and energy-efficient features of your new fan; you’re one step closer to reducing your carbon footprint.
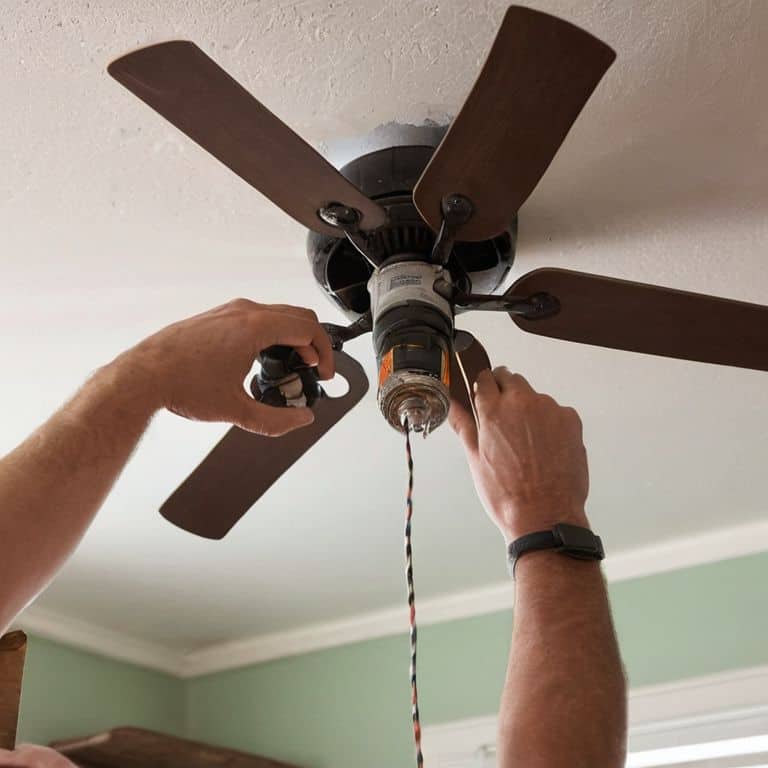
- 5. Next, we’ll connect the wiring – a step that requires attention to detail and a bit of patience. Start by identifying the black (hot), white (neutral), and copper (ground) wires, and then match them to the corresponding wires on your new fan. Use wire nuts or connectors to secure the connections, and don’t forget to double-check your work to ensure everything is safe and secure.
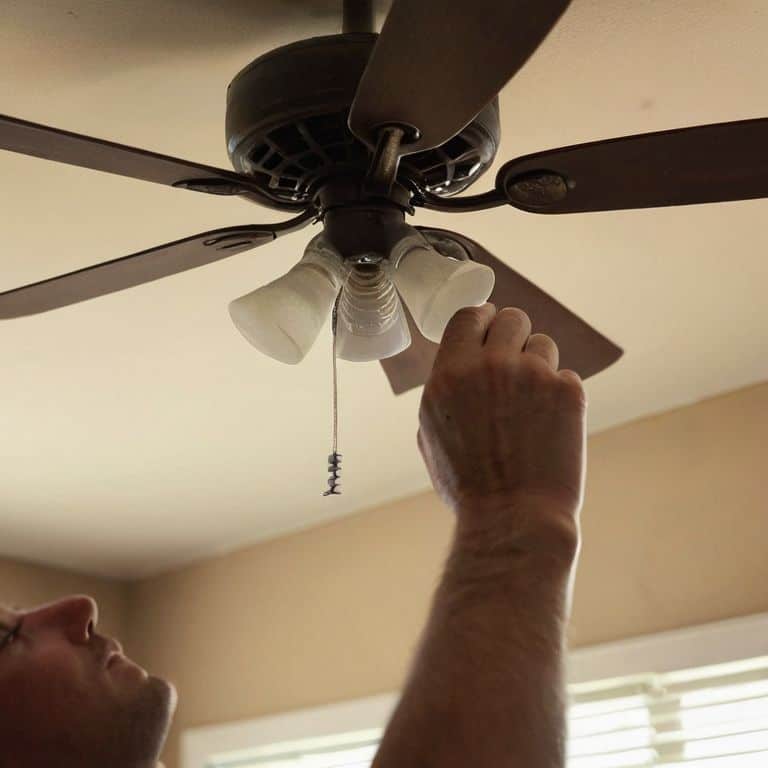
- 6. Now it’s time to hang our ceiling fan – the moment of truth, where we get to see our hard work pay off. Carefully lift the fan and attach it to the mounting bracket, making sure it’s level and securely fastened. Take a step back to admire your handiwork and visualize the finished product – you’re almost there, and the sense of accomplishment is just around the corner.
- 7. Finally, turn the power back on at the main electrical panel and test your new ceiling fan – the grand finale of our DIY project. Start with a low speed and gradually increase it to ensure everything is working smoothly and quietly. Take a moment to appreciate the rustic charm and contemporary flair of your new ceiling fan, and bask in the pride of knowing you’ve created something truly unique and eco-friendly.
Spin Your Way to Sustainability
As I always say, the devil is in the details, and when it comes to ceiling fan wiring diagrams, it’s essential to get it right to avoid any electrical mishaps. I recall a project where I had to hang a ceiling fan from a sloped ceiling, and let me tell you, it was a fun challenge. The key is to understand the types of ceiling fan mounts available and choose the one that suits your ceiling type.
When you’re working with electrical components, it’s crucial to consider the ceiling fan electrical requirements to ensure everything runs smoothly and safely. I’ve found that taking the time to review the manufacturer’s instructions and double-checking the wiring can save you a lot of trouble in the long run. And, if you’re like me, you’ll want to add a personal touch to your DIY project, so don’t be afraid to get creative with the ceiling fan installation process.
Now, I know some of you might be thinking, “But what if my ceiling fan is wobbly?” Fear not, my friends, for I’ve got some tips up my sleeve to help you balance a wobbly ceiling fan. It’s all about finding the right balance and making adjustments as needed. With a little patience and practice, you’ll be a pro at DIY ceiling fan installation in no time, and you’ll be enjoying the benefits of your new, eco-friendly ceiling fan.
Demystifying Ceiling Fan Wiring Diagrams
When it comes to ceiling fan wiring diagrams, I know it can seem like a puzzle wrapped in a mystery, inside a DIY enigma. But trust me, friend, it’s actually quite straightforward once you break it down. Think of it as upcycling an old dresser – you need to understand the existing structure before you can give it a fresh new spin. In the case of ceiling fan wiring, it’s all about identifying the black (hot), white (neutral), and copper (ground) wires, and matching them to their corresponding connections on the fan and mounting bracket.
As I always say, a little creativity and patience can work wonders. So, take a deep breath, put on your favorite pair of colorful socks (I’m rocking my Van Gogh-inspired ones today), and dive into that wiring diagram with confidence. Remember, the goal is to create a beautiful, functional piece that not only spins your way to sustainability but also adds a touch of personality to your space.
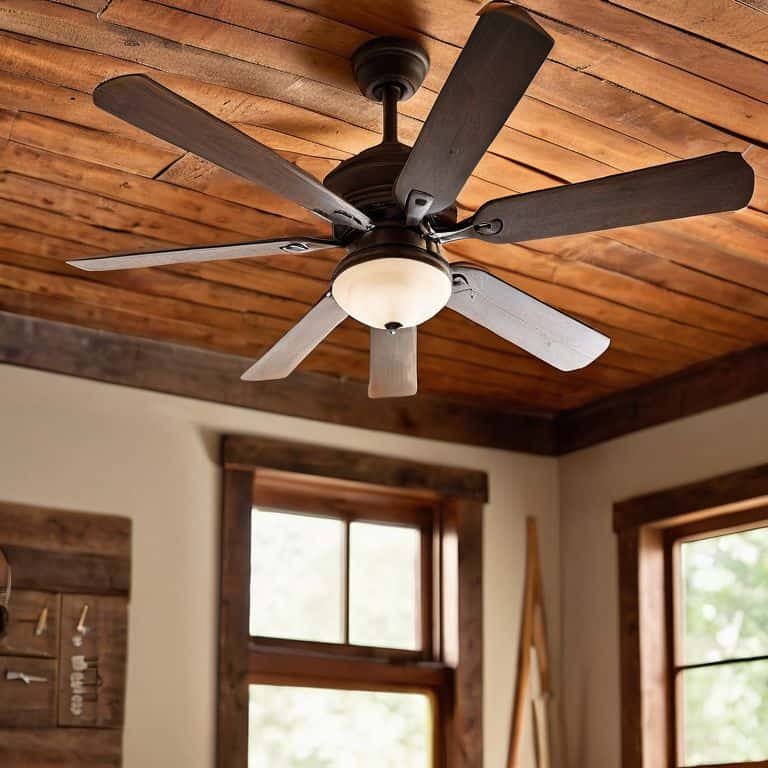
Mastering Types of Ceiling Fan Mounts
Now that we’ve demystified those wiring diagrams, let’s dive into the wonderful world of ceiling fan mounts. I just love how a unique mount can add a touch of personality to a room – it’s like the icing on the cake, or should I say, the swirl on your favorite vintage-inspired sock (I’m currently rocking a pair featuring Van Gogh’s Starry Night, perfectly matching the whimsy of my latest upcycling project). From sleek and modern flush mounts to rustic pendant-style mounts, the right choice can make or break the ambiance of your space. With my trusty collection of colorful socks as inspiration, I’ve experimented with various mounts, and I’m excited to share my findings with you.
Fan-tastic Finishing Touches: 5 Tips to Spin Your Ceiling Fan into Action
- Measure Twice, Drill Once: Ensure you’ve got the right spot and a sturdy anchor to hold your ceiling fan in place, avoiding any pesky wobbles or future fixes
- Wire Wizardry: Don’t be intimidated by the wiring diagram – take your time, and remember, it’s all about matching the colors and double-checking those connections
- Mounting Mastery: Choose the right type of mount for your ceiling fan, whether it’s a standard, sloped, or flush mount, to guarantee a secure and level installation
- Balancing Act: Make sure your ceiling fan blades are evenly balanced to prevent vibrations and noise, giving you a smooth, whisper-quiet operation
- Safety First: Always turn off the power to the circuit at the main electrical panel before starting work, and consider having a trusty sidekick hold the ladder for you – better safe than sorry, my friend!
Whimsy in Wiring: 3 Key Takeaways for a Sustainable Spin
Embracing the art of DIY ceiling fan installation not only reduces waste but also allows for the incorporation of unique, upcycled elements that reflect your personal style
Understanding the nuances of ceiling fan wiring diagrams and mount types is crucial for a successful, safe, and energy-efficient installation that adds a touch of whimsy to any room
By choosing the right ceiling fan and installing it with flair, you’re not only enhancing the aesthetic of your space but also contributing to a more sustainable future, one spinning blade at a time
A Spin of Wisdom
As you hang your ceiling fan, remember that the true beauty of DIY lies not in the destination, but in the whimsical dance between wires, wood, and wonder – where every spin is a testament to the magic that happens when we breathe new life into the ordinary.
James O'Neill
Spinning Towards a Sustainable Future
As we conclude our whimsical journey of installing a ceiling fan, let’s take a moment to reflect on the key points we’ve covered. From demystifying ceiling fan wiring diagrams to mastering the various types of ceiling fan mounts, we’ve empowered ourselves with the knowledge to tackle this DIY project with confidence. Remember, the process is just as important as the outcome, and by choosing to install a ceiling fan, we’re not only reducing our energy consumption but also adding a touch of rustic charm to our homes.
So, as you stand back to admire your handiwork, feeling the gentle breeze from your newly installed ceiling fan, remember that sustainable living is within reach, one DIY project at a time. Don’t be afraid to get creative, to think outside the box, and to see the potential in every discarded item. With a little imagination and a lot of heart, we can transform our spaces into unique reflections of ourselves, and in doing so, create a more beautifully imperfect world, one ceiling fan at a time.
Frequently Asked Questions
What are the most common mistakes to avoid when installing a ceiling fan to ensure safe and efficient operation?
When hanging a ceiling fan, beware of common pitfalls like incorrect wiring, loose mounting, and insufficient clearance. Double-check those wiring diagrams and ensure a snug, level fit to avoid any wobbly woes or safety hazards – trust me, your DIY delight will spin smoothly and safely with a little extra attention to detail!
How do I determine the correct ceiling fan size and type for my room to maximize energy efficiency and aesthetic appeal?
To find the perfect fan, measure your room’s square footage and choose a fan with a compatible CFM rating. Consider the ceiling height, too – a longer downrod might be needed. For a rustic touch, I adore vintage-inspired fans with wooden blades, like the ones I upcycled from an old barn door, paired with my Van Gogh socks, of course!
Can I install a ceiling fan in a room with a sloped or vaulted ceiling, and if so, what special considerations or hardware do I need to take into account?
Absolutely, my friend! For sloped or vaulted ceilings, you’ll need to use a specialized ceiling fan mount, like a sloped ceiling adapter or a vaulted ceiling kit, to ensure secure and stable installation – trust me, it’s a game-changer for those uniquely angled spaces!