I still remember the first time I attempted to how to make a butt joint in woodworking – it was a disaster. I had envisioned a beautiful, rustic coffee table, but what I got was a wobbly mess that looked like it belonged in a thrift store. The problem was, I had fallen prey to the common myth that making a butt joint is a complicated, tedious process that only experienced woodworkers can master. But, as I soon discovered, the truth is that with a few simple steps and the right mindset, anyone can create a sturdy, gorgeous piece of furniture using this timeless technique.
As you embark on your own journey to master the art of how to make a butt joint in woodworking, I want to assure you that this article will provide you with honest, no-hype advice on how to achieve professional-looking results. You’ll learn how to choose the right materials, prepare your wood, and assemble the joint with ease. My goal is to empower you with the knowledge and confidence to tackle any woodworking project that comes your way, and to have fun while doing it. So, let’s get started and uncover the hidden charm of yesterday’s treasures, one joint at a time.
Table of Contents
Guide Overview: What You'll Need

Total Time: 30 minutes to 1 hour
Estimated Cost: $10 – $30
Difficulty Level: Easy
Tools Required
- Table Saw (for making straight cuts)
- Miter Saw (optional, for precise angled cuts)
- Sandpaper (for smoothing out the joint)
- Clamps (for holding the pieces together)
- Tape Measure (for accurate measurements)
- Square (for ensuring accurate corners)
- Marking Gauge (for consistent markings)
Supplies & Materials
- 2-in x 4-in lumber (or similar dimensional lumber)
- Wood Glue (for bonding the joint)
- 2 1/4 inches wood screws (for securing the joint)
- Wood filler (optional, for filling gaps)
Step-by-Step Instructions
- 1. To start creating your butt joint masterpiece, gather your tools and materials, including a table saw or a circular saw for making precise cuts, a drill press for any necessary holes, and of course, your beautiful pieces of wood. I always like to wear my _Van Gogh_ socks for inspiration when working with wood – there’s something about the swirling patterns that gets my creative juices flowing.
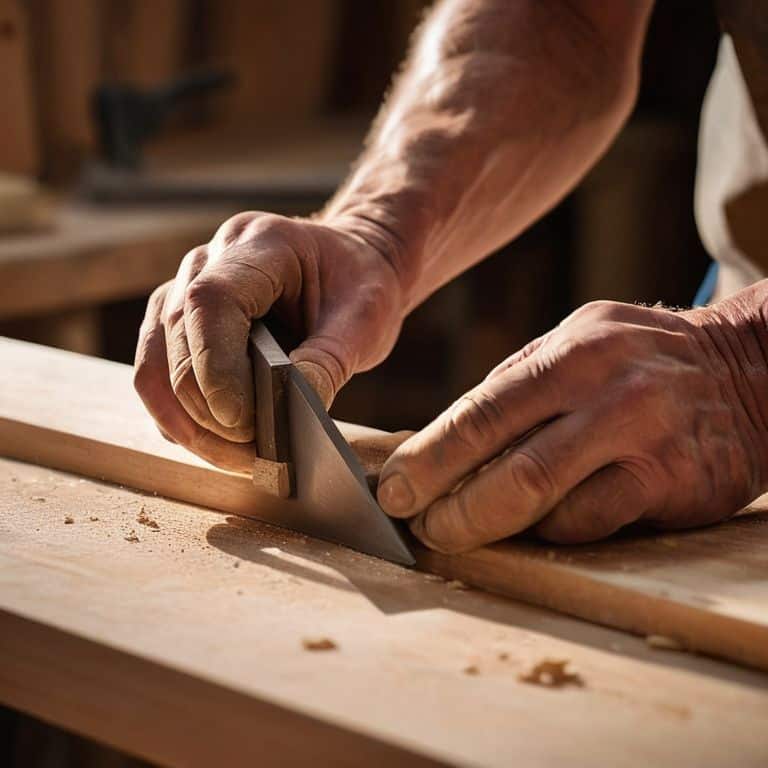
- 2. Next, prepare your wood by cutting it into the required lengths for your project. This is where patience and precision come into play, as you’ll want to ensure that your cuts are accurate and smooth. Remember, the key to a successful butt joint is in the precision of your cuts, so take your time and double-check your measurements.
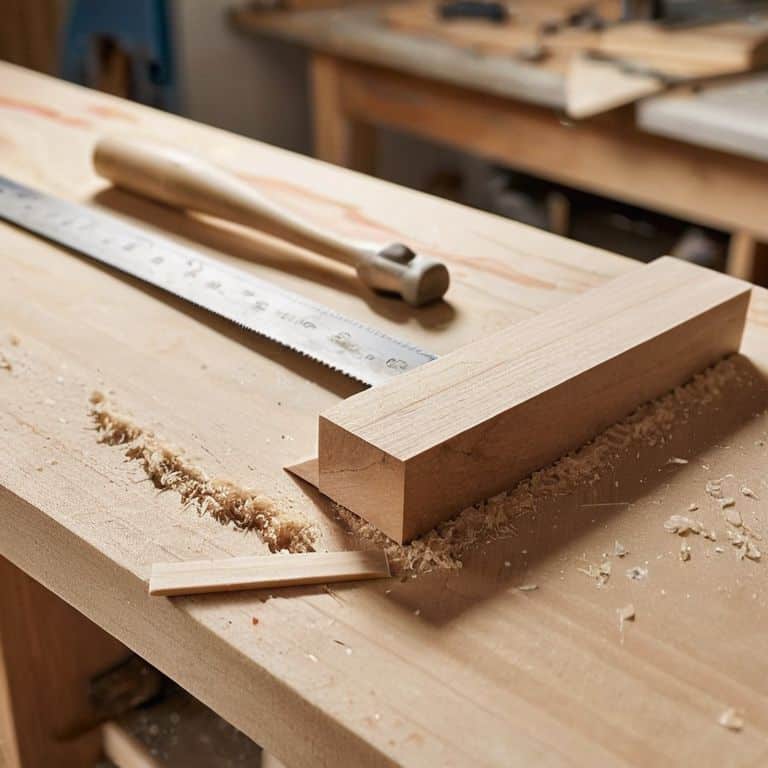
- 3. Now, it’s time to create the joint itself. This involves cutting a straight edge on each piece of wood that will form the joint. I find that using a table saw is best for this, as it allows for very precise cuts. Make sure your saw is set to the correct angle and that you’re using a sharp blade to avoid any tear-out.
- 4. With your edges cut, it’s time to assemble the joint. This is the part where you get to see your project start to come together. Apply a small amount of wood glue to the cut edges and clamp them together. Make sure everything is aligned properly and that the joint is tight, but not so tight that it splits the wood.
- 5. While the glue is drying, you can start thinking about adding any decorative touches. This could be anything from a simple lacquer finish to an intricate carving, depending on the style you’re going for. I personally love adding a bit of _rustic charm_ to my pieces, maybe some distressed finishes or metal accents.
- 6. Once the glue is fully dry, you can add any additional support to the joint, such as screws or nails, depending on the type of project you’re making. This step is crucial for ensuring that your joint is strong and durable. Remember, the goal is to create something that will last, so don’t skimp on the support.
- 7. Finally, finish and inspect your work. Apply any final coats of finish, install any hardware, and make sure that your butt joint is strong and functional. This is the moment of truth, where you get to step back and admire your handiwork. I always feel a sense of pride and accomplishment at this stage, knowing that I’ve taken something old and made it new again, all while wearing my favorite _Picasso_ socks for good luck.
Butt Joint Brilliance Found

As I sit in my workshop, surrounded by the eclectic charm of upcycled furniture, I’m reminded that mastering the art of woodworking is all about paying attention to the details. One of the most crucial aspects of creating a beautiful butt joint is ensuring that the wood surfaces are perfectly aligned. This is where using clamps for woodworking becomes essential, as they help maintain pressure and prevent the wood from shifting during the gluing process.
When it comes to wood glue application, I’ve found that a little goes a long way. Applying too much glue can lead to a messy joint, while too little may result in a weak bond. It’s all about finding that perfect balance. I also like to keep in mind the different woodworking joint types, as each has its unique characteristics and requirements. For instance, a butt joint is often compared to a dovetail joint, but they serve distinct purposes in woodworking projects.
In my experience, one of the most common common woodworking mistakes is rushing through the process. Woodworking is an art that requires patience and dedication. By taking the time to carefully prepare each piece, apply the right amount of wood glue, and use clamps effectively, you’ll be well on your way to creating stunning pieces that showcase your skill and craftsmanship. Remember, it’s all about embracing the process and having fun with it – and don’t forget to wear your favorite pair of colorful socks to inspire your creativity!
Butt Joint vs Dovetail Charm Revealed
As I delve into the world of woodworking joints, I find myself pondering the unique charms of the butt joint versus the dovetail. While both serve their purposes, the butt joint holds a certain whimsy, a simplicity that belies its strength. I recall a vintage side table I upcycled, where the original butt joints had been carefully crafted to create a beautiful, rustic piece. In contrast, dovetail joints exude a sense of sophistication, their interlocking tails a testament to precision and craftsmanship.
For my current project, a quirky wooden bench, I’ve opted for the humble butt joint, allowing the natural beauty of the wood to take center stage. My colorful socks, featuring Van Gogh’s swirling patterns, seem to match the creative energy of this choice. As I work, I realize that the butt joint’s understated elegance is precisely what makes it so endearing, a reminder that sometimes, less is indeed more.
Unlocking Woodworking Joint Types
As I delve deeper into the world of woodworking joints, I’m reminded of the vast array of creative possibilities. Beyond the humble butt joint, there’s a universe of joint types waiting to be explored. From the elegant dovetail to the sturdy mortise and tenon, each joint boasts its unique character and application. I love experimenting with these different joints, matching them with the perfect vintage piece to upcycle. My colorful socks, featuring the likes of Van Gogh and Monet, seem to inspire me to think outside the box when it comes to combining joints and materials.
With practice, you’ll develop an eye for which joint to use where, and how to blend them in a way that’s both functional and visually striking. Whether you’re restoring a antique dresser or crafting a modern coffee table, mastering various woodworking joints will elevate your DIY game and make your creations truly one-of-a-kind.
Butt Joint Bonanza: 5 Tips to Make Your Woodworking Shine
- Measure Twice, Cut Once: The Golden Rule of Woodworking
- Choose the Right Wood: Selecting Lumber that’s as Unique as You Are
- Clamp it Like You Mean It: The Secret to a Rock-Solid Butt Joint
- Sanding is Your Superpower: Smoothing Out the Edges for a Professional Finish
- Don’t Be Afraid to Get Creative: Adding Your Own Personal Touch to Make Each Piece Truly One-of-a-Kind
Key Takeaways to Unlock Your Woodworking Potential
Butt joints are a fundamental woodworking technique that can add a touch of rustic charm to any piece, whether you’re upcycling a vintage find or creating something entirely new
By mastering the simple steps involved in creating a butt joint, you’ll unlock a world of possibilities for your DIY projects, from transforming old pallets into garden planters to turning antique doors into one-of-a-kind coffee tables
Remember, the beauty of woodworking lies not just in the technical skills, but in the stories and character that each piece tells – so don’t be afraid to experiment, get creative, and make each project a reflection of your own unique style and personality
The Wisdom of Woodworking
A butt joint is not just a connection, it’s a conversation between two pieces of wood, where each tells a story of the past, and together, they create a masterpiece that whispers tales of the future.
James O'Neill
Wrapping Up the Woodworking Journey
As we conclude our adventure in creating the perfect butt joint, let’s take a moment to reflect on the key takeaways. We’ve covered the essential steps to make a butt joint that’s both sturdy and visually appealing, from preparing your wood to assembling the final piece. It’s all about understanding the basics and then letting your creativity shine through the process. Whether you’re a seasoned woodworker or just starting out, the ability to craft a beautiful butt joint is a fundamental skill that will elevate your projects and make them truly unique.
So, as you put down your tools and step back to admire your handiwork, remember that the true magic lies not just in the technique, but in the story you bring to each piece. Every scratch, every joint, every carefully chosen detail is a testament to your craftsmanship and your ability to breathe new life into raw materials. Keep pushing the boundaries of what’s possible, and always remember to have fun along the way – because in the world of woodworking, it’s the journey that makes the destination so rewarding.
Frequently Asked Questions
What are the most common mistakes to avoid when making a butt joint in woodworking?
My friend, let’s talk trouble spots! When making a butt joint, watch out for uneven cuts, inadequate clamping, and insufficient glue application – these common culprits can leave your joint shaky, not sturdy. Trust me, I’ve been there, and my favorite Van Gogh socks have seen their fair share of woodworking woes!
How do I choose the right type of wood for a butt joint project to ensure stability and durability?
Ah, wood selection – the secret sauce to a rock-solid butt joint! I always say, ‘choose woods that are BFFs’ – similar densities and grain patterns ensure a harmonious union. For stability and durability, opt for hardwoods like oak or maple, or softwoods like pine, but make sure to match their personalities, er, properties, to your project’s needs.
Can I use a butt joint for load-bearing applications, such as building a table or shelf?
While a butt joint can be sturdy, I’d advise against using it for heavy load-bearing applications like tables or shelves. It’s better suited for non-weight bearing projects or when combined with other joints for added support. For load-bearing pieces, consider using stronger joints like dovetails or mortise and tenon for that extra oomph!