I still remember the first time I attempted to how to safely replace a light switch in my grandparents’ old Victorian home. I was a novice DIY enthusiast, equipped with nothing but a YouTube tutorial and a dash of confidence. As I began to tinker, I realized that the process was not as straightforward as I thought. The outdated switch was stuck, and I was worried about causing a short circuit. But, with some patience and the right guidance, I successfully replaced it with a beautiful, vintage-inspired switch that added a touch of charm to the room. This experience taught me that safety should always be the top priority when working with electricity.
In this article, I’ll share my honest, no-hype advice on how to safely replace a light switch, covering everything from preparing your workspace to testing the new switch. You’ll learn how to avoid common pitfalls and ensure a smooth, stress-free installation process. By the end of this guide, you’ll be equipped with the knowledge and confidence to tackle this task on your own, giving your space a fresh new look while maintaining the highest standards of safety. So, let’s get started and flip the switch to a more sustainable, stylish you!
Table of Contents
Guide Overview: What You'll Need
Total Time: 1 hour 15 minutes
Estimated Cost: $10 – $30
Difficulty Level: Intermediate
Tools Required
- Voltage Tester for safety
- Screwdriver flathead and Phillips
- Pliers needle-nose for wire handling
- Wire Strippers for 14-gauge or 12-gauge wire
Supplies & Materials
- New Light Switch matching the old switch’s voltage and amperage
- Wire Nuts or push-in connectors
- Electrical Tape for insulation and protection
Step-by-Step Instructions
- 1. First, let’s get started by switching off the power to the light switch at the breaker box – this is the most crucial step for your safety, my friend! Make sure to verify that the light is completely dark before proceeding, as this will ensure you’re working with a safe and de-energized system.
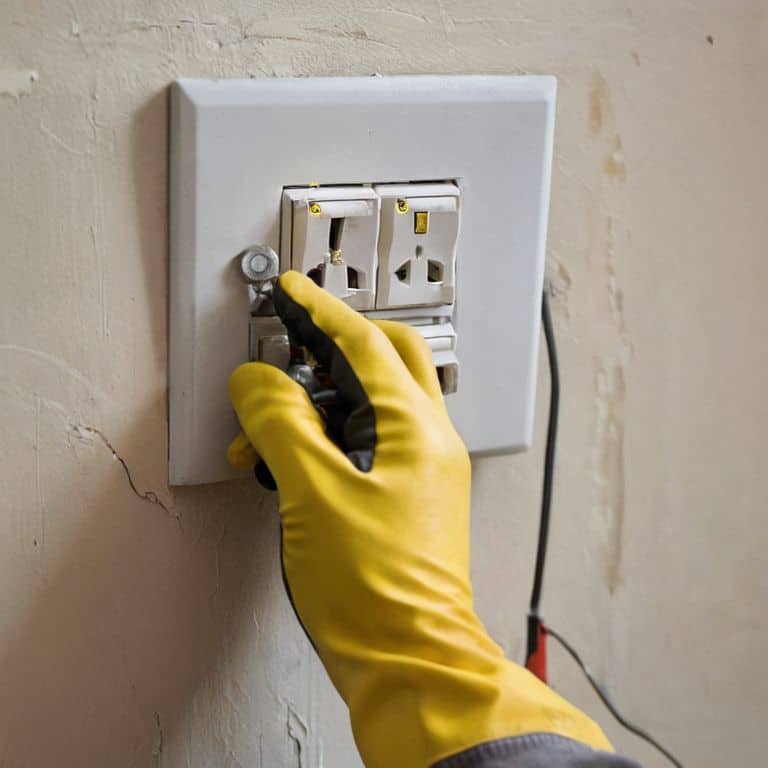
- 2. Next, remove the cover plate from the light switch to expose the inner workings – you’ll typically find a few screws holding it in place, so grab your trusty screwdriver and get to work. As you’re doing this, take a moment to appreciate the craftsmanship that went into creating the original switch, and think about how you can incorporate some of that vintage charm into your new, eco-friendly design.
- 3. Now it’s time to disconnect the wires from the old light switch – this might seem intimidating, but don’t worry, it’s quite straightforward. You’ll usually find two or three wires attached to the switch, so carefully label each wire with a piece of masking tape to keep track of which one goes where. This will save you a lot of headache later on when it’s time to reconnect everything.
- 4. With the wires safely disconnected, you can now remove the old light switch from the wall – be gentle, as you don’t want to damage any of the surrounding drywall or plaster. Take a glance at the unique patina that’s developed on the old switch over time, and think about how you can replicate that look with a distressed finish on your new switch.
- 5. Moving on to the new light switch, take a moment to familiarize yourself with its components – you’ll typically find a few screws, some wire connectors, and the switch itself. Make sure you understand how everything fits together before proceeding, as this will make the rest of the process much smoother.
- 6. Next, connect the wires to the new light switch, making sure to match the labels you created earlier – it’s essential to get this right, as incorrect wiring can lead to all sorts of issues down the line. As you’re working, consider the story behind the materials you’re using – where did they come from, and how can you ensure that your project is as sustainable as possible?
- 7. With the wires securely attached, you can now mount the new light switch to the wall – make sure it’s level and securely fastened with the provided screws. Take a step back to admire your handiwork, and think about how this small change can make a big impact on the overall ambiance of the room.
- 8. Finally, replace the cover plate and turn the power back on at the breaker box – flip the switch and watch as your new, eco-friendly light switch springs to life. Take a moment to appreciate the sense of satisfaction that comes with completing a project like this, and think about how you can apply these same principles to other areas of your home.
Safely Replacing Light Switches
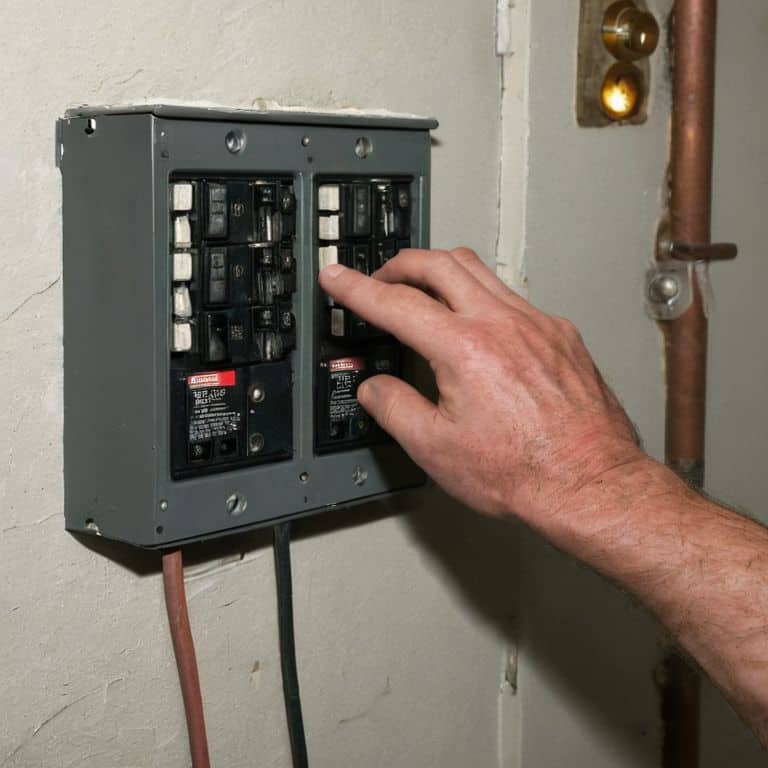
As I always say, safety first, especially when it comes to electrical work. When replacing a light switch, it’s essential to be aware of common light switch wiring mistakes that can lead to safety hazards. One of the most critical errors is not turning off the power to the circuit at the breaker box. This simple oversight can result in electrical shock or even a fire. To avoid such mishaps, double-check that the power is off before starting the replacement process.
When it comes to single pole switch installation, there are a few single pole switch installation tips to keep in mind. Firstly, ensure that the switch is rated for the correct voltage and amperage. Secondly, use the correct wire nuts or connectors to secure the wires to the switch. This will prevent any loose connections that could cause the switch to malfunction. By following these tips, you’ll be able to complete the replacement safely and efficiently.
In case you encounter any issues during the replacement process, it’s crucial to know how to troubleshoot light switch problems. Start by checking the wiring diagram to ensure that all connections are correct. If the problem persists, try checking for any loose wires or faulty connections. By being diligent and methodical, you’ll be able to identify and fix the issue, and your new light switch will be up and running in no time.
Avoiding Common Wiring Mistakes
As I always say, a successful DIY project is all about the details – and when it comes to replacing a light switch, wiring is where the magic happens, or, if not done correctly, where the trouble starts. I recall a project where I was upcycling an old dresser into a quirky bathroom vanity, and I had to get creative with the wiring to make it work. Thankfully, my trusty pair of Van Gogh socks brought me good luck, and it turned out to be a masterpiece. To steer clear of those pesky wiring mistakes, remember to double-check your connections and ensure that all wires are securely fastened to their corresponding terminals.
By taking that extra minute to verify your work, you’ll avoid potential hazards like short circuits or, worse, a electrical fire. Trust me, I’ve been there, and it’s not a fun place to be – especially when you’re wearing your favorite pair of socks, like my beloved Monet ones. So, let’s keep those socks safe and sound, and our homes even safer, by being meticulous with our wiring. With a little patience and attention to detail, you’ll be flipping the switch to a brighter, more sustainable future in no time.
Installing Single Pole Switches
Now that we’ve covered the basics, let’s dive into installing single pole switches. These are the most common type of light switch, and with a few simple steps, you’ll be a pro in no time. First, ensure you’ve turned off the power to the switch at the breaker box – safety first, my friend! Next, remove the old switch and take note of the wire colors and connections.
When installing the new single pole switch, match the wire colors to the corresponding terminals, and screw it into place. Don’t overtighten, as this can damage the switch or surrounding material. With the switch securely in place, turn the power back on and test it out. Voilà! You’ve successfully installed a single pole switch, and it’s working like a charm.
Shine On: 5 Safety Savvy Tips for a Seamless Light Switch Swap
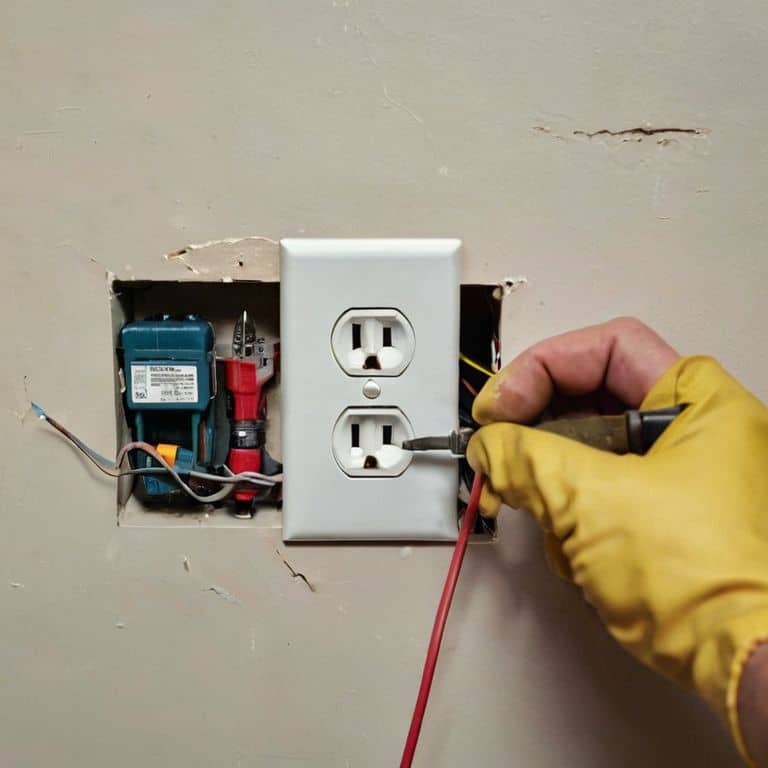
- Flip the power switch: Always start by turning off the power to the light switch at the breaker box, then double-check it’s off with a voltage tester – safety first, my friends!
- Get wired for success: Take a snapshot of the existing wiring with your phone before you begin, and consider labeling each wire to avoid any mix-ups during the replacement process
- Switch it up with the right tools: Gather your trusty toolbox essentials, including a screwdriver, pliers, and a wire stripper, to ensure a smooth and efficient installation
- Grounded and good to go: Verify the grounding system is intact and functioning properly to prevent any electrical shocks or hazards – your safety is my top priority!
- Test it out: Once the new switch is installed, flip the power back on and give it a try – if it’s not working as expected, don’t hesitate to consult the manufacturer’s instructions or call in a professional for assistance
Flipping the Switch to Sustainability: 3 Key Takeaways
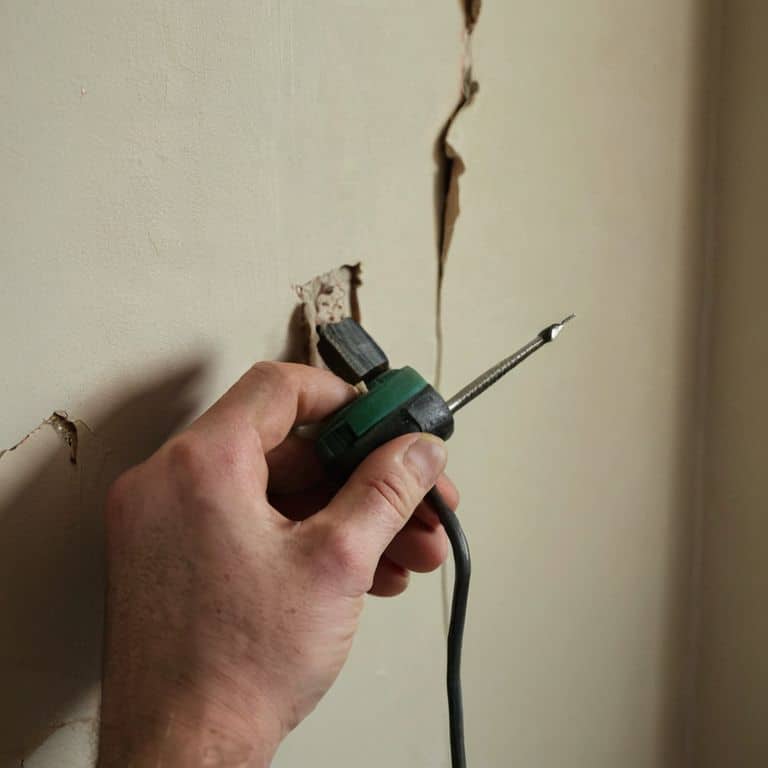
Always switch off the power at the breaker box before starting your light switch replacement project to avoid any potential electrical hazards, and make sure to test the wires with a non-contact voltage tester for extra safety
Choosing the right light switch for your needs, whether it’s a single pole, three-way, or smart switch, can make a significant difference in the functionality and ambiance of your space, so consider factors like dimming capabilities, smart home integration, and energy efficiency
Upcycling or repurposing vintage materials for your lighting project, such as turning old mason jars into pendant lights or using reclaimed wood for a unique switch plate, can add a touch of whimsy and personality to your space while promoting sustainable living and reducing waste
Illuminating Wisdom
As we flip the switch to a more sustainable tomorrow, remember that safety is not just about following instructions, but about illuminating the path to a brighter, more DIY-friendly future, one vintage light switch at a time.
James O'Neill
Flip the Switch to a Brighter Tomorrow
As we wrap up this whimsical journey of replacing a light switch, let’s quickly recap the essential steps: ensuring the power is off, understanding the wiring, and carefully installing the new switch. It’s been a blast guiding you through the process, and I hope you’ve not only learned something new but also had a bit of fun along the way. Remember, safety first is always the motto when it comes to electrical work, so don’t hesitate to consult a professional if you’re ever in doubt. Now, go forth and illuminate your space with the confidence of a DIY rockstar!
As you stand back to admire your handiwork, remember that this small accomplishment is part of a larger movement towards sustainable living. Every switch flipped, every bulb changed, and every piece of furniture upcycled brings us closer to a world where creativity meets conservation. So, keep on tinkering, keep on creating, and most importantly, keep on shining your light for all to see. And who knows, maybe your next project will be inspired by a pair of quirky socks, just like mine!
Frequently Asked Questions
What are the most common mistakes to avoid when replacing a light switch to ensure safety and proper function?
When swapping out a light switch, beware of common pitfalls like incorrect wire connections or forgetting to turn off the power. I’ve seen it happen – a spark here, a shock there! To avoid these mishaps, double-check your wiring diagram and ensure the breaker is switched off before you start tinkering. Trust me, your safety (and your socks) will thank you!
How do I know if I need to replace my light switch with a single pole or three-way switch?
Ah, great question, my friend! To determine if you need a single pole or three-way switch, simply check if the light can be controlled from two different locations. If so, you’ll need a three-way switch. But if it’s a solo act, a single pole switch will do the trick. Now, let me just adjust my Van Gogh socks – they’re inspiring me to get creative with this wiring conundrum!
Can I replace a light switch myself if I have no prior electrical experience, or is it recommended to hire a professional?
Don’t let inexperience hold you back, my friend! With caution and the right guidance, you can definitely replace a light switch yourself. Just remember to turn off the power at the breaker box and take your time. If you’re still unsure, consider consulting a pro, but I’m here to walk you through it, so let’s get started!