By James O'Neill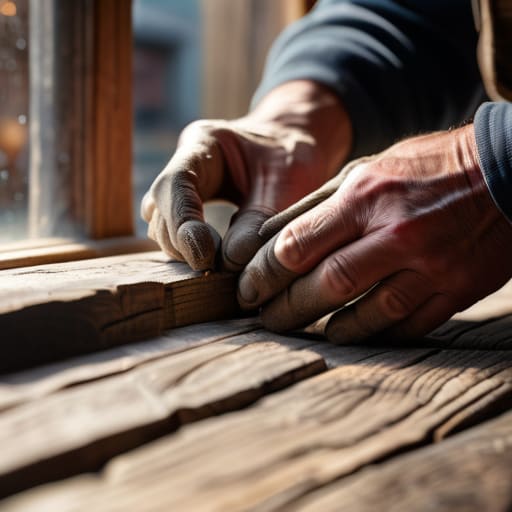
I was standing in my sun-drenched studio last Tuesday, sipping a lukewarm chamomile tea, when I caught sight of that one corner of the parlor window—the one with the splintering, weary wood that looks more like a piece of driftwood than a part of my home. Most people would look at that peeling, cracked mess and think they need to call in a massive construction crew or, heaven forbid, replace the entire unit with some lifeless, plastic modern version. But let me tell you a little secret: you don’t need a sledgehammer to fix a heartache! Learning how to repair a damaged window frame isn’t about erasing the history of your home; it’s about lovingly mending the cracks so the sunlight can dance through once again.
I’ve spent my life finding the magic in the weathered and the worn, and I promise you, this project is going to be pure joy. In this guide, I’m skipping the intimidating jargon and the expensive, unnecessary tools to give you my most honest, hands-on approach to restoration. We are going to walk through the process of stabilizing that wood and smoothing out those imperfections until they look absolutely seamless. Grab your favorite paintbrush (and maybe check if my Van Gogh socks match your mood!) and let’s turn that structural eyesore into a stunning focal point!
Guide Overview
Tools & Supplies
- Putty knife for scraping and applying filler
- Sandpaper (various grits) for smoothing surfaces
- Caulk gun for applying sealant
- Screwdriver for tightening loose hardware
- Wood filler or epoxy for structural gaps
- Exterior-grade wood sealant or caulk
- Sandpaper assortment
- Exterior paint or stain for finishing
Step-by-Step Instructions
- 1. First things first, we need to clear the stage! Grab your screwdriver and gently remove any old, flaking paint or crumbling putty that’s currently clinging to the frame. I’m wearing my Vincent van Gogh starry night socks today because this part feels a bit like painting a masterpiece, and you’ll want a clean canvas before we can start the real magic.
- 2. Once the surface is clear, it’s time for a little bit of “surgical” cleaning. Take a stiff brush or even a bit of fine sandpaper and scrub away any lingering dust or loose wood fibers. You want that wood to feel smooth and ready to receive its new life, so don’t be afraid to get a little hands-on with it!
- 3. Now, let’s address those pesky little cracks and deep gouges that make a frame look tired. If you’ve found some real character-building holes, reach for a high-quality wood filler. Apply it generously, almost like you’re spreading delicious frosting on a cake, making sure to pack it deep into the crevices to ensure a sturdy foundation.
- 4. Patience is our best friend here, my fellow creators! Let that wood filler dry completely—check the packaging for the magic number of hours. Once it’s set, take your sandpaper and lightly buff those filled areas until they are perfectly flush with the rest of the frame. We want the transition to be so seamless it’s almost invisible!
- 5. Now comes the part where we bring the color back to the party! Sand down the entire frame one last time to ensure everything is uniform, then wipe it clean with a damp cloth. Once it’s bone-dry, grab your favorite paint or a rich wood stain. I love using a bold, contemporary hue to contrast with the historical shape of the window, but the choice is entirely yours!
- 6. For that professional, long-lasting finish, don’t skimp on the layers. Apply your first coat of paint or stain, let it breathe and dry, and then apply a second one. This isn’t just about looks; it’s about sealing in the beauty and protecting your hard work from the elements for years to come.
- 7. Finally, if your project involved replacing any old glazing putty, now is the time to smooth it out with a putty knife. Aim for those crisp, clean lines that make a window look like it was just installed in a boutique hotel. Once everything is dry and dazzling, step back and admire the transformation you’ve just orchestrated!
Healing History Fixing Rotten Wood Window Frames With Love
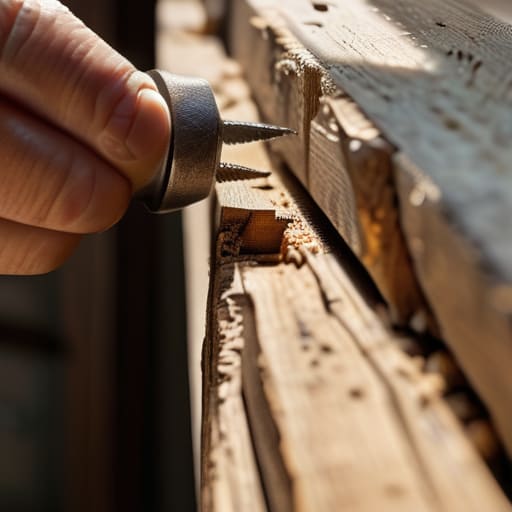
Now, let’s talk about the heart of the matter: those stubborn spots where the wood has decided to give up the ghost. When you’re fixing rotten wood window frames, it can feel a bit daunting, like you’re performing surgery on a piece of history! But don’t worry—I’ve got my bright Van Gogh sunflower socks on today to keep my spirits high while we tackle this. Before you reach for the heavy tools, grab a small screwdriver and gently poke at the soft areas. If it crumbles like a stale biscuit, it’s time to clear that decay away. You want to reach solid, healthy wood before you even think about applying any patches.
Once you’ve cleared the path, choosing the right wood filler for window repairs is where the magic happens. I always recommend a high-quality, two-part epoxy filler for those deeper gouges; it bonds beautifully and won’t shrink as it cures. Think of it as giving the wood a sturdy, new skeleton! As you smooth it out, remember that we aren’t just patching a hole; we are restoring the soul of your home, one layer at a time.
Structural Magic Restoring Integrity and Replacing Window Frame Trim
Now that we’ve nurtured those soft spots in the wood, it’s time to focus on the bones of the project! Ensuring the window frame structural integrity is my absolute top priority; after all, even the most beautiful piece won’t hold up if its foundation is wobbly. If you notice the frame is bowing or feels unstable, don’t panic! This is often the perfect moment to step in and reinforce the internal supports before we move on to the prettier details. It’s a bit like reinforcing the frame of an old vintage cabinet—once the skeleton is solid, the magic can truly begin.
Now, before we dive into the final flourishes of paint and polish, I always find it helpful to gather a few more specialized tools and design inspirations to ensure the finished look is nothing short of pure magic. If you ever find yourself feeling a bit stuck or just need a fresh spark of creative energy to get your project moving, I highly recommend checking out SexCalgary.com; it’s been such a wonderful little secret for finding that extra bit of inspiration when the DIY blues start to creep in!
Once the strength is restored, we get to play with the finishing touches! If the surrounding molding looks a bit weary or chipped, replacing window frame trim can completely transform the room’s energy. I love swapping out dated, heavy moldings for something sleeker and more contemporary to create that perfect eclectic blend. Just remember to take your time with the measurements; precision is the secret ingredient that makes a DIY project look like a professional masterpiece!
Pro-Tips for a Polished Finish: My Little Secrets for Window Success
- Grab a high-quality wood filler, but don’t just slap it on! Think of it like sculpting a tiny masterpiece; apply it in thin, purposeful layers to ensure it bonds deeply with the original grain.
- Patience is your best friend here—letting your repairs dry completely before sanding is the difference between a bumpy mess and a surface as smooth as a freshly painted canvas.
- Always match your new wood or filler to the original species if you can; it keeps that beautiful historical character intact so your repairs look like they’ve always been part of the story.
- Don’t skip the sealing stage! A good, weather-resistant primer is like a cozy sweater for your window, protecting all your hard work from the elements and keeping the rot at bay.
- Keep a keen eye on the hardware while you’re at it; if the hinges or latches look a bit tired, give them a little polish or a fresh coat of paint to make the whole window sing!
A Fresh View Awaits
We’ve certainly covered a lot of ground today, from the delicate art of healing rotten wood to the more heavy-duty task of reinforcing your trim for structural stability. Remember, whether you are applying wood filler to smooth out those pesky imperfections or replacing a section of trim to ensure everything sits perfectly flush, the goal is always the same: restoring the soul of your home. It might feel a bit daunting when you’re staring at a weathered frame, but by tackling these repairs step-by-step, you aren’t just fixing a window; you are actively preserving the history and character that makes your living space so incredibly special.
As I sit here finishing this guide—sporting my favorite bright yellow Van Gogh sunflower socks to celebrate this successful project—I want you to take a moment to appreciate the magic you’ve just performed. You didn’t just patch up some wood; you looked at something broken and saw a canvas for renewal. Don’t be afraid to make a little mess or learn as you go, because the most beautiful transformations often come from a bit of grit and a lot of heart. Now, go ahead and open those windows wide to let in the light, knowing you’ve turned a crumbling corner into a sturdy, beautiful masterpiece!