
I still remember the first time I attempted to paint a vintage dresser I had upcycled – the finish was uneven, and the edges looked like they had been painted by a novice. It was then that I realized the importance of mastering the art of what is cutting in and how to do it perfectly. It’s a technique that can make or break the aesthetic of your DIY project, and yet, it’s often overlooked in favor of more flashy renovation methods. As someone who’s passionate about blending rustic charm with contemporary style, I’ve learned that cutting in is not just about painting – it’s about telling a story with every brushstroke.
In this article, I’ll share my honest, no-hype advice on what is cutting in and how to do it perfectly, so you can achieve a professional finish on your own DIY projects. From the best tools to use to the techniques that will make your edges look seamless, I’ll cover it all. My goal is to empower you with the knowledge to transform your spaces into unique reflections of your personality, and to make sustainable living a fun and creative process. By the end of this guide, you’ll be equipped with the skills to tackle any painting project with confidence, and to make your DIY endeavors truly one-of-a-kind.
Table of Contents
- Guide Overview: What You'll Need
- Step-by-Step Instructions
- Cutting in Secrets Revealed
- Unleashing the Cutting In Guru: 5 Whimsical Tips to Tame the Trim
- Embracing the Art: 3 Key Takeaways for Perfect Cutting In
- The Art of Cutting In
- Bringing it All Together: The Art of Cutting In
- Frequently Asked Questions
Guide Overview: What You'll Need
Total Time: 1 hour 30 minutes
Estimated Cost: $10 – $30
Difficulty Level: Intermediate
Tools Required
- Paintbrush (angled brush, 1 inch to 2 inches wide)
- Paint Roller (for larger areas)
- Paint Tray (for holding and loading paint)
- Masking Tape (for creating sharp edges)
- Ladder or Step Stool (for reaching high areas)
- Drop Cloths or Tarps (for protecting floors and furniture)
Supplies & Materials
- Paint (in desired color and finish)
- Primer (optional, but recommended for bold color changes)
- Sandpaper (for light surface preparation)
- Cleaning Solution (for cleaning walls before painting)
Step-by-Step Instructions
- 1. To begin mastering the art of cutting in, you’ll need to gather your essential tools, including a high-quality paintbrush, a paint tray, and a selection of paints that match your desired color palette. I always find that using a natural bristle brush is best for this technique, as it allows for smooth, even strokes that help you achieve a professional finish.
- 2. Next, prepare your workspace by laying down a drop cloth or old sheets to protect your floors and furniture from any accidental paint spills. This is also a great time to slip on your favorite pair of colorful socks – I’m wearing my Van Gogh inspired pair today, which always seems to bring me a dash of creative luck. As you’re setting up, take a moment to visualize the final result and get excited about the transformation you’re about to create.
- 3. Now, it’s time to tape off the trim and any areas you don’t want to paint. This is a crucial step in achieving crisp, clean lines, so make sure your tape is applied smoothly and evenly. I like to use a level to ensure my lines are perfectly straight, but don’t be too hard on yourself if they’re not absolute perfection – a little character never hurt anyone.
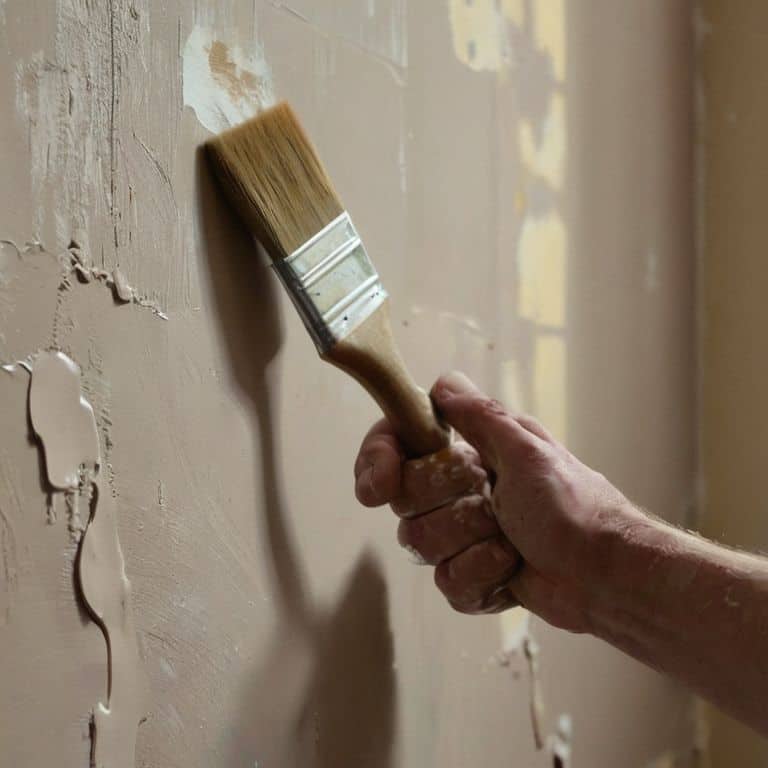
- 4. With your area prepped and taped, you can start applying the paint. Begin by dipping the tip of your brush into the paint, wiping off any excess on the rim of the paint tray to avoid drips. Then, carefully start painting along the edge of the tape, using long, smooth strokes to cover the area. Remember to work in small sections, as this will help you maintain even coverage and avoid any uneven edges.
- 5. As you continue painting, pay close attention to the edges and corners, where the paint can quickly build up. To avoid this, use light, gentle strokes to feather the paint out towards the edges, creating a seamless blend with the surrounding area. It’s also a good idea to use a smaller brush for these detailed areas, as it will give you more control over the paint.
- 6. Once you’ve completed the painting, remove the tape to reveal your crisp, clean lines. If necessary, use a small touch-up brush to correct any minor errors or bleeds under the tape. This is also a great opportunity to step back and admire your handiwork, feeling proud of the beautiful, professional finish you’ve achieved.
- 7. Finally, take a step back and evaluate your work, making any necessary adjustments to the paint or trim. If everything looks good, you can start applying a second coat of paint, following the same process as before. And when you’re all done, don’t forget to treat yourself to a fun reward – maybe a new pair of artist-inspired socks to add to your collection.
Cutting in Secrets Revealed
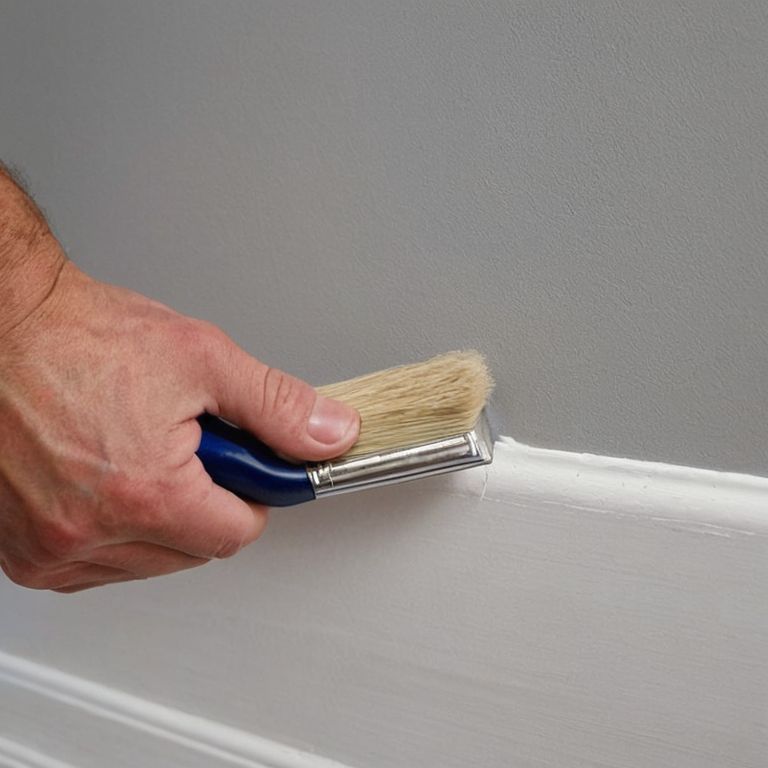
As I delve into the world of interior painting techniques, I’ve discovered that mastering the art of cutting in is just the beginning. One of my favorite secrets to a flawless finish is using angled brush strokes for edges. This technique allows for a smooth, seamless transition between colors, making it perfect for trim painting without tape. I like to think of it as a little dance, where the brush glides effortlessly along the edge, leaving a beautiful, crisp line in its wake.
When it comes to achieving those smooth edge painting tips, I’m a firm believer in the power of quality tools. Masking tape vs painter’s tape is a common debate, but I always opt for the latter. There’s something about the gentle grip of painter’s tape that makes it perfect for delicate surfaces. And, let’s be real, who doesn’t love the satisfaction of removing the tape to reveal a perfectly painted edge? It’s like unwrapping a little present, and it never gets old.
For those hard-to-reach areas, I swear by cutting in with a roller extension. It’s a game-changer for getting into tight spaces and achieving a uniform coat. Plus, it’s a great way to add some extra flair to your project, like a pop of color on a ceiling or a statement wall. With a little practice and patience, you’ll be a pro at cutting in in no time, and your walls will thank you.
Mastering Angled Brush Strokes
To truly master the art of cutting in, it’s essential to develop a flair for angled brush strokes. I like to think of it as dancing with my brush, where every movement is a deliberate, sweeping motion that coaxes out the perfect edge. It’s all about feeling the brush’s weight and balance in your hand, much like a musician feels their instrument. As I work, I find myself lost in the rhythm of the strokes, the soft whoosh of the bristles against the wall, and the vibrant color that begins to emerge.
With practice, you’ll find your own unique rhythm, and those once-imperfect edges will transform into crisp, clean lines that add a touch of sophistication to any room. I recall a particularly tricky project where I had to cut in around a beautifully ornate molding – it was a challenge, but the end result was well worth it. Now, I’m excited to see you unleash your own creativity and bring those dull, forgotten spaces back to life with the magic of angled brush strokes!
Trim Painting Without Tape Hacks
Now that we’ve mastered those angled brush strokes, let’s dive into some ingenious hacks for trim painting without tape. I’ve got a favorite trick up my sleeve – using a putty knife to create a seal between the trim and the wall. It’s all about gently pressing the knife into the gap, creating a barrier that prevents paint from seeping underneath. This technique requires a bit of finesse, but trust me, it’s a game-changer. With a steady hand and the right tools, you can achieve crisp, clean lines without the need for tape, and that’s what I call a beautiful, vintage-meets-modern finish.
Unleashing the Cutting In Guru: 5 Whimsical Tips to Tame the Trim
- Embracing the Art of Loaded Brushstrokes: Load up your brush with just the right amount of paint to ensure a smooth, consistent coat that hugs those trim lines like a vintage glove
- Dancing with the Edge: Master the subtle waltz of angled brush strokes to kiss those corners and ceilings with precision, as if the brush were an extension of your own creative hand
- The Tape Trap: Ditch the tape and unleash your inner artist – with a steady hand and a keen eye, you can paint crisp, clean lines that make your trim sing, all while saving time and avoiding the dreaded tape residue
- Feathering the Edge: Blend, blend, blend – the key to a seamless transition from wall to trim lies in the gentle art of feathering, where your brush whispers sweet nothings to the paint, coaxing it into perfect harmony
- Lighting the Way: Don’t be afraid to get a little dramatic with your lighting – natural light, lamplight, or even the soft glow of a string of fairy lights can help you spot those pesky imperfections and make adjustments on the fly, ensuring your cutting in skills shine like a masterpiece
Embracing the Art: 3 Key Takeaways for Perfect Cutting In
Embracing imperfections is key: just like upcycling vintage furniture, mastering the art of cutting in is about highlighting the unique character of your walls and ceilings, making each brushstroke a celebration of individuality
Angled brush strokes are your best friend: by mastering the technique of angled brush strokes, you can achieve professional-looking results without the need for tape, giving your walls a seamless, hand-painted finish that exudes charm and personality
Practice makes perfect, and patience is a virtue: don’t be discouraged if your first attempts at cutting in don’t yield perfect results – with time, patience, and a willingness to experiment, you’ll find your own rhythm and style, transforming your walls into a vibrant reflection of your unique taste and flair
The Art of Cutting In
Cutting in is not just a technique, it’s an art form that requires patience, precision, and a dash of personality – where every brush stroke tells a story of transformation, turning the mundane into the magnificent, one delicate line at a time.
James O'Neill
Bringing it All Together: The Art of Cutting In

As we’ve explored the world of cutting in, you’ve learned the fundamentals of achieving a professional finish, from mastering angled brush strokes to clever hacks for trim painting without tape. These techniques, combined with a dash of patience and practice, will have you transforming your spaces with vibrant, one-of-a-kind personalities. Remember, the key to perfection lies in embracing the imperfections and making them shine – a philosophy that resonates deeply with my passion for upcycling vintage furniture into quirky modern pieces.
So, as you embark on your next DIY adventure, I encourage you to view cutting in not just as a painting technique, but as an opportunity to unleash your creativity and make a statement. Whether you’re a seasoned pro or a curious beginner, the art of cutting in invites you to explore the intersection of history and innovation, where every brush stroke tells a story of transformation and renewal. With every project, you’ll find yourself falling more in love with the process, and the unique treasures you create will be a testament to your imagination and skill.
Frequently Asked Questions
What are some common mistakes to avoid when cutting in, especially for beginners?
When cutting in, I’ve seen beginners struggle with uneven edges and paint bleeds. To avoid these mishaps, remember to work in small sections, use the right brush angle, and don’t overload the brush with paint. Oh, and don’t forget to clean as you go – it’s like sanding down a vintage find, it’s all about the prep work, my friends!
How do I choose the right brush for cutting in, and what features should I look for?
When it comes to choosing the right brush for cutting in, I always say it’s all about the perfect blend of precision and personality! Look for brushes with synthetic or natural fibers, a angled or tapered edge, and a comfortable grip – trust me, it makes all the difference, and I just so happen to be wearing my Van Gogh socks, which always inspire my brush choices!
Can cutting in be done with a roller, or is it strictly a brush-only technique?
While traditional cutting in is typically done with a brush, I’ve experimented with using a specialized roller for certain edges and corners – it’s all about choosing the right nap length and being gentle to avoid bleeds. However, for intricate details, a brush remains my go-to for precision and control.