I still remember the first time I tried to how to build a pc – it was like attempting to solve a puzzle blindfolded. Everyone said it was complicated, that only tech geniuses could manage it, but I was determined to prove them wrong. As it turns out, building a PC is not rocket science; it’s actually quite straightforward once you understand the basics. The myth that you need to be a tech expert to build a PC is just that – a myth. With the right guidance, anyone can learn how to build a pc and create their dream machine.
In this article, I’ll walk you through the process of building a PC, sharing my own experiences and tips to make it as smooth as possible. You’ll get honest, no-hype advice on what components to choose, how to assemble them, and even some tricks for troubleshooting common issues. My goal is to make building a PC accessible to everyone, regardless of their technical background. By the end of this guide, you’ll be equipped with the knowledge to build your own PC and start exploring the world of computer hardware with confidence.
Table of Contents
Guide Overview: What You'll Need
Total Time: 2 hours 30 minutes
Estimated Cost: $500 – $2000
Difficulty Level: Intermediate / Hard
Tools Required
- Screwdriver Phillips and flathead
- Torx driver For CPU cooler and motherboard
- Pliers For gripping small components
- Wire cutters For cutting cable ties and wires
- Thermal paste For CPU and GPU cooling
Supplies & Materials
- CPU Choose from Intel or AMD
- Motherboard Compatible with chosen CPU
- RAM At least 16 GB, preferably 32 GB or more
- Storage Choose from hard drive or solid state drive
- Power supply Wattage depends on system requirements
- Graphics card Optional, but required for gaming
- Case Choose from various sizes, such as mid-tower or full-tower
- Cooling system Choose from air or liquid cooling
- Operating system Choose from Windows, Linux, or macOS
Step-by-Step Instructions
- 1. First, let’s start with the basics: gathering all the necessary components for our PC build. This includes a CPU, motherboard, RAM, storage drive, power supply, and a graphics card if you’re planning on gaming or doing graphics-intensive work. I remember when I first started building PCs, I had to scour the internet for deals on these parts, but now there are plenty of resources available to help you find what you need.
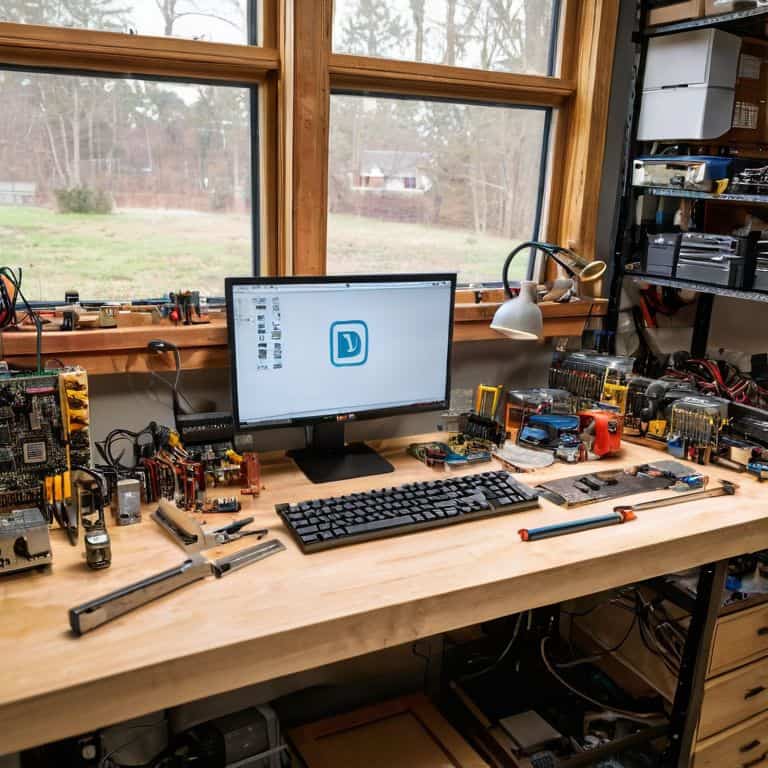
- 2. Next, we need to prepare our workspace. This means clearing a large area where we can lay out all our components and tools without any clutter or distractions. As someone who’s into 3D printing, I can tell you that having a well-organized workspace is crucial for any project, especially when working with sensitive electronics.
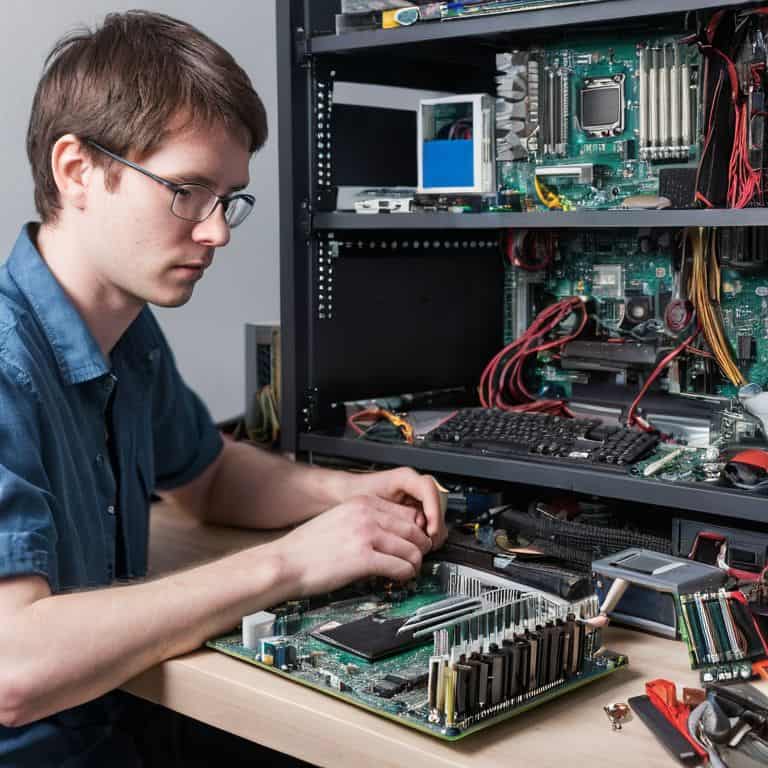
- 3. Now, let’s unbox and ground ourselves to prevent static electricity damage to our components. This is a critical step that many beginners overlook, but trust me, you don’t want to fry your brand-new CPU because of a static shock. I always make sure to touch a grounded metal object or wear an anti-static strap when handling sensitive parts.
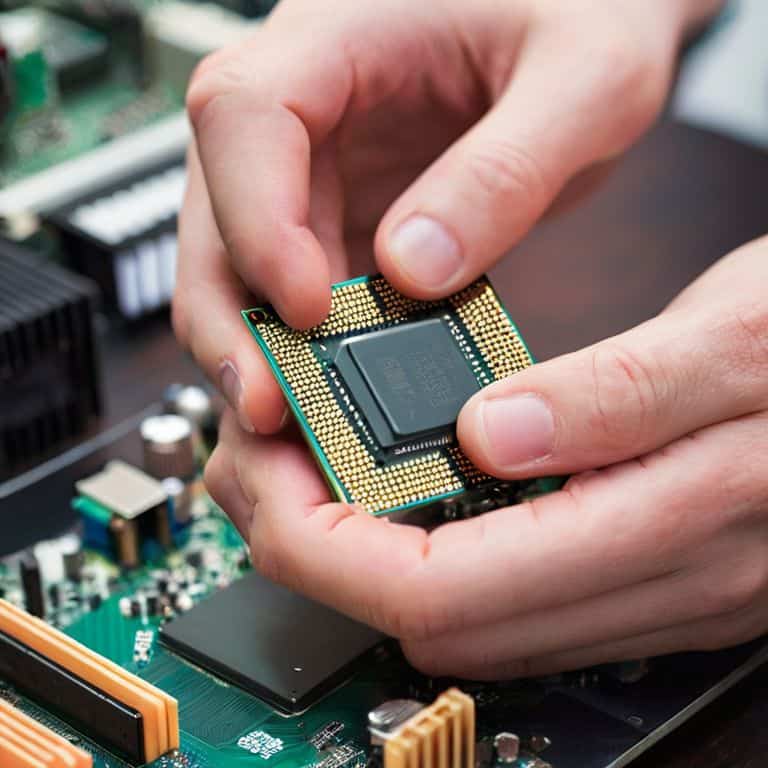
- 4. The fourth step is to install the CPU onto the motherboard. This requires careful alignment of the CPU pins with the socket on the motherboard, and then gently pushing it in until it clicks into place. Be careful not to bend any pins, as this can render your CPU useless. I’ve had my fair share of mishaps in the past, but with patience and the right tools, you’ll get the hang of it.
- 5. After securing the CPU, we move on to installing the RAM. This is relatively straightforward: just align the notches on the RAM with the tabs on the motherboard’s RAM slots, and then firmly push it in until it clicks. Make sure to check the compatibility of your RAM with your motherboard to avoid any issues down the line.
- 6. With our CPU and RAM in place, we can now install the storage drive and power supply. For the storage drive, you’ll need to connect it to the motherboard using a SATA cable, and then secure it to the case using screws. The power supply, on the other hand, needs to be connected to the motherboard, storage drive, and any other components that require power. Always check the wattage of your power supply to ensure it can handle the load of all your components.
- 7. The final step is to put everything together and connect the front panel headers to the motherboard. This includes the power button, reset button, and any LED indicators. Once everything is connected, plug in the power cord and press the power button. If everything is installed correctly, your PC should roar to life, and you’ll be greeted with the BIOS screen. From here, you can install your operating system and start exploring the world of PC customization.
Building Dream Pcs
As I reflect on my journey of building dream PCs, I realize that choosing the right cpu is a crucial step. It’s like laying the foundation of a skyscraper – if it’s not solid, the entire structure can come crashing down. I’ve seen many beginners overlook this aspect, only to regret it later when their system fails to deliver. When selecting a CPU, consider factors like clock speed, cores, and threads to ensure it meets your needs.
When it comes to gaming, the best motherboard for gaming can make all the difference. A good motherboard can provide the necessary support for high-performance components, while a bad one can bottleneck your system. I’ve experimented with various motherboards in my 3D printing lab, and I can attest that a well-chosen motherboard can elevate your gaming experience. Look for features like USB ports, SATA ports, and PCIe slots to connect your peripherals and storage devices.
To take your PC to the next level, consider optimizing pc performance for beginners. This involves tweaking settings, updating drivers, and monitoring system temps. By doing so, you can squeeze out extra frames per second, reduce lag, and enjoy a smoother overall experience. I’ve found that using pc building tools and software can help streamline this process, making it easier to fine-tune your system and get the most out of your hardware.
Choosing the Right Cpu for Beginners
As I delve into the world of CPU selection, I’m reminded of my early days in the tech club, where we’d spend hours discussing the perfect processor for our DIY projects. For beginners, choosing the right CPU can be overwhelming, but it’s essential to remember that it’s the brain of your operation. When selecting a CPU, consider your needs: are you a gamer, a video editor, or perhaps a budding coder like myself? Look for a balance between cores, threads, and clock speed. I always recommend starting with a mid-range CPU, as it offers a great compromise between performance and budget.
For my own DIY dream machine, I opted for a CPU that boasted a high clock speed and multiple cores, allowing me to tackle both gaming and coding with ease. As a beginner, don’t be afraid to ask for advice or do your research – and remember, the right CPU is just the starting point for creating your ultimate PC.
Installing Graphics Cards Like a Pro
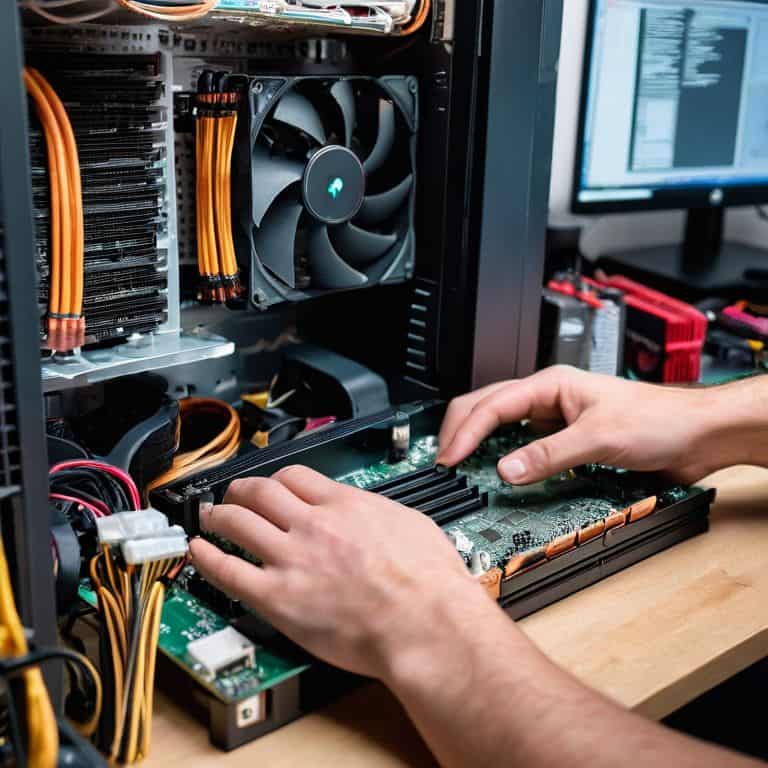
When it comes to installing graphics cards, I like to think of it as the icing on the cake – it’s what brings your PC to life. I remember my first time installing a graphics card, it was a bit nerve-wracking, but with the right guidance, it can be a breeze. For beginners, it’s essential to handle the card by the edges, avoiding touching the sensitive components. Gently push the card into the PCIe slot, ensuring it’s securely fastened with screws.
As someone who’s passionate about 3D printing futuristic gadgets, I can appreciate the attention to detail required for this process. With the card firmly in place, connect the power cables and any additional cables required. Double-check all connections to ensure a seamless gaming or graphics experience. By following these simple steps, you’ll be well on your way to creating a PC that’s capable of handling even the most demanding tasks.
Hammering Out the Essentials: 5 Key Tips for a Seamless PC Building Experience
- Plan Your Build Around Your Budget, Considering Both Hardware and Software Needs
- Choose Components That Are Compatible With Each Other to Avoid Bottlenecks and Ensure Optimal Performance
- Ground Yourself Before Starting to Work on Your PC to Prevent Static Electricity Damage to Sensitive Components
- Keep Your Workspace Well-Lit and Organized, With All Tools and Parts Easily Accessible to Streamline the Assembly Process
- Test Your PC Incrementally, Starting With the CPU, Motherboard, and RAM, Before Adding Other Components to Identify Any Issues Early On
Key Takeaways for Your Dream PC
Always choose a CPU that balances performance with power consumption, considering your specific needs and budget to ensure a seamless computing experience
Installing a graphics card is easier than you think, and with the right tools and patience, you can unlock a world of high-definition gaming and content creation
Building your own PC is not just about following a checklist, but about understanding how each component works together in harmony, allowing you to tailor your machine to your unique needs and passions
Building Beyond the Manual
The true art of building a PC lies not in following instructions, but in understanding the symphony of components that come together to create a digital dream machine, where every screw, every wire, and every chip plays a crucial role in the orchestra of innovation.
Alex Byte
Conclusion: Bridging the Gap to PC Mastery
As we conclude this journey of building a PC from scratch, it’s essential to reflect on the key milestones we’ve achieved. We’ve navigated the step-by-step guide, carefully selecting components like the CPU and graphics card, and learned how to install them with ease. The subsections on choosing the right CPU for beginners and installing graphics cards like a pro have provided a solid foundation for our DIY project. By following these instructions and tips, you’ve not only gained practical knowledge but also developed a deeper understanding of what makes a PC tick. This experience will serve as a launching pad for further exploration and customization, allowing you to push the boundaries of innovation in the world of PC building.
Looking back on my own journey, from teaching myself coding in a small town library to becoming an AI researcher, I’m reminded that the true power of technology lies not just in its complexity, but in its ability to empower and connect people. As you boot up your newly built PC for the first time, remember that you’re not just turning on a machine – you’re unlocking a doorway to endless possibilities, from 3D printing futuristic gadgets to exploring the frontiers of artificial intelligence. So, go ahead, get creative, and make your mark on the digital world. The future is yours to shape, one byte at a time.
Frequently Asked Questions
What are the essential tools I need to have before starting to build my PC?
To get started, you’ll need a few essential tools – a screwdriver set, pliers, and a can of compressed air to keep things clean. I also swear by my trusty torque wrench for securing those CPU coolers. These basics will help you navigate the build process with ease, just like I did back in our small town’s tech club.
How do I ensure that my PC's cooling system is efficient and quiet?
To keep your PC’s cooling system efficient and quiet, I recommend opting for a liquid cooling solution or a high-quality air cooler with a low RPM fan. This will not only reduce noise but also effectively dissipate heat, ensuring your system runs smoothly.
Can I mix and match components from different manufacturers or should I stick to a single brand for compatibility?
When it comes to mixing and matching components, I say go for it – just ensure compatibility. I’ve had success combining parts from different manufacturers in my own builds, but it’s crucial to double-check specs and reviews to avoid any potential issues.