I still remember the first time I tried to build a set of floating shelves – it was a disaster. I had envisioned a sleek, modern look for my living room, but what I got was a wobbly, uneven mess. It wasn’t until I stumbled upon an old, dusty a guide to building floating shelves in a thrift store that I discovered the secret to creating truly suspended masterpieces. This guide, with its worn pages and handwritten notes, became my bible for all things DIY, and I’ve been hooked on upcycling ever since. As I delved into the world of DIY, I found that a good a guide to building floating shelves is hard to come by, but with the right tools and a bit of patience, anyone can create their own unique pieces.
In this article, I’ll share my own experiences and tips for building stunning floating shelves that will elevate your space and showcase your personal style. You’ll learn how to choose the right materials, measure and cut with precision, and assemble your shelves with ease. I’ll also share some of my favorite upcycling hacks for giving old furniture a new lease on life. Whether you’re a seasoned DIY enthusiast or just starting out, this a guide to building floating shelves will provide you with the practical advice and inspiration you need to create something truly special. So, let’s get started and turn your DIY dreams into reality!
Table of Contents
- Guide Overview: What You'll Need
- Step-by-Step Instructions
- A Guide to Building Floating Shelves
- Shelf Life: 5 Tips to Elevate Your Floating Shelf Game
- Treasured Tips: 3 Key Takeaways for Crafting Enchanting Floating Shelves
- Shelf Reflections
- Suspended in Perfection: The Final Touches
- Frequently Asked Questions
Guide Overview: What You'll Need
Total Time: 2 hours 30 minutes
Estimated Cost: $50 – $100
Difficulty Level: Intermediate
Tools Required
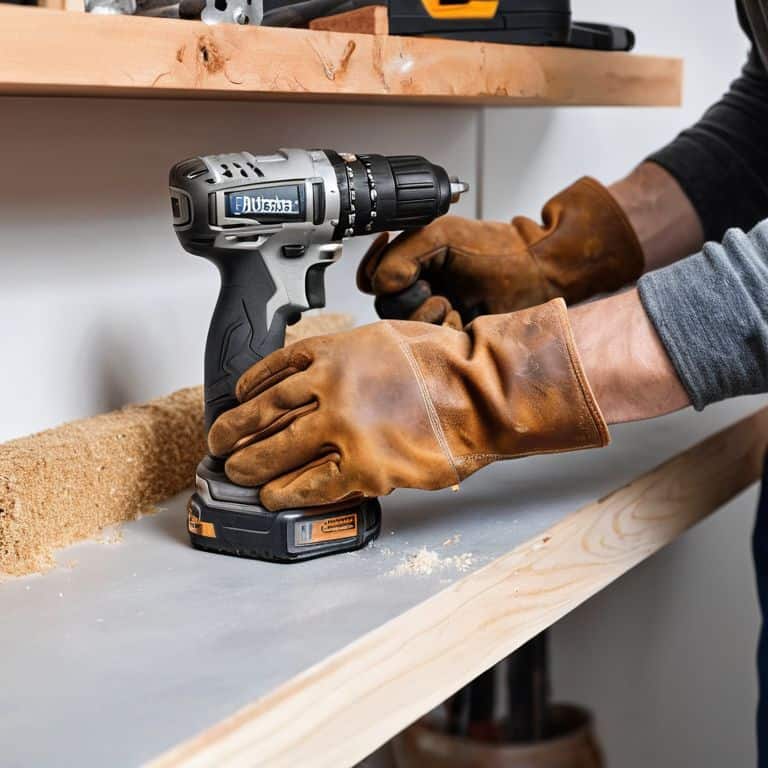
- Drill (with screwdriver and drill bits)
- Level (to ensure shelves are straight)
- Measuring Tape (for accurate measurements)
- Saw (circular or hand saw for cutting lumber)
- Sander (optional, for smoothing out wood)
- Stud Finder (to locate wall studs)
- Wall Anchor (for securing shelves to wall)
- Wrench (for tightening bolts and screws)
Supplies & Materials
- 2-in x 4-in lumber (for shelf support)
- 3/4-in plywood (for shelf boards)
- Wall brackets (for floating shelf hardware)
- Screws (2 inches or 2.5 inches for assembling shelves)
- Wood glue (for bonding wood pieces)
- Finishing nails (1.5 inches or 2 inches for attaching shelf boards)
- Paint or stain (optional, for finishing and protecting the wood)
Step-by-Step Instructions
- 1. To start our whimsical journey of creating floating shelves, let’s begin with gathering our materials, which will include wooden planks or reclaimed wood for the shelf itself, wall anchors, screws, a drill, and a level to ensure our shelves are perfectly aligned. I always like to wear my Van Gogh socks for inspiration when working with wood, and I find that it adds a touch of personality to my projects.
- 2. Next, we need to measure the space where our floating shelves will be installed, taking into account the size of the items we plan to display and the overall aesthetic we wish to achieve. It’s essential to consider the visual weight of the shelves and how they will interact with the surrounding environment, creating a harmonious balance between form and function.
- 3. With our measurements in hand, it’s time to cut our wooden planks to the desired length, using a saw or a cutting tool. I prefer to use reclaimed wood for my projects, as it adds a touch of history and character to the final piece. Remember to always wear protective gear, including gloves and safety glasses, to ensure a safe and enjoyable experience.
- 4. Now, let’s move on to assembling the shelves, which involves attaching the wall anchors to the back of the wooden planks. This is where the magic happens, and our shelves start to take shape. Be sure to use high-quality materials and follow the manufacturer’s instructions for the wall anchors to ensure a sturdy and secure installation.
- 5. Once our shelves are assembled, it’s time to drill the holes for the wall anchors, making sure they are evenly spaced and aligned with the studs in the wall. This is a crucial step, as it will determine the stability and safety of our floating shelves. I like to think of this step as the foundation of our creation, setting the stage for a beautiful and functional piece of art.
- 6. With our holes drilled, we can now install the wall anchors, screwing them into place and making sure they are securely fastened. This is where our shelves start to come to life, and we can begin to envision the final result. Take a step back and admire your handiwork, as the transformation is underway.
- 7. Finally, let’s add the finishing touches to our floating shelves, which may include sanding, staining, or painting the wood to match our desired color and style. This is the final flourish of our creative journey, where we get to see our vision come to life. Take pride in your work, and don’t hesitate to add your personal touch, making the shelves truly yours.
A Guide to Building Floating Shelves
As I delve into the world of diy wall shelf designs, I’m reminded of the importance of considering the overall aesthetic you want to achieve. When it comes to floating shelves, the floating shelf hardware options can make or break the illusion of suspension. I always recommend exploring different types of hidden brackets to find the one that best suits your project.
In my experience, woodworking plans for shelves can be a great resource for inspiration, but don’t be afraid to think outside the box and add your own unique twist. For instance, incorporating decorative shelf trim ideas can add a touch of personality to your shelves. I’ve found that a well-placed trim can elevate the entire look of a room.
When it comes to the nitty-gritty of installation, hidden bracket installation tips are essential for a seamless finish. I always advise my students to carefully consider the type of wall anchor types for shelves they’ll be using, as this can impact the overall stability of the shelf. By taking the time to plan and prepare, you’ll be able to create a beautiful and functional floating shelf that showcases your personal style.
Hidden Strength Floating Shelf Hardware Options
When it comes to bringing your floating shelves to life, the right hardware can make all the difference. I’m obsessed with the sleek, minimalist look of hidden brackets – they add an air of magic to your shelves, don’t you think? From sturdy steel to sleek aluminum, the options are endless, and I just love experimenting with different materials to find the perfect fit for each project. My personal favorite? A vintage-inspired bracket that adds a touch of whimsy to the overall design.
For a more rustic charm, consider using reclaimed wood brackets or decorative corbels – they add a unique, one-of-a-kind touch to your shelves. Whatever your style, the key is to find the perfect balance between form and function, and I just can’t wait to see the creative ways you’ll use these hardware options to bring your own floating shelves to life!
Suspended Charm Diy Wall Shelf Designs
As I delve into the world of DIY wall shelf designs, I’m reminded of my favorite pair of socks – the ones featuring Van Gogh’s Starry Night. There’s something about the swirling clouds and stars that inspires me to think outside the box, or in this case, the shelf. When it comes to suspended charm, it’s all about creating a sense of airiness and visual interest. I love experimenting with reclaimed wood, metal brackets, and a dash of creative flair to craft one-of-a-kind floating shelves that seem to defy gravity.
From rustic wooden planks to sleek glass shelves, the possibilities are endless. I’ve seen DIY enthusiasts upcycle old pallets, ladder rungs, and even vintage windows into stunning wall shelves that add a touch of whimsy to any room. The key is to balance functionality with aesthetic appeal, ensuring that your floating shelves not only showcase your treasured possessions but also tell a story of their own.
Shelf Life: 5 Tips to Elevate Your Floating Shelf Game
- Measure Twice, Drill Once: Double-check your wall space and shelf dimensions to ensure a perfect fit, saving you from frustrating reworks and uneven shelves
- Choose Your Anchor: Select the right floating shelf hardware for your wall type, whether it’s a sturdy brick or a sleek glass, to guarantee a secure and stable installation
- Balance is Key: Distribute the weight of your decorative items and treasures thoughtfully, mixing heavy and light pieces to create a visually appealing and harmonious display
- Add a Personal Touch: Incorporate unique, upcycled materials or vintage finds into your shelf design to infuse your space with character and tell a story of its own
- Light it Up: Consider adding subtle LED lighting or fairy lights to highlight your favorite pieces and create a warm ambiance, making your floating shelves a true showstopper in any room
Treasured Tips: 3 Key Takeaways for Crafting Enchanting Floating Shelves
Embracing the art of upcycling, you can transform vintage pieces into stunning floating shelves that not only add a touch of whimsy to your space but also tell a story of their own, reflecting your personal style and creativity.
By selecting the right floating shelf hardware, you ensure both the aesthetic appeal and the structural integrity of your DIY masterpiece, allowing you to securely display your most cherished treasures and mementos.
Remember, the true magic of DIY lies not just in the end result, but in the journey itself – the process of discovery, the joy of creation, and the satisfaction of giving new life to something old, making every project a unique reflection of your imagination and craftsmanship.
Shelf Reflections
As we suspend treasures on floating shelves, we’re not just decorating walls, we’re weaving stories of the past into the fabric of our present, giving old relics a chance to float effortlessly into our future.
James O'Neill
Suspended in Perfection: The Final Touches
As we conclude this whimsical journey of crafting floating shelves from yesterday’s treasures, let’s recap the essential elements that have brought us to this point. From selecting the perfect vintage pieces to understanding the intricacies of floating shelf hardware, each step has been a testament to the beauty of upcycling and the satisfaction of creating something uniquely personal. By embracing sustainable living and giving new life to discarded items, we not only reduce waste but also infuse our homes with character and charm. Remember, the true magic lies in the transformative power of imagination and a bit of elbow grease.
As you stand back to admire your newly installed floating shelves, adorned with treasures that tell stories of their own, remember that the journey doesn’t end here. The art of DIY is a never-ending canvas of possibilities, waiting for your brushstrokes of creativity and passion. So, don’t be afraid to experiment and innovate, to turn the forgotten into the unforgettable. In the world of upcycling and DIY, every piece of furniture is a potential masterpiece, and every project is an opportunity to leave your mark on the world, one beautifully crafted floating shelf at a time.
Frequently Asked Questions
What kind of materials are best suited for building floating shelves to ensure they can hold a significant amount of weight?
For sturdy floating shelves, I swear by solid woods like oak or maple, and robust MDF or plywood for a more budget-friendly option. When paired with the right hardware, these materials can hold a significant amount of weight, giving you peace of mind and a beautiful display space – now, if you’ll excuse me, I need to match my socks to this project’s vibe!
How do I determine the optimal height and spacing for my floating shelves to achieve a balanced and visually appealing arrangement?
Ah, the million-dollar question! To determine the perfect height and spacing for your floating shelves, consider the scale of your room, the size of the items you’ll be displaying, and the overall aesthetic you’re aiming for. I like to think of it as a fun puzzle – play around with different configurations until it feels just right, and don’t be afraid to trust your instincts!
Are there any specific safety precautions I should take when installing floating shelf hardware to avoid damaging the walls or injuring myself?
When installing floating shelf hardware, safety first, my friend! Wear gloves, use a level, and drill slowly to avoid wall damage. Ensure your ladder is stable and have a buddy hold it, if possible. And, of course, turn off that funky playlist for a bit to focus on the task at hand – we don’t want any accidents!