
I still remember the first time I had to how to fix drywall in my own home – it was a daunting task, to say the least. The internet was flooded with tutorials, but most of them seemed to be written by robots, lacking the personal touch and practical advice I was craving. As someone who’s passionate about upcycling and giving old materials a new life, I was determined to find a way to make the process not only effective but also enjoyable. I’ve learned that with the right mindset and tools, even the most mundane tasks like drywall repair can become an opportunity for creativity and self-expression.
In this article, I’ll share my honest, no-hype approach to how to fix drywall, covering the essential steps and tips you need to know to get the job done efficiently. From preparing the area to applying the final coat of paint, I’ll walk you through the process with practical advice and a dash of personality. My goal is to empower you with the confidence to tackle this project on your own, and maybe even discover a new passion for DIY home repair. So, let’s get started on this journey to transform your walls and unleash your inner handyman (or woman)!
Table of Contents
Guide Overview: What You'll Need
Total Time: 2 hours 30 minutes
Estimated Cost: $25 – $50
Difficulty Level: Intermediate
Tools Required
- Utility Knife (with extra blades)
- Drill (for mixing and applying joint compound)
- Sanding Block (for smoothing out the drywall surface)
- Taping Knife (for applying joint compound to the drywall tape)
- Mud Pan (for holding joint compound)
- Pencil (for marking the drywall)
- Straightedge (for drawing straight lines)
- Saw or Drywall Cutter (for cutting drywall to size)
Supplies & Materials
- Drywall Patch Kit
- Joint Compound (also known as spackling compound)
- Drywall Tape (for reinforcing the drywall joints)
- Screws (for securing the drywall patch to the surrounding drywall)
- Sandpaper (for sanding down the drywall surface)
- Paint (for matching the surrounding area)
- Primer (optional, for preparing the surface for paint)
Step-by-Step Instructions
- 1. First, let’s get started by gathering our tools and materials, because, as any DIY enthusiast knows, having everything you need within arm’s reach can make all the difference in the world. For drywall repair, you’ll need a putty knife, some joint compound (also known as spackling compound), a sanding block, a paintbrush, and some paint that matches your wall color. Don’t forget to wear a dust mask and protective eyewear to keep yourself safe from the dust and debris that come with sanding.
- 2. Next, we need to clean the area around the damaged drywall to ensure we’re working with a smooth, even surface. Use a vacuum cleaner or a damp cloth to remove any dust, dirt, or debris that might be clinging to the wall. This step is crucial because it helps the joint compound adhere better to the drywall, resulting in a stronger and more durable repair.
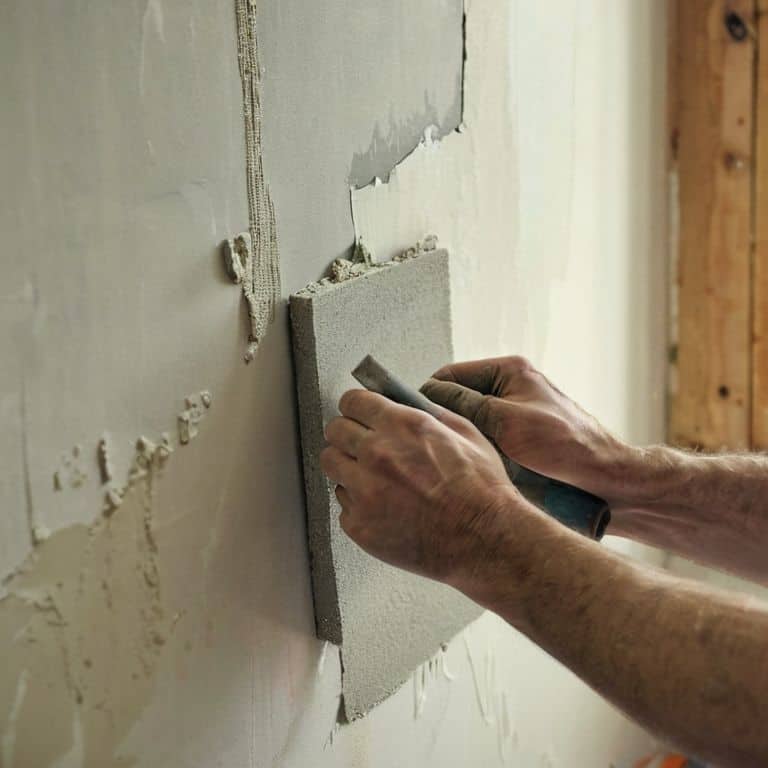
- 3. Now, it’s time to apply the joint compound to the damaged area using your putty knife. Spread a thick layer of compound over the hole or crack, making sure to fill it completely. Don’t worry too much about making a mess at this stage; we’ll be sanding it down later. The key is to apply enough compound to fill the gap but not so much that it becomes difficult to sand.
- 4. After applying the joint compound, let it dry completely according to the manufacturer’s instructions, which can range from 30 minutes to an hour, depending on the type of compound you’re using. Once it’s dry, use your sanding block to smooth out the area, feathering the edges so that the repair blends seamlessly into the surrounding drywall. It’s essential to sand in a circular motion and apply gentle to moderate pressure, depending on the depth of the repair.
- 5. If necessary, apply a second coat of joint compound and let it dry, then sand it again. This process might need to be repeated several times until the surface is completely smooth and even. Remember, patience is key when it comes to drywall repair; each layer of compound and sanding brings you closer to a flawless finish.
- 6. With the repair area now smooth and even, it’s time to paint the wall to match the surrounding area. Use a paintbrush to apply a coat of paint that matches your wall color as closely as possible. If you’re not sure about the exact shade, it might be helpful to consult with a professional or take a sample of your wall paint to a hardware store for matching. Apply the paint evenly, making sure to cover the entire repaired area.
- 7. Finally, step back and admire your handiwork. With these steps, you should have successfully repaired your drywall, giving your wall a second chance to look its best. Remember, the art of drywall repair is all about patience, attention to detail, and the willingness to get a little messy. So, don your favorite pair of DIY-themed socks (I’m currently wearing my Van Gogh pair, which seems fitting for a project that involves a bit of artistic flair) and get ready to tackle that next DIY project with confidence.
Fixing Drywall Whimsy
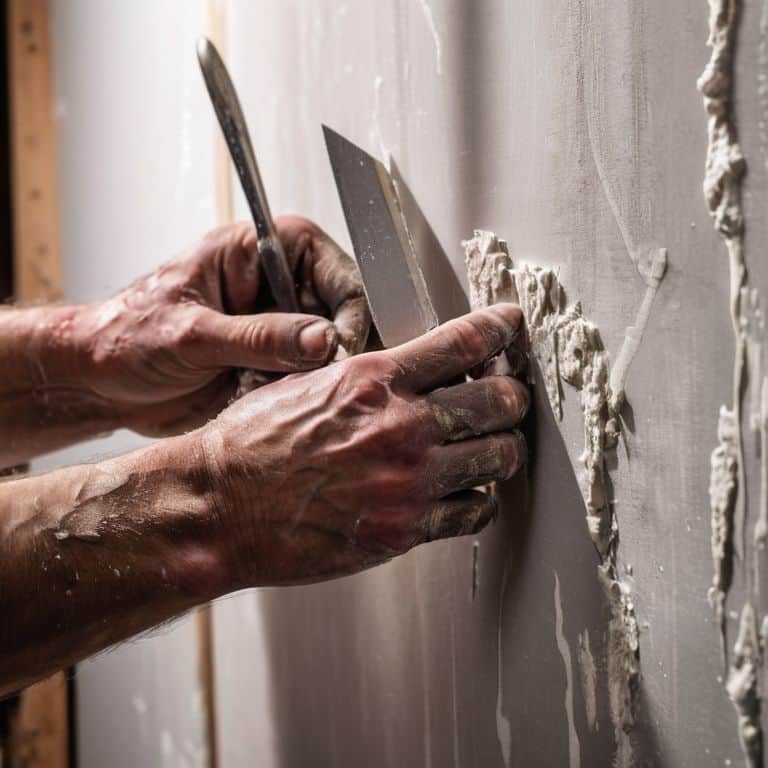
As I delve into the world of drywall repair, I find myself drawn to the artistic nuances that can elevate a simple fix into a masterpiece. When it comes to drywall repair techniques, I’ve discovered that the key to a seamless finish lies in the subtle dance between joint compound and drywall tape application. By mastering this delicate balance, you can create a surface that’s not only sturdy but also visually stunning.
One of my favorite tricks for adding a touch of whimsy to drywall repair is to experiment with joint compound mixing tips. By adjusting the consistency and texture of the compound, you can achieve a unique, almost artisanal quality that sets your work apart. Of course, this is where the right tools come in – I swear by my trusty putty knife and a set of best drywall anchors that ensure a secure hold, even in the most uneven of surfaces.
As you work your way through the repair process, remember to keep an eye out for potential pitfalls, like preventing drywall cracks. A little foresight and planning can go a long way in avoiding these common issues, allowing you to focus on the fun part: transforming your space into a reflection of your personality. With a dash of creativity and the right techniques, you can turn even the most mundane repair job into a work of art that showcases your unique style and flair.
Mendingscratches With Best Anchors
When it comes to mending those pesky scratches, I always say, “It’s not just about covering them up, it’s about telling a story!” And that’s where the best anchors come in – they’re the heroes of our drywall tale. I like to think of them as the trusty sidekicks that hold everything together, literally! For smaller scratches, I swear by these adorable little plastic anchors that come in a variety of colors, adding a pop of fun to our repair process.
My personal favorite are the ones shaped like tiny artist palettes – they match perfectly with my Vincent van Gogh socks, don’t you think? But, in all seriousness, these anchors provide a sturdy base for our joint compound to adhere to, ensuring a seamless repair. By choosing the right anchor for the job, we’re not just fixing a scratch, we’re creating a unique piece of DIY art that tells the story of our whimsical journey.
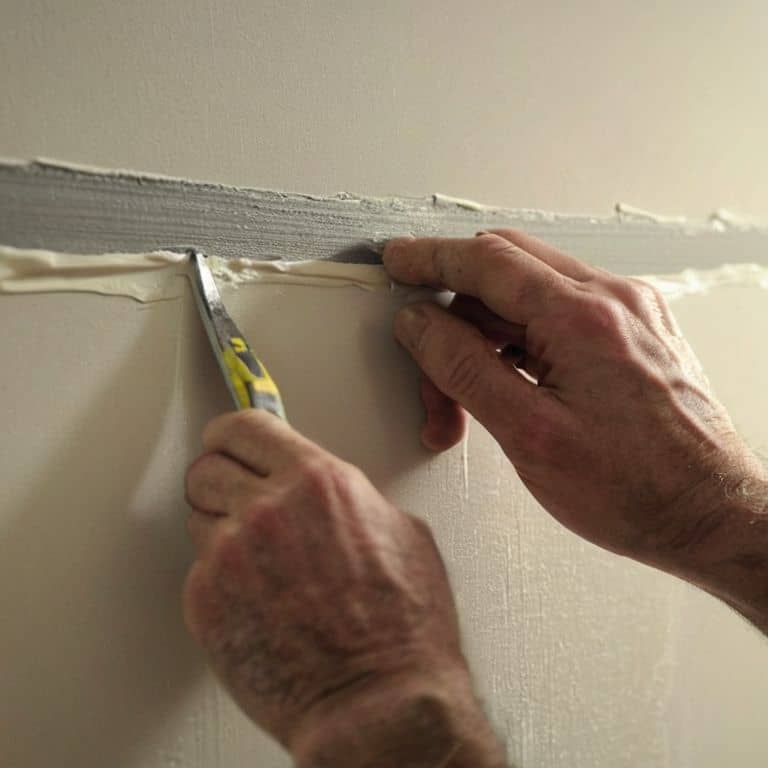
Tape Applications and Joint Secrets
As I slip on my Picasso socks, I’m reminded that even the most mundane tasks, like applying tape and joint compound, can be an art form. When it comes to tape applications, I always say, “It’s all about the smooth moves, baby!” Gently press that tape into place, making sure it’s centered and snug, just like a perfectly placed brushstroke on a canvas. And don’t even get me started on the joy of joint secrets – a perfectly sanded seam is like the icing on a beautifully restored vintage cake.
With my trusty putty knife, I spread a thin layer of joint compound, feathering it out towards the edges to create a seamless blend. It’s a bit like adding the final touches to a masterpiece, don’t you think? The compound dries, and then it’s time to sand, revealing a smooth surface that’s just begging for a fresh coat of paint.
Drywall Revival: 5 Whimsical Tips to Mend Your Walls
- Embrace the imperfections: when filling holes or scratches, use a putty knife to apply joint compound in a sweeping motion, then sand it down to a smooth finish, giving your wall a unique character
- Anchors away: for heavier objects, opt for sturdy anchors like molly bolts or toggle bolts to ensure a secure hold, and avoid those pesky nail pops
- Tape it like you mean it: apply drywall tape with a gentle press, using a putty knife to smooth out air bubbles, and remember, patience is key to a seamless joint
- Sanding symphony: when sanding down your drywall repairs, work in circular motions, gradually increasing the grit of your sandpaper for a silky finish, and don’t forget to vacuum up those pesky dust bunnies
- Finishing touches: once your repairs are complete, apply a coat of primer and paint to match the surrounding area, and voila, your drywall is revived, ready to tell a new story, with a dash of whimsy and a pinch of personality, all while rocking my favorite Van Gogh socks
Whimsy in Review: 3 Key Takeaways
Embracing the art of drywall repair as a creative journey, where every scratch tells a story and every fix is a testament to sustainable living
Mastering the dance of drywall mending, from selecting the perfect anchors to applying tape with the finesse of a seasoned artist, all while donning your most inspiring pair of socks
Transforming the mundane into the magical, one drywall patch at a time, and discovering that with a little whimsy and a lot of heart, even the most ordinary repairs can become extraordinary works of art
A Dash of Whimsy in Drywall Repair
As we mend the cracks and scratches on our walls, we’re not just fixing drywall, we’re weaving tales of transformation, where every patched hole and smoothed surface tells a story of renewal and the beauty of giving old things a second chance at life.
James O'Neill
Embracing the Art of Drywall Repair
As we conclude our whimsical journey through the realm of drywall repair, let’s take a moment to reflect on the key takeaways. We’ve delved into the world of fixing scratches with the best anchors, explored the secrets of tape applications, and uncovered the magic of joint compounds. By embracing these techniques, you’ll not only be able to mend those pesky drywall imperfections but also develop a deeper appreciation for the art of restoration. Remember, it’s all about giving old materials a second chance to shine, and with practice, you’ll become a master of transforming scratches into stories.
So, the next time you’re faced with a drywall dilemma, I encourage you to approach it with a sense of creative curiosity. See it as an opportunity to unleash your inner artist, to experiment with new techniques, and to breathe new life into a worn-out space. As you stand back to admire your handiwork, remember that it’s not just about fixing drywall – it’s about crafting a unique narrative, one that weaves together the threads of history, sustainability, and self-expression. And who knows, you might just find yourself falling in love with the process, socks and all.
Frequently Asked Questions
What are the most common mistakes to avoid when repairing drywall?
Oh friend, let’s dodge those DIY disasters! Common drywall repair mistakes include applying too much joint compound, failing to press tape firmly, and sanding too aggressively – all of which can lead to a patchy, uneven finish.
How do I choose the right type of joint compound for my drywall repair project?
Ah, my friend, selecting the right joint compound is like picking the perfect paintbrush – it’s all about the vibe you’re going for! For a smooth finish, I swear by a lightweight, all-purpose compound, while a heavier, setting-type compound is perfect for those deeper scratches, giving your drywall a second chance at perfection.
Can I repair drywall holes or scratches without using tape, and if so, what are the best alternative methods?
My friend, you can indeed ditch the tape for drywall repairs. I recommend using a joint compound with a built-in adhesive or opting for a mesh patch – it’s like giving your wall a second skin. For smaller scratches, a dab of spackling paste can work wonders, allowing you to sand and paint over the area seamlessly.