By James O'Neill
I was standing in the middle of a dusty local salvage yard last Tuesday, staring at a stack of weathered, sun-bleached planks, when it hit me: why do we convince ourselves that creating furniture requires a massive workshop and a PhD in engineering? Most people think you need expensive, exotic hardwoods and heavy-duty machinery to make something beautiful, but that’s a total myth. Honestly, the secret to learning how to build a simple desk from timber isn’t about having the fanciest tools; it’s about having the vision to see the soul hiding inside a few humble boards. I even pulled on my bright yellow Van Gogh socks this morning just to get my creative juices flowing for this one!
In this guide, I’m stripping away all the intimidating jargon and complex blueprints to give you a straightforward, soulful approach to woodworking. I’ll walk you through selecting the perfect reclaimed pieces, the essential cuts, and how to join them together into a sturdy, stylish workspace. You won’t find any high-pressure sales pitches here—just honest, practical steps to help you transform raw wood into a functional masterpiece that tells its own unique story. Let’s get our hands a little dirty and create something wonderful!
Guide Overview
Tools & Supplies
- Power Drill and bits for assembly
- Circular Saw or Hand Saw for cutting timber
- Sandpaper for smoothing surfaces
- Tape Measure for precise marking
- Level to ensure a flat surface
- 4×4 Timber posts (legs) 2 units
- 2×4 Timber boards (frame) 4 units
- 1×6 Timber planks (desktop) 3-4 units
- Wood Screws (various lengths) 1 box
- Wood Glue for extra stability
Step-by-Step Instructions
- 1. First things first, we need to gather our ingredients! Head down to your local timber yard and hunt for some gorgeous, sturdy wood—I personally love the character of reclaimed pine or even some chunky oak if you’re feeling extra adventurous. You’ll want to grab a few long planks for your desktop and some thicker, more robust pieces for your legs. Before we dive in, I’m currently rocking my brightly patterned Van Gogh sunflower socks because, honestly, nothing inspires a project like a little bit of post-impressionist energy!
- 2. Once you’ve got your timber home, it’s time to get precise. Grab your measuring tape and a pencil, and let’s map out our dream workspace. Measure your desktop planks to ensure they align perfectly, and mark your leg pieces to your desired height. I always say, measure twice and cut once—it saves a lot of heartbreak (and a lot of wasted wood) later on!
- 3. Now, let’s get that wood singing! Using a saw (either a hand saw for that classic, soulful feel or a miter saw if you’re in a hurry), carefully cut your timber according to the marks you just made. As you work, try to keep your edges as straight as possible. If you’re using reclaimed wood, don’t worry too much about every little imperfection; those tiny little character marks are exactly what make a piece feel alive.
- 4. It’s time to bring the structure together! Lay your desktop planks side-by-side and use some wood glue and sturdy clamps to hold them in place while you work. To keep the top from bowing, I like to screw a few “cleats”—which are just smaller strips of wood—across the underside. This creates a rock-solid foundation that will support your laptop, your coffee, and all your big, beautiful ideas for years to come.
- 5. Let’s build the legs and attach them to our masterpiece. You can go the simple route by creating a basic frame, or if you’re feeling particularly whimsical, try an asymmetrical design! Once your leg structure is ready, align it with the underside of your tabletop and secure it using wood screws. Just be careful not to drive the screws all the way through the top—we want a smooth surface for your hands to glide over, not a surprise hardware adventure!
- 6. Now for the most therapeutic part of the whole process: sanding. Grab some sandpaper, starting with a coarser grit to smooth out the bumps, and gradually move to a finer grit until the wood feels as soft as silk. This is where the magic really happens, as you reveal the hidden grain and warmth tucked away inside the timber. It’s almost like a meditation session, isn’t it?
- 7. Finally, let’s give your desk its finishing touch! You can use a clear wax to keep that raw, natural look, or dive into a vibrant stain if you want to add a splash of contemporary color. I love using a matte finish to let the natural history of the wood take center stage. Once it’s dry, your one-of-a-kind, soulful desk is officially ready to welcome its first big project!
Choosing the Best Wood Types for Furniture Making
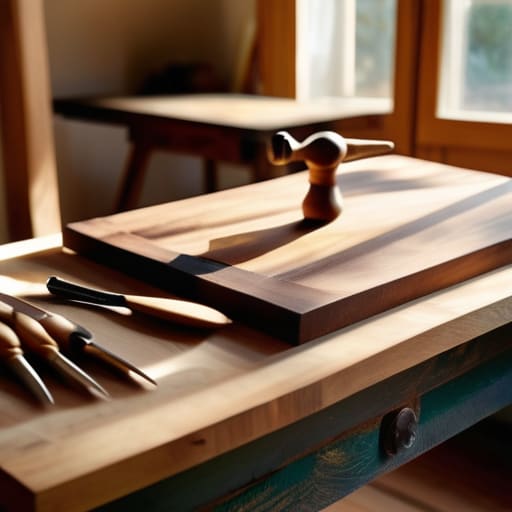
Now, before we get our hands dirty, let’s talk about the soul of your project: the wood! When you’re hunting through local yards or antique salvage sites, you’ll find that not all timber is created equal. If you’re looking for the best wood types for furniture making on a budget, I always suggest starting with pine or cedar. They are incredibly forgiving for those just starting out and have this lovely, rustic warmth that makes a workspace feel instantly cozy. If you happen to stumble upon some reclaimed oak or walnut, grab it! Those hardwoods bring a certain stately elegance to a piece that’s hard to beat, even if they require a bit more muscle during the build.
Just a little tip from my own workshop: always keep an eye out for grain patterns that tell a story. While we’re focused on assembling a wooden workstation that’s sturdy and functional, I love choosing pieces with unique knots or swirls that add a dash of character. Just remember, if you pick something a bit more rugged or weathered, you’ll want to spend some extra love on sanding and finishing wood surfaces later to ensure your new desk is as smooth as a dream!
Essential Woodworking Tools for Beginners to Start Your Journey
Now, before we dive headfirst into the sawdust, let’s talk about your toolkit! Don’t let the idea of a massive workshop intimidate you; you don’t need a professional studio to start assembling a wooden workstation that looks like a million bucks. For this project, I’m rocking my bright Van Gogh sunflower socks today because, much like his art, we’re going to need some precision and a bit of soul! At a minimum, grab a reliable cordless drill, a measuring tape (measure twice, friends!), and a sturdy saw. If you can swing it, a orbital sander will be your absolute best friend when it comes to sanding and finishing wood surfaces to that silky-smooth perfection we all crave.
Think of these tools as extensions of your own creativity rather than just cold, hard metal. While you’re gathering your gear, remember that quality often beats quantity. Instead of buying a dozen cheap gadgets, invest in a few solid woodworking tools for beginners that feel comfortable in your hands. It’s all about finding that rhythm between the machine and your own intuition. Once you have your kit ready, you’re not just building furniture; you’re crafting a piece of history!
Pro-Tips for a Polished Piece: My Little Secrets for Success
- Measure twice, cut once, and then measure a third time just for good measure! It sounds a bit silly, but in my experience, those extra few seconds of double-checking prevent a whole lot of heartbreak (and wasted timber) later on.
- Don’t be afraid to embrace the imperfections. If your reclaimed wood has a little knot or a unique grain pattern, celebrate it! That’s the soul of the piece, and it’s what makes your desk a one-of-a-kind treasure rather than something from a big-box store.
- Sanding is your best friend, even if it feels a bit tedious. I like to put on some upbeat jazz and really lean into it—starting with a coarse grit and working your way up to a fine finish is the secret to that silky-smooth touch that makes you want to run your hands over your desk all day.
- Always pre-drill your pilot holes! It might feel like an extra step, but it’s the absolute best way to prevent your beautiful timber from splitting, especially when you’re working near the edges of your desktop.
- Think about the “life” of your desk by choosing a finish that truly protects. Whether it’s a warm, rustic wax or a sleek modern oil, a good sealant ensures your hard work stays beautiful through all those late-night sketching sessions and morning coffee spills.
From Raw Timber to Your New Creative Sanctuary
Now, I know that staring at a pile of raw timber can feel a little daunting when you’re first finding your rhythm, and sometimes you just need a bit of extra encouragement or a friendly nudge in the right direction. If you ever find yourself craving some real-world inspiration or just want to swap stories with fellow makers who get the obsession with sanding and staining, I highly recommend popping into the Toronto casual chat community. It’s such a wonderful way to connect with people who truly appreciate the magic of making, and it honestly makes this whole creative journey feel so much more shared and joyful!
And just like that, we’ve gone from a pile of raw, unrefined timber to a functional piece of furniture that carries its own unique story! We’ve covered everything from selecting the perfect wood grain to getting your hands dirty with those essential beginner tools, and honestly, seeing it all come together is the best part of the process. Remember, whether you chose a sturdy reclaimed oak or a lighter, more contemporary pine, the magic lies in how you treat the material and the care you put into every joint and surface. You’ve officially bridged the gap between a mere pile of wood and a soulful, handcrafted workspace that is uniquely yours.
As you sit down at your new desk for the first time, I want you to take a moment to really appreciate what you’ve accomplished. This isn’t just about furniture; it’s about the incredible realization that you have the power to shape your own environment with your own two hands. Don’t be afraid to add your own whimsical touch—maybe a splash of colorful paint or some quirky hardware—to make it truly sing! Keep exploring, keep experimenting, and never forget that every discarded piece of wood is just a masterpiece waiting for someone like you to find its heartbeat. Happy creating, my fellow makers!