I still remember the first time I attempted to tackle a drywall project – I was upcycling an old vintage dresser into a quirky modern TV stand, and I needed to create a smooth surface for painting. As I delved into the world of drywall, I realized that a good guide to mudding and taping drywall joints was hard to come by. Everyone seemed to have their own secret techniques, and the internet was flooded with confusing tutorials. But I was determined to learn, and after months of trial and error, I finally mastered the art of mudding and taping like a pro.
Now, I’m excited to share my knowledge with you, and help you avoid the frustrations I faced. In this article, I’ll provide you with honest and practical advice on how to mud and tape drywall joints like a seasoned craftsman. You’ll learn the essential steps to achieve a smooth finish, from preparing the surface to applying the final coat of paint. My goal is to empower you with the skills and confidence to tackle your own drywall projects, whether you’re a seasoned DIY enthusiast or a beginner looking to upcycle your first vintage piece. So, let’s get started on this whimsical journey of discovery and creation, and turn those drywall joints into a masterpiece!
Table of Contents
- Guide Overview: What You'll Need
- Step-by-Step Instructions
- A Guide to Mudding and Taping Drywall Joints
- Mudding Like a Master: 5 Whimsical Tips to Tape Your Way to Drywall Perfection
- Time-Traveling Craftsman's Top 3 Takeaways
- Embracing the Art of Drywall Transformation
- Bringing It All Together: A Masterful Finish
- Frequently Asked Questions
Guide Overview: What You'll Need
Total Time: 2 hours 30 minutes
Estimated Cost: $25 – $50
Difficulty Level: Intermediate
Tools Required
- Utility Knife (with extra blades)
- Mud Pan
- Putty Knife (6 inches and 12 inches)
- Taping Knife
- Sandpaper (fine-grit and medium-grit)
- Sanding Block
Supplies & Materials
- Joint Compound
- Drywall Tape (paper or mesh)
- Corner Bead (for reinforced corners)
- Screws (for securing drywall panels)
- Water (for mixing joint compound)
Step-by-Step Instructions
- 1. First, let’s get prepared by gathering all the necessary tools and materials for our mudding and taping adventure, including a putty knife, joint compound, drywall tape, and a sanding block – just like I do when I’m upcycling vintage furniture into quirky modern pieces, and I’ve got my favorite Pablo Picasso socks on to inspire my creativity.
- 2. Next, we need to clean the area around the drywall joints, making sure there’s no dust, dirt, or debris that could interfere with our mudding and taping process. I like to think of this step as wiping the slate clean, much like when I’m starting a new DIY project and I get to decide the direction it takes.
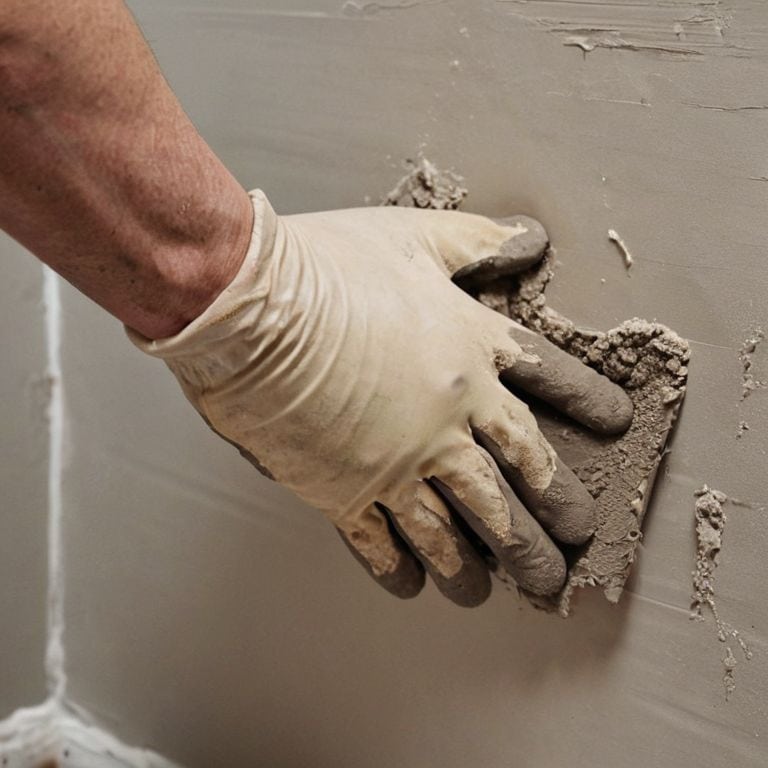
- 3. Now, it’s time to apply a thin layer of joint compound to the drywall joints using our trusty putty knife, making sure to fill in any gaps or holes. This is where the magic happens, and our drywall starts to transform into a smooth, beautiful surface – much like when I’m adding a fresh coat of paint to a vintage chair.
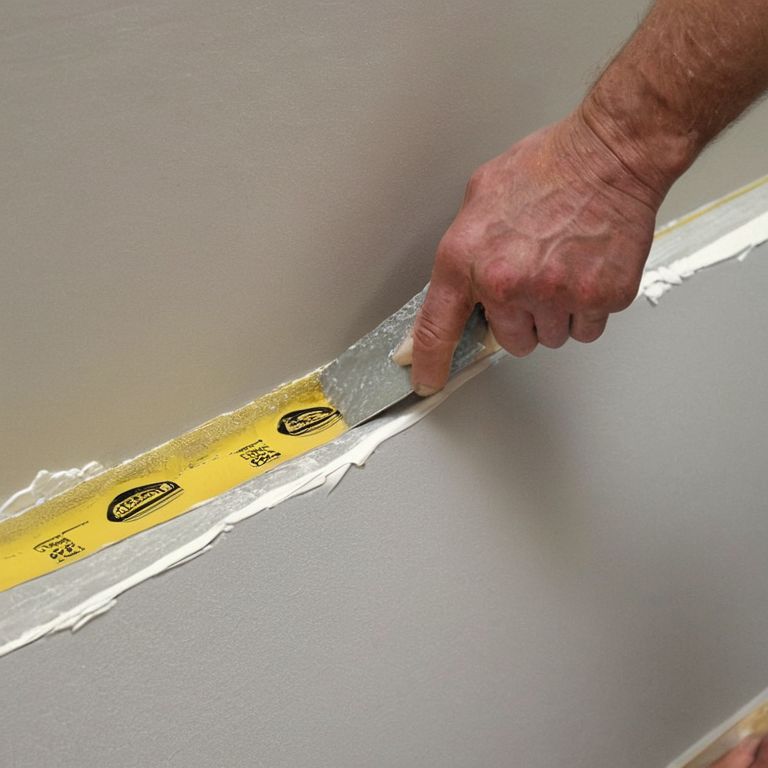
- 4. With our joint compound in place, we can start applying the drywall tape, pressing it firmly onto the compound to ensure a strong bond. I find this step to be quite therapeutic, as it requires a gentle yet firm touch, much like when I’m sanding down a piece of wood to reveal its natural beauty.
- 5. After applying the tape, we need to add another layer of joint compound, this time covering the tape completely and feathering it out towards the edges. This step requires a bit of finesse, as we want to make sure the compound is evenly distributed and not too thick in any one area – much like when I’m adding the final touches to a piece of upcycled furniture.
- 6. Now, it’s time to let it dry and allow the joint compound to set completely, which can take anywhere from 30 minutes to an hour, depending on the type of compound we’re using. This is a great opportunity to take a break, grab a cup of coffee, and reflect on our progress, just like when I’m waiting for a fresh coat of paint to dry on a vintage piece.
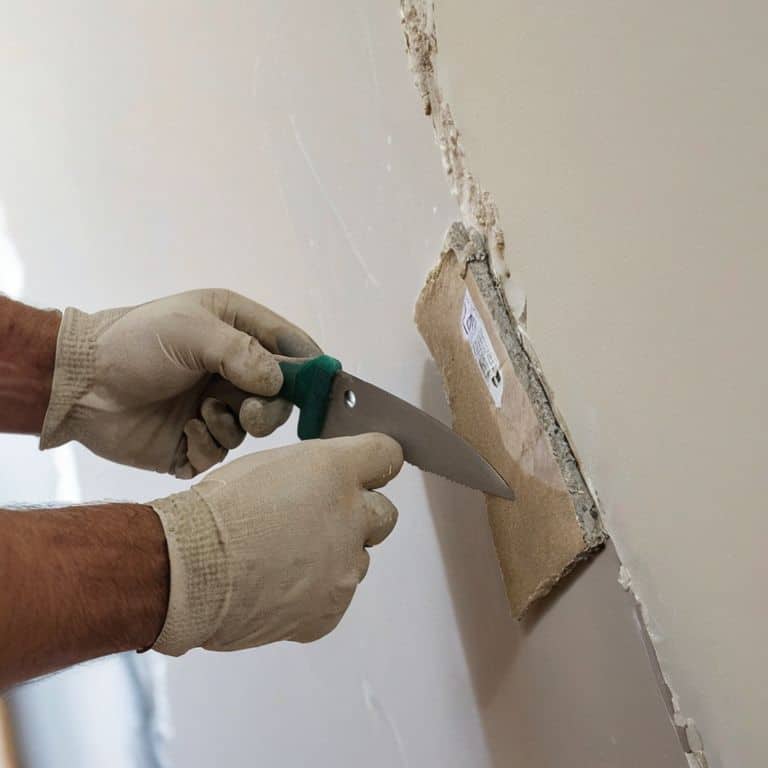
- 7. Once our joint compound is dry, we can start sanding it down using our sanding block, working in circular motions to smooth out any bumps or imperfections. This step requires a bit of elbow grease, but the end result is well worth the effort, as we’re left with a smooth, even surface that’s perfect for painting – much like when I’m revealing the hidden beauty of a vintage piece of furniture.
A Guide to Mudding and Taping Drywall Joints
As I dive into the world of drywall finishing, I’m reminded of the importance of selecting the right drywall joint compound types for the job. With so many options available, it’s crucial to understand the differences between them and choose the one that best suits your project. I’ve found that using a high-quality compound can make all the difference in achieving a smooth finish. When it comes to applying the compound, I swear by mudding techniques for smooth finish that involve a combination of patience and practice.
One of the most critical tools in my drywall finishing arsenal is a good taping knife. I’ve tried numerous best taping knives for drywall on the market, and I can confidently say that a high-quality knife can make the process much easier and more efficient. When paired with the right technique, a good taping knife can help you achieve a seamless joint that’s nearly invisible. Of course, even with the best tools and techniques, drywall sanding tips and tricks are essential for smoothing out any imperfections and creating a finish that’s ready for paint or wallpaper.
As a creative workshop instructor, I’ve seen my fair share of common drywall finishing mistakes, especially when it comes to beginners. That’s why I always emphasize the importance of taking your time and following proper techniques. For those new to drywall repair, I recommend starting with small projects and gradually working your way up to more complex tasks. With practice and patience, you’ll be well on your way to mastering the art of drywall finishing, and you’ll be ready to tackle even the most daunting drywall repair for beginners projects with confidence.
Mastering Mudding Techniques for a Smooth Finish
Now that we’ve got our joint compound types sorted, let’s dive into the fun part – mastering those mudding techniques. I like to think of mudding as a dance between my putty knife and the drywall, where every swoop and swirl brings me closer to a silky smooth finish. It’s all about feeling the rhythm of the compound as it glides across the surface, filling in those gaps and imperfections with ease. As I work, I’m reminded of the time I upcycled an old vintage dresser, transforming it into a quirky modern masterpiece – it’s that same sense of creative satisfaction that drives me to get the mudding just right.
With a little practice, you’ll be a pro at applying just the right amount of pressure, feathering the edges, and building up those layers to achieve a finish that’s nothing short of flawless. And trust me, there’s no better feeling than stepping back to admire your handiwork, knowing that all that elbow grease has paid off in the form of a beautifully mudded and taped drywall joint.
Unlocking Drywall Joint Compound Types Secrets
As I delve into the world of drywall joint compounds, I’m reminded of my favorite vintage chair upcycling project – the one where I paired a distressed finish with a pop of colorful fabric. Just like how that project required the perfect blend of old and new, choosing the right drywall joint compound can make all the difference in achieving a seamless finish. There are several types to explore, each with its own unique characteristics, from lightweight to all-purpose and even those specially designed for taping and finishing.
I like to think of these compounds as the “secret sauces” that bring my DIY projects to life. By understanding their differences, you’ll be better equipped to tackle any drywall challenge that comes your way, whether you’re a seasoned pro or a curious beginner, just like I was when I first started experimenting with upcycling vintage furniture.
Mudding Like a Master: 5 Whimsical Tips to Tape Your Way to Drywall Perfection

- Always prepare your drywall joints for their makeover by cleaning them of any debris or dust, just like I prep my vintage furniture finds for a fresh coat of paint
- Choose the right drywall joint compound for the job – I like to think of it as picking the perfect shade of varnish for my upcycled treasures, it makes all the difference
- Apply your compound in thin, even layers, allowing each to dry before adding the next, much like building up the perfect patina on a restored wooden chair
- Press that tape into place with a firm but gentle touch, making sure it’s snug and even – think of it as carefully placing a new upholstered seat on a refurbished frame
- Finish it all off with a light sanding and a coat of paint, and you’ll have drywall joints that are as smooth as a freshly restored vintage side table, ready to be admired and enjoyed
Time-Traveling Craftsman's Top 3 Takeaways
Always remember, my friends, that the key to a seamless drywall finish lies not just in the mudding and taping, but in the patience and love you put into each layer – just like I do when I’m upcycling vintage furniture into quirky modern pieces!
Unlocking the secrets of drywall joint compound types is crucial, whether you’re a seasoned pro or a DIY newbie, so don’t be afraid to experiment and find your perfect blend, and don’t forget to wear your favorite colorful socks to inspire your creativity!
By mastering mudding techniques and embracing the whimsy of the process, you’ll not only achieve a smooth finish, but you’ll also be joining a community of time-traveling craftsmen who see the beauty in blending the old with the new, one drywall joint at a time, and who knows, maybe you’ll even discover a new favorite artist to feature on your socks!
Embracing the Art of Drywall Transformation
As I always say, mudding and taping drywall joints is not just about covering seams, it’s about uncovering the hidden beauty in the imperfections, much like how a vintage chair can be reborn with a fresh coat of paint and a pair of vibrant, new socks – it’s all about embracing the quirks and turning them into unique works of art!
James O'Neill
Bringing It All Together: A Masterful Finish
As we conclude this whimsical journey through the world of mudding and taping drywall joints, let’s take a moment to reflect on the key takeaways. We’ve delved into the secrets of drywall joint compound types, mastering techniques for a smooth finish, and explored the importance of patience and practice in achieving professional-grade results. Whether you’re a seasoned DIY enthusiast or a curious beginner, remember that the process of transforming raw drywall into a polished, ready-to-paint surface is not just about the end result, but also about the creative journey itself.
So, as you embark on your next DIY adventure, remember to embrace the imperfections and view each project as an opportunity to grow. With every joint you mud and every piece of tape you apply, you’re not just building a wall – you’re crafting a story. And who knows? You might just find that the most beautiful stories are the ones told through the imperfections and quirks of a handmade, one-of-a-kind masterpiece.
Frequently Asked Questions
What are some common mistakes to avoid when applying joint compound to drywall joints?
When applying joint compound, I’ve found that common mistakes include applying too much pressure, which can create air pockets, and not allowing each coat to dry completely, leading to a sloppy finish. Also, using the wrong type of compound for the job can lead to uneven drying times and a subpar result – been there, done that, and learned from it!
How do I choose the right type of joint compound for my drywall project?
Choosing the right joint compound is like picking the perfect paint for my vintage furniture upcycles – it’s all about the finish! For a smooth, durable result, I recommend selecting a compound that suits your project’s needs, such as an all-purpose or lightweight option, depending on the level of texture and finish you desire.
Can I use a putty knife to apply tape to drywall joints or is a specialized tool required?
My friend, you can definitely use a putty knife to apply tape, but I find that a specialized taping knife or a drywall taping tool makes the job smoother and more efficient – trust me, I’ve tried both while wearing my favorite Van Gogh socks, and the difference is like night and day!