By James O'Neill
I was standing in my studio last Tuesday, staring at a jagged, unsightly crater in my favorite reclaimed oak accent wall, thinking to myself: why does every little repair feel like a monumental catastrophe? Most people will tell you that fixing a ding is all about slapping on a thick glob of spackle and hoping for the best, but let me tell you, that’s a recipe for a bumpy, amateurish disaster. If you want to learn how to patch a wall properly, you have to stop treating it like a quick fix and start seeing it as a delicate act of restoration. It’s not about hiding the damage; it’s about seamlessly reintegrating the repair back into the soul of the room.
Once you’ve finally smoothed out those bumps and your wall is looking as pristine as a fresh canvas, you might find yourself craving even more inspiration for your home’s transformation. If you’re ever feeling stuck or just want to connect with fellow creative souls who share a love for local charm and clever home fixes, I always suggest checking out the New York local community. It’s such a wonderful treasure trove of ideas, and honestly, there’s nothing quite like tapping into that collective creative energy to turn a simple repair project into a full-blown artistic revival!
In this guide, I’m stripping away all the intimidating jargon to give you the honest, hands-on techniques I use in my own workshop. We aren’t just covering up holes; we are going to master the art of the smooth finish, from selecting the right compound to the final, magical sanding stage. I promise to share my no-nonsense secrets for achieving a surface so flawless, you’ll actually forget the mishap ever happened. Let’s turn those clumsy scars into a perfectly pristine canvas for your next creative adventure!
Guide Overview
Tools & Supplies
- Putty knife for spreading compound
- Sandpaper (120-220 grit) for smoothing
- Utility knife for cleaning edges
- Sponge for cleaning dust
- Spackling compound (small tub)
- Wall patch or mesh tape (1-2 pieces)
- Primer (small can or sample size)
- Matching interior paint (small container)
Step-by-Step Instructions
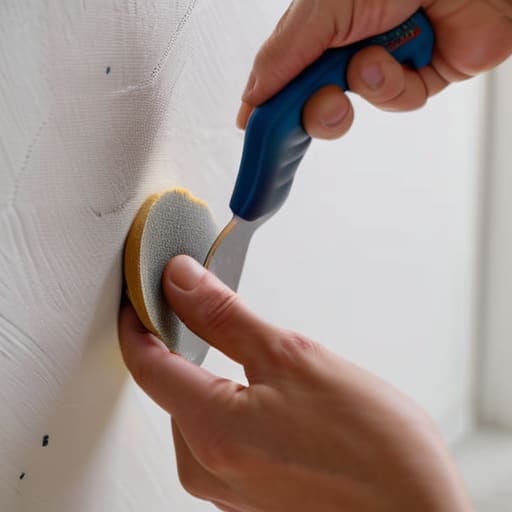
- 1. First things first, we need to clear the stage! Grab a sturdy putty knife and gently scrape away any loose, flaking bits of old paint or crumbling plaster around the damage. You want to make sure you’re working with a solid foundation, so if anything feels wobbly or tired, whisk it away until you hit something firm.
- 2. Once the area is clean, let’s give it a little bit of “breathing room” by slightly widening the hole or crack. Using your knife, create a shallow, V-shaped indentation; this might feel a bit counterintuitive, but it actually helps the new compound grip the edges much more effectively than a tiny, narrow slit would.
- 3. Now, let’s get a little messy with the magic! Scoop up a generous dollop of your favorite lightweight spackle and press it firmly into the cavity. The trick here is to use a light, sweeping motion to spread it out, making sure you fill every nook and cranny without leaving any hidden air pockets lurking beneath the surface.
- 4. This is where patience becomes your best friend. Apply a second, much thinner layer of compound to feather the edges out wide, blending the patch into the surrounding wall. You want to create a seamless transition so that when the light hits the wall later, you won’t see a sudden bump, just a perfectly smooth canvas.
- 5. After you’ve let your creation dry completely (don’t rush the process, or you’ll be back at square one!), grab a fine-grit sanding sponge. Gently buff the area until it feels as soft as silk under your fingertips; just be sure to keep it light so you don’t accidentally sand down the good stuff around the edges!
- 6. Before we bring in the color, we have to tidy up the dust. Wipe the area down with a slightly damp cloth to ensure every speck of sanding grit is gone, leaving you with a pristine surface that is ready and waiting for your beautiful new coat of paint.
Gathering Your Drywall Repair Kit Essentials
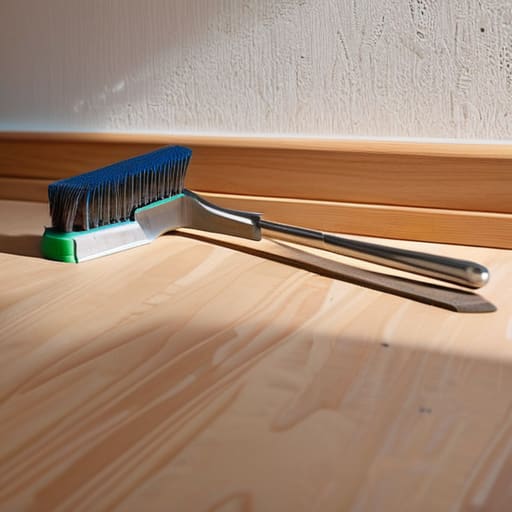
Before we dive into the magic of transformation, we need to gather our little troupe of tools! Think of this as setting the stage for a grand performance. For those of you tackling minor blemishes, your drywall repair kit essentials should include a sturdy putty knife, a fine-grit sanding sponge, and a small container of lightweight spackle. If you’re dealing with something a bit more substantial, like a dent from a rogue moving box, you’ll want to upgrade to a larger tub of joint compound and perhaps some drywall mesh tape application supplies to ensure everything stays rock-solid and doesn’t crack later on.
I always like to keep a little “texture kit” on hand too—things like a sea sponge or even a damp cloth can be lifesavers for wall texture matching tips when you want to blend your repair seamlessly into the surrounding surface. And of course, don’t forget a pair of protective goggles! Even though we’re here to create beauty, nobody wants a face full of fine white dust. I’m currently rocking my Vincent van Gogh starry-night socks today, which always makes even the dustiest chores feel a bit more like an artistic adventure!
Mastering the Art of Applying Joint Compound Steps
Now comes the part where we truly get our hands a little messy—and honestly, I find it so therapeutic! When you’re diving into the applying joint compound steps, think of yourself as a sculptor rather than just a handyman. Start by applying a thin, even layer around the edges of your patch. If you’re tackling something a bit more substantial, like fixing holes in plaster, don’t try to fill the whole void at once. Instead, build it up in delicate, thin layers. It’s much better to do three light passes than one thick, gloopy mountain that will inevitably crack as it dries.
As you work, keep your putty knife at a slight angle to ensure you’re feathering the edges out toward the good part of the wall. This secret trick is what makes the repair practically invisible! Once your layers are dry, you’ll want to focus on how to sand drywall smooth by using a fine-grit sanding sponge. Move in gentle, circular motions—think of it as a light massage for your walls—to erase any bumps and create a perfectly seamless canvas for your beautiful new paint job.
✨ Little Secrets for a Flawless Finish: My Pro Tips!
- Don’t be afraid to go thin! It’s much better to apply three whisper-light layers of compound than to try and plop on one thick, heavy glob that’ll inevitably crack while it’s dreaming of being dry.
- Think like an artist and feather those edges! Instead of stopping abruptly at the patch, gently sweep your putty knife outward to blend the compound into the surrounding wall, making the repair practically invisible to the naked eye.
- Patience is your best friend (and your most stylish companion). Resist the urge to sand too early; wait until that compound is bone-dry and feels firm under your touch, otherwise, you’ll just end up creating a muddy mess.
- Lighting is everything, my friends! Grab a bright work light or even your phone’s flashlight and shine it across the wall at an angle; this “grazing light” will reveal any tiny bumps or divots that might be hiding from view.
- A little sanding goes a long way, but keep it gentle! Use a fine-grit sandpaper to smooth things over, and treat it like you’re buffing a vintage mahogany table—you want a soft, seamless transition, not a deep gouge in your hard work.
The Grand Reveal: From Scars to Splendor
And just like that, we’ve turned a little bit of chaos into a beautiful, clean slate! We’ve journeyed through the essential dance of gathering our tools, prepping those pesky surface imperfections, and finally mastering the delicate application of joint compound to ensure everything sits perfectly flush. Remember, the secret to a professional-looking finish isn’t about rushing the process; it’s all about those gentle, sweeping motions and having the patience to let each layer dry before moving forward. By taking the time to smooth out those rough edges today, you’ve ensured that your walls are officially ready to become the perfect canvas for whatever vibrant colors or textures you decide to dream up next.
As I sit here sipping my tea—sporting my favorite Van Gogh sunflower socks to celebrate this little victory—I’m reminded that home improvement is so much more than just fixing things. It’s about the joy of nurturing your space and finding the magic in the mend. Don’t let a tiny hole or a scuffed corner intimidate you; instead, see it as a wonderful opportunity to reclaim your sanctuary one small patch at a time. You’ve done the hard work, and now it’s time to step back, admire your handiwork, and get ready to transform your home into the whimsical masterpiece you deserve. Happy creating, my friends!